The Panorama Database Exchange allows Panorama users to share databases with each other. This page shows how to upload a database to the exchange. To learn how to download databases, see Panorama Database Exchange.
The exchange acts as a clearinghouse so that users can find available files. It’s important to keep in mind that ProVUE does not actually provide a hosting service. Before a database can be put on the exchange, it has to be uploaded to a web server, and ProVUE doesn’t provide that.
Preparing a Database
Before you can share a database you must compress it and upload it to a web server (the databases are not hosted on ProVUE’s server).
To compress a Panorama database into a zip file, right click on the file in the Finder and choose Compress from the pop-up menu.
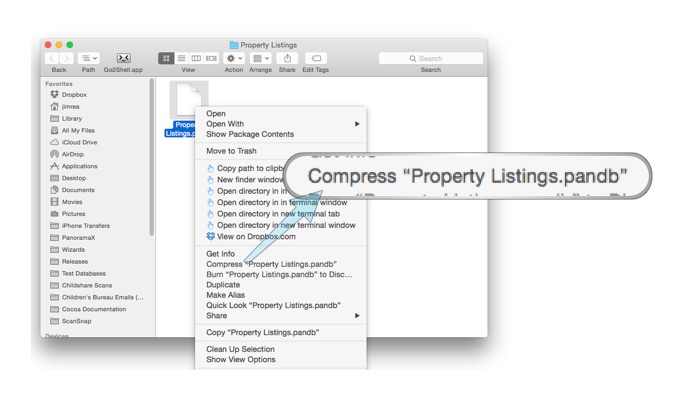
Now you’ll have a “zipped” copy of the database, in this case Property Listings.pandb.zip. The compressed file needs to have the exact same name as the original database, except with .zip on the end. Do not modify the zipped file name. For example, you might be tempted to remove the spaces or remove the .pandb extension from the .zip file, do not do this. If the name of the zip file does not exactly match the name of the database, the database exchange will not accept the database.
Now you need to upload the zip file to a publicly available web server. At this time, ProVUE does not offer hosting of third party files, so you’ll need to find a service on your own. The database itself is not ever uploaded to the ProVUE server. Users will download it directly from whatever server you uploaded it to, so you should pick a server that will remain available, is reasonably fast, and that doesn’t have expensive bandwidth fees. It used to be very easy to do this with Dropbox, but they discontinued this service in mid-2017.
Submitting the Database to the Exchange
To submit a new database to the exchange, start by choosing Add Database from the Share menu. This opens a dialog sheet where you can enter the meta-data for the database.
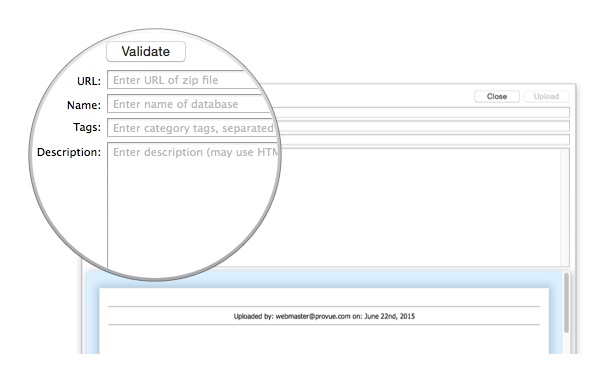
The first step is to enter the URL of the zip file. After you enter the URL, press the Validate button. Panorama will validate that the zip file is accessible and contains a Panorama database file.
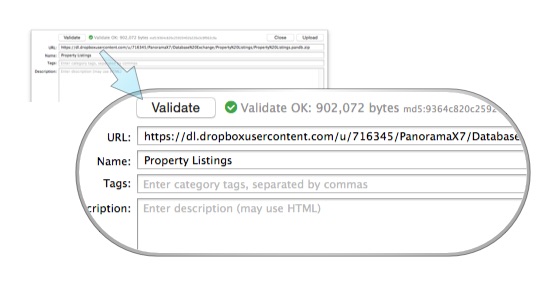
Assuming the validation is ok, you can go ahead and fill out the tags and description (Panorama will fill in the name for you). The tags are optional. If present, they will be used for searching.
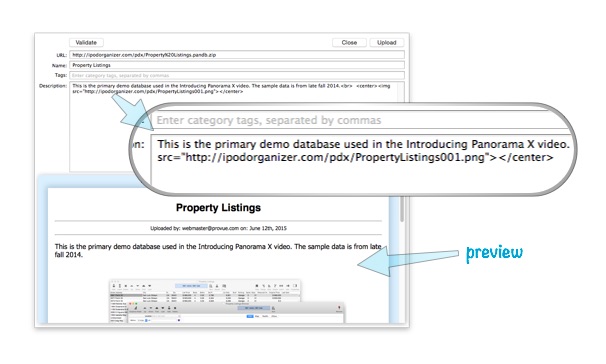
The description controls how the database will be listed in the exchange window. You can enter the description as plain text, or you can include HTML tags for formatting. The dialog sheet will show you a preview of what the HTML will look like as you type.
Once the entries are all complete, press the Upload button to add the database to the exchange. (Note: The database will not be added to the exchange right away, it will have to be cleared by an exchange moderator before it is publicly available.)
Editing an Existing Entry
Once you’ve added a database, you can go back and edit it later. (Note: You can only edit databases that you uploaded.) To do so, simply click on the database in the sidebar and choode Edit Database Information from the Share menu. If the database itself has changed, you’ll need to validate it again (even if the URL hasn’t changed). If you are just editing the tags and description, you don’t have to validate. Just edit the data and press the Upload button.
Multi-File Entries
So far we’ve been assuming that an item in the exchange is a single database file. In some cases, however, an item may include multiple files. For example, you might have a set of databases that work together, or you might have a collection of image files that go with the database.
To upload an item with multiple files, first put the files into a folder. Make sure that only the files you want to include are inside the folder. Then, right click on the folder and make a zip file of the entire folder. You can then upload this zip file to your web server (or copy it into your DropBox/Public folder).
Now follow the instructions above for adding an item to the exchange, but with one variation. After you paste in the URL, you will need to manually adjust the name. You don’t want the name of the zip file here – instead, you want the name of the primary database inside your folder. This is the database that will be opened when the person downloading the item presses the Open button. However, don’t include the .pandb extension.
Once the name is set up, press the Validate button. This will check that your zip file and name are correct. If they are, go ahead and fill in the tags and descriptions, and then press Upload to add the item to the exchange.