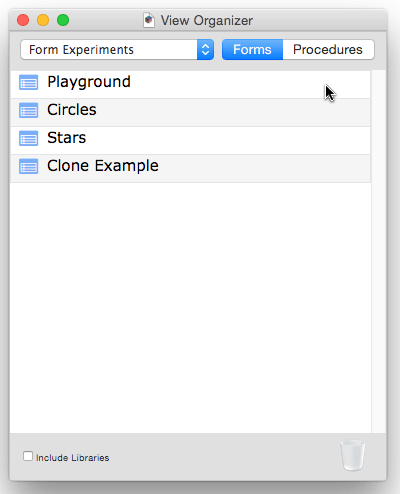
Choose View>View Organizer to open, rearrange, copy or delete views. When you first open it, it shows a list of the views in the database. You can switch back and forth between listing forms and procedures.
Double click to open any view. (You can also right click on the view and choose Open from the pop-up menu.)
Rearranging View Order
To change the position of a view in the View menu, simply drag it. If this is a procedure this will also change its position in the Action Menu.

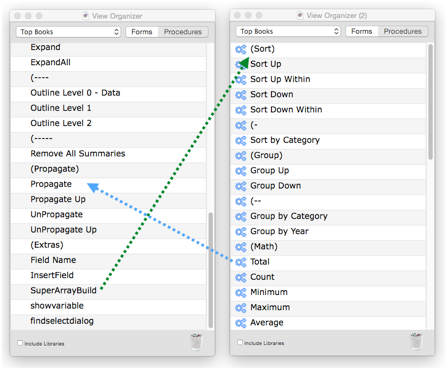
If there are dozens or hundreds of views it can be tedious to drag a view a long way, for example from bottom to top. To make this easier, Panorama allows you to open a second View Organizer window (simply choose View>View Organizer again) and drag between them to rearrange.
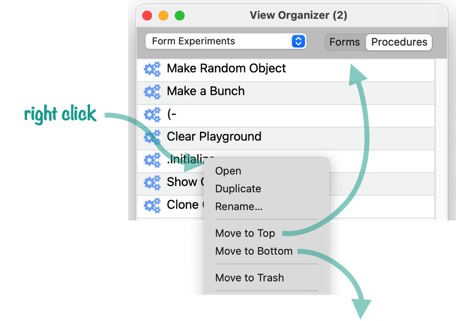
You can also quickly move a view to the top or bottom of the list by right clicking on it and choosing Move to Top or Move to Bottom from the pop-up menu.
Deleting a View
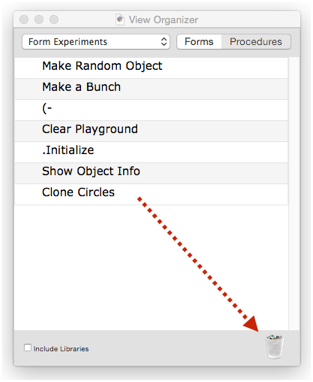
To delete a view, drag it into the trash can. (Alternately, you can right click on it and choose Move to Trash from the pop-up menu.)
The view is immediately removed from the database, but you can get it back (you might think you could get it back with Undo, but Undo does not work in the View Organizer wizard). To view deleted views, click on the trash can icon. This opens the Trash window. You can drag views from the Trash window back into the database.
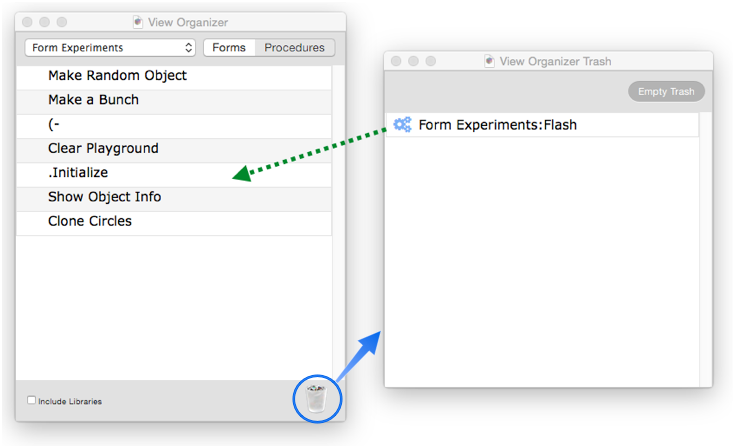
Deleted views stay in the trash until you empty the trash or close Panorama.
Renaming a View
To rename a view, right click on it and choose Rename… from the pop-up menu. This opens a dialog that allows the name to be edited. Enter the new name and press the Rename button.
Duplicating a View
To make a copy of a view within the same database, right click on the view and choose Duplicate from the pop-up menu.
Now you can open the duplicate view and rename it to whatever name you want.

Copying Views Between Databases
To copy a form or procedure from one database to another, open a View Organizer for each database (using View>View Organizer). Then you can simply drag views across to copy them.

If a form or procedure already exists in a database, dragging a like-named view replaces it. This can be useful for updating a second database with changes made to the first.
Inserting a New Procedure or Form in a Specific Spot
To insert a new procedure or form in a specific spot, right click on the spot and choose Insert New Procedure or Insert New Form from the pop-up menu. (You can also add a new procedure or form at the bottom by using Add New command in the View Organizer’s Database menu.)
Modifying the Action Menu(s)
Panorama automatically builds the Action Menu from list of procedures in the database. With the View Organizer you can easily rearrange the order of the procedures, which also rearranges the items in the Action Menu (see above).
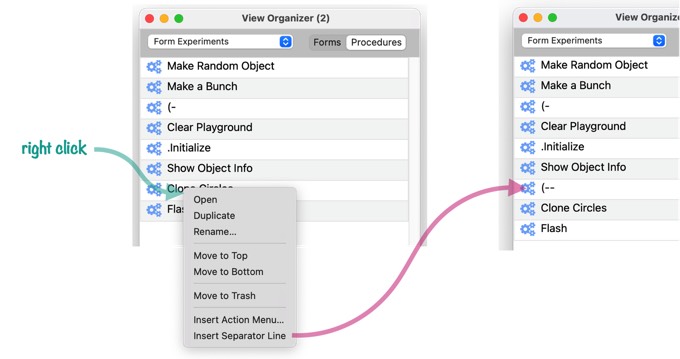
Separator Lines – Any procedure with a name that begins with (- is displayed as a separator line in the Action Menu. You can create these procedures manually, but the View Organizer has a shortcut to make this easier. Simply right-click where you want the separator line to appear, then choose Insert Separator Line from the pop-up menu. Panorama will automatically create a new (empty) procedure that will display as a separator.
Renaming the Action Menu – To give the Action Menu a different name, right-click on the top procedure and choose Insert Action Menu from the pop-up menu. Type in a name for a new procedure, then press the Insert button.
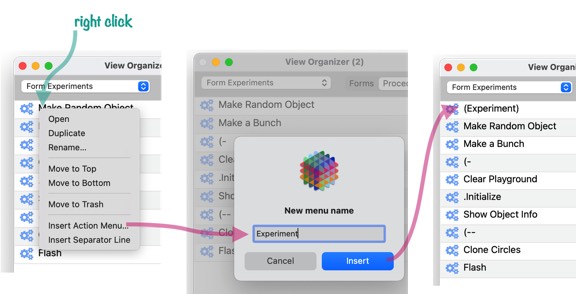
As you can see, this adds a new procedure at the top of the list with the procedure name surrounded by ( and ). This causes the name of the Action menu to become the Experiment menu (or whatever name you choose. See Action Menu to learn more about renaming the menu.
Splitting the Action Menu – To split the Action Menu into multiple menus, right-click at the point where you want to split the menu and choose Insert Action Menu from the pop-up menu. Type in a name for a new procedure, then press the Insert button.
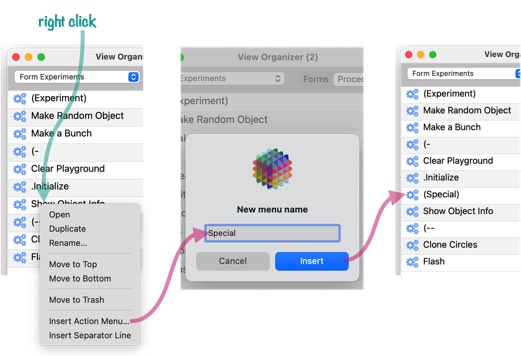
This adds a new procedure at this spot with the procedure name surrounded by ( and ), which causes the menu to split at this point. In this case, everything above will be in the Experiment menu, everything below will be in the Special menu. See Action Menu to learn more about splitting the menu.
Excluding Individual Forms and Procedures from the View Menu
The View Menu normally displays all the views in the database — the Data Sheet, all Forms, and all Procedures. However, if a view is rarely used or is only used by programming code, you can ask Panorama to omit a view from the View menu. To omit an individual view, open the View Organizer window (from the View menu), then right-click on the view you want to omit and choose Exclude from View Menu from the pop-up menu. The icon for this view will turn gray to indicate that it is now excluded from the View menu.
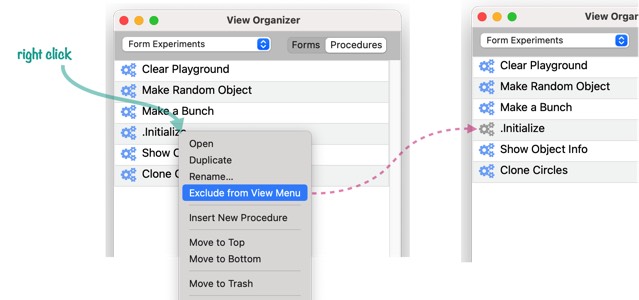
Even though this procedure no longer appears in the View menu, you can still access it with the View Organizer window, or the View Search window (see below). If you later decide that you do want this procedure (or form) to appear in the View menu, just right click on it and choose Exclude from View Menu from the pop-up menu again.
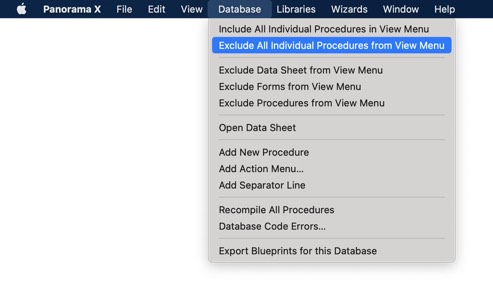
You can exclude as many individual items from the View menu as you want. If you want to exclude a lot of items, it may be easier to go to the Database menu and choose Include All Individual Procedures from the View Menu, then re-enable individual items as needed.
Important: If you hold down the Option key, Panorama will always display the complete View menu, with nothing excluded.
Excluding Sections of the View Menu
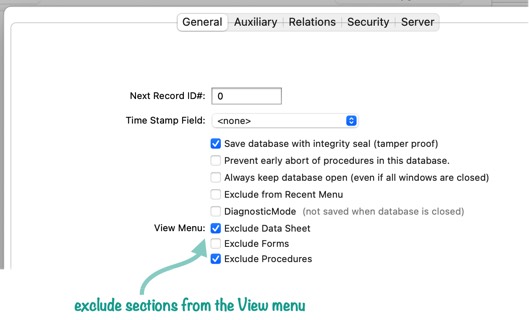
In addition to excluding individual items from the View menu, you can also exclude entire sections of the menu. There are two ways to do this. The first is to open the File>Database Options dialog, and pick the sections you want to exclude.
The second technique is to open the View Organizer window, and pick the sections you want to exclude from the Database menu.
Important: If you hold down the Option key, Panorama will always display the complete View menu, with nothing excluded. You can also access excluded items using the View Search or View Organizer windows.
Working with Library Databases
Library database are usually hidden, but you can check the Include Libraries option if you want to work with them.
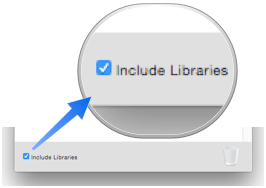
When this option is checked the pop-up menu at the top of the window will list all available library databases, in addition to the normally visible databases.
Creating and Editing a Custom Library Database
Panorama comes with over a dozen built in libary databases that Panorama relies on for operation. You can also build one or more of your own custom library databases. If these databases are placed in the
~/Library/Application Support/PanoramaX/Libraries
folder, Panorama will automatically load them when launching Panorama, and add any custom statements, functions and hotkeys contained in the databases to Panorama automatically.
You can of course open this folder using the Finder, but the View Organizer gives you a shortcut to do this:
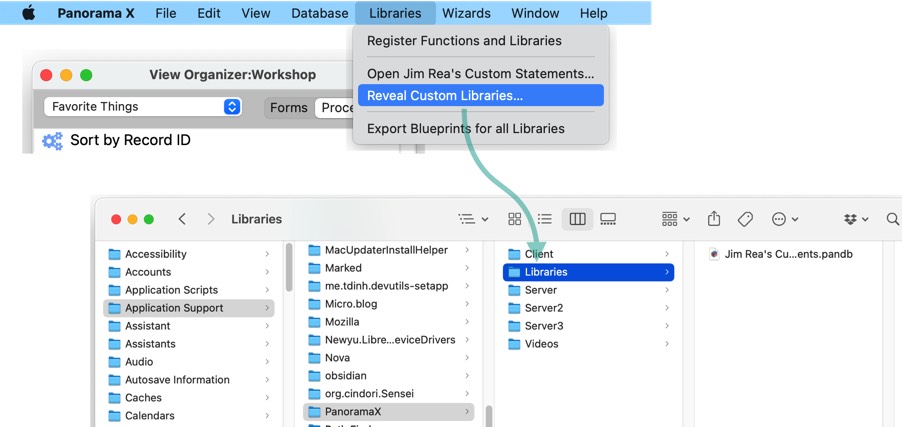
The View Organizer also has a menu command to create a library database for you. This will automatically create an empty database with your user name in the correct spot. Or, if the database has already been created, it will open it again.
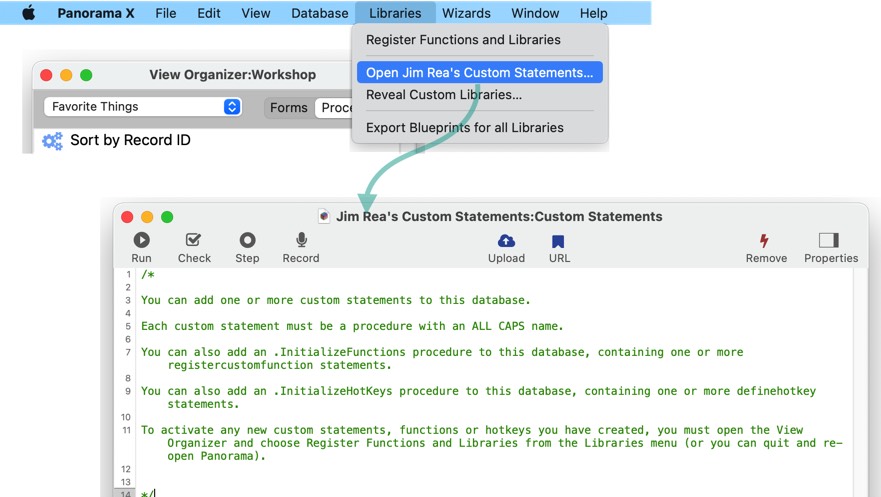
To create a custom statement, simply create a procedure with all upper case letters.

To avoid conflicts with future versions of Panorama it’s best to choose statement names that are unlikely to be used by Panorama itself. For example, MYCHIME or BIGCHIME might be a safer choice than CHIME. If a future version of Panorama includes a statement with the same name as your statement then your statement will stop working (you’ll have to rename your statement and locate and change every place where you have used it).
Once you’ve written your custom statement, go back to the View Organizer and choose Register Funtions and Libraries from the Libraries menu. This allows you to start using your new custom statement immediately, without having to quit and relaunch Panorama. In this case, the new chime statement can now be used anywhere on your code (of course you must make sure the specified sound file is placed in the specified folder).
chime
To learn more about working with custom statements, see Custom Statements.
See Also
- Action Menu -- simple way to create your own menu items.
- Open View -- using the Open View window to quickly access any form, procedure or data sheet.
- openviewsearch -- opens a View Search window.
- View Menu -- accessing and creating the data sheet, forms and procedures.
- View Search -- persistent, comprehensive search of procedures and forms in one or multiple databases.
- views( -- lists views in open databases.
History
| Version | Status | Notes |
| 10.2 | Updated | Right clicking on a procedure in the View Organizer window now provides new options for renaming a form or procedure, moving a form/procedure to the top or bottom of the list, adding separator lines to the Action menu, and splitting the Action menu into multiple menus. |
| 10.0 | New | New in this version. |