Out of the box, Panorama X Server will normally allow anyone to connect to it. It’s very easy, however, to restrict access, as explained in the sections below.
Restricting Access to the Current Account
Most commonly, you’ll want to restrict access to users logged into the same Panorama X account as the server computer. To do this, simply click on the Clients must be logged in as checkbox in the Server Preferences panel
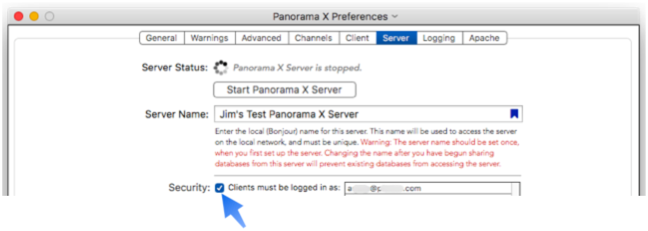
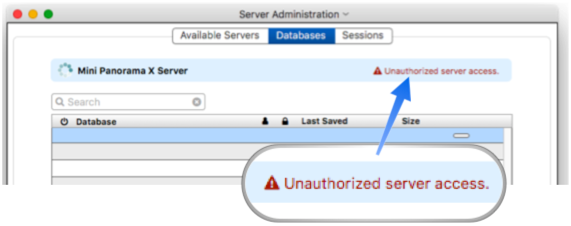
If anyone using a different account tries to connect to the server, they will be refused. For example if they tried to use the Server Administration Wizard they would see a message like this.
Allowing an Alternate Account
There are situations where you may want to allow another account to access the server. For example, you may have a consultant that is helping with you databases, and you need to allow them to access your server.
The first step in this process is to generate a certificate for the alternate account. On a computer that is logged in to the alternate account, open Panorama X and then open the Site License window (from the PanoramaX menu). To generate the certificate, click on the certificate icon. (Note: You must be logged on as an administrator to do this.)
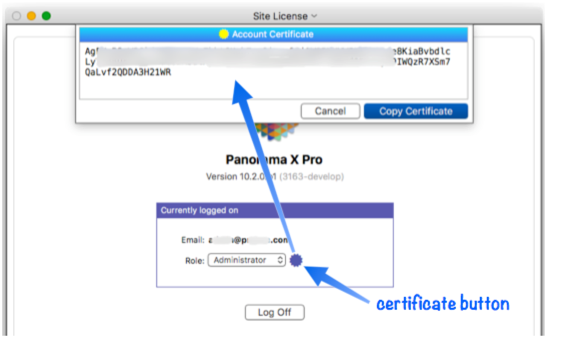
Copy the text of the certificate and transfer it to the server computer (via email, text message, or whatever other method you find convenient). On the Server Preference panel, press the + button to add the alternate account.
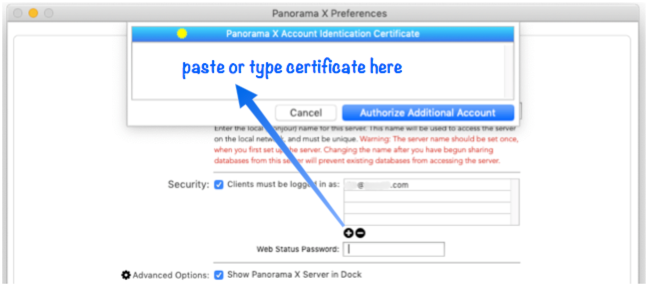
Now type or paste in the certificate, then press the Authorize Additional Account button. You’ll see the new alternate account listed.
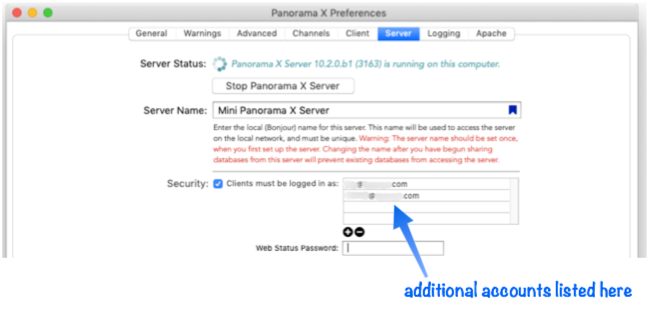
You can add as many alternate accounts as you need. You can also remove an alternate account at any time by selecting it and pressing the - button.
Note: Even if you allow access to an alternate account, only users logged into the primary account will be able to use databases that are encrypted. If you want a database to be available to server clients logged into an alternate account, you must not encrypt that database or lock it to the primary account.
Minimum Admin Role
Normally anyone allowed to access the server can also access the Server Administration Wizard for that server. You can use this popup menu to block low level users from administering the server.
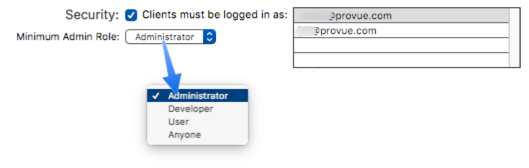
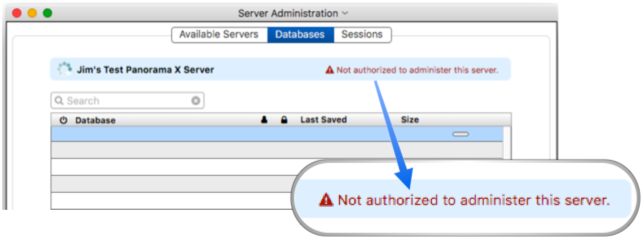
For example, if you select Administrator, then users logged in as Developer and User (see Managing Account Roles) won’t be able to view the admin information. They can still open the Admin wizard, but only an error message will appear, like this.
Note: If you’ve set up alternate accounts (see previous section), the minimum role applies to any of the accounts. For example, if access to the Server Administration Wizard is restricted to Administrator level, then anyone logged in as Administrator will be able to use the Admin wizard, no matter which account they are logged in to.
Master Computer
Out of the box Panorama Server allows any client computer to upload a database (see Creating a Shared Database) or to upload new database generations (see Changing the Design of a Shared Database). However, if you designate a Master Computer, only that computer will be able to upload and/or change database design. Use the pop-up menu to designate which client is the master computer, if any. (The pop-up menu lists all computers that have ever connected to this server.)
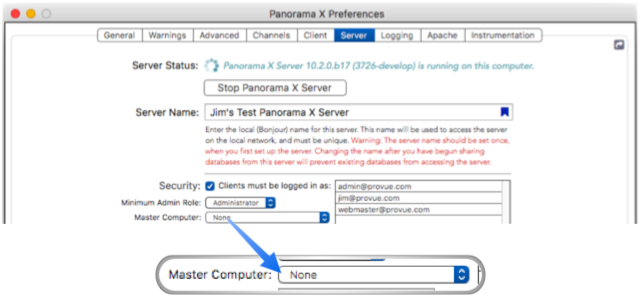
The master computer can be changed at any time, or you can switch back to None, which allows any client computer to upload or to change database design.
Web Server Admin Password
If you’ve set up a public Panorama X web server, you will probably want to set up a password to restrict access to information about your online databases. Simply type the password into the Server Preferences panel.
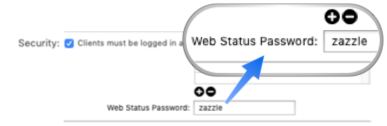
To use this password, type it onto the end of the server admin URL, like this:
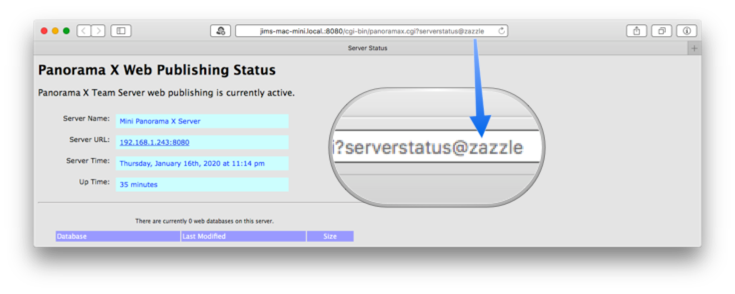
If the password is left off, the database information will not be displayed on the status page.
See Also
- Advanced Server Settings -- Panorama X Server settings for advanced users.
- Client/Server Debug Instrumentation -- using instrumentation with Panorama X server and clients.
- Installing and Launching Panorama Server -- instructions for getting Panorama Server up and running, as well as best practices for configuring system settings on a server computer.
- Logging Server Activity -- recording server activities for later analysis.
- Server Administration Wizard -- this wizard is used to monitor the operation of Panorama servers (both local and remote servers can be monitored), including monitoring server status, checking database status and downloading databases, and monitoring the status of user sessions.
- Setting up a Computer as a Panorama X Client -- instructions for setting up a new client computer so that it can access a Panorama X server.
- Using an External Web Server -- instructions for using Panorama Server in conjunction with an external web server (for example Apache, Nginx, etc.).
History
| Version | Status | Notes |
| 10.2 | New | New in this version. |