Image Display objects display images based on a formula. In addition to basic image display, these objects can also be used for:
- custom push buttons (see Image Display Push Buttons)
- custom checkboxes and radio buttons (see Image Display Data Buttons)
- displaying animated images (see Image Display Animations)
- displaying pure colors and gradients (see Image Display Colors and Gradients)
The rest of this page describes the most common application – displaying images that are somehow related to data in the database.
For example, here is a database that has four records, with one image corresponding to each record. The images themselves are not in the database, but stored in separate image files, often (but not always) in the same folder as the database. The movie shows how the image changes as the Down tool is pressed to move from record to record in the database.

Creating an Image Display Object
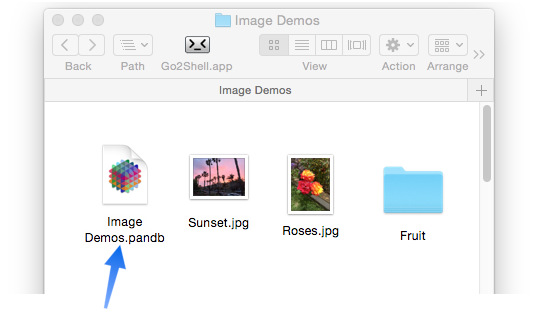
Before you create an Image Display object, you need images. For these examples we’ll assume that we have a database in the same folder as several images. This folder also contains a folder named Fruit, which contains more images.
To create the object, drag it from the Object Library to the form, then type in the formula. In this case we’ll simply type in the name of one of the image files in the same folder as the database. To make this a valid formula the name of the image file must be quoted.

If the image file is in a subfolder relative to the database, the formula must include the folder path, like this:
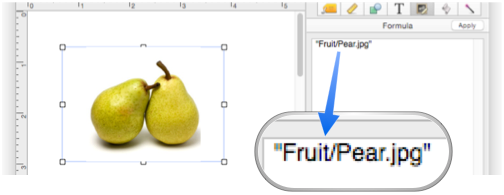
The image can actually be be anywhere on the hard drive, but if it is not in a subfolder relative to the database you must supply the complete path.
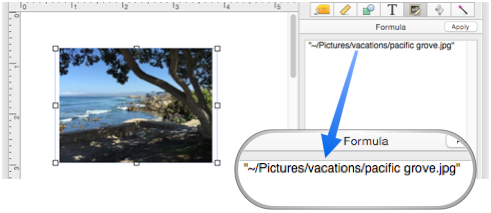
Normally you won’t use an Image Display Object to display a fixed image like these examples (that’s what the Fixed Image Object is for), but these examples do illustrate how to reference image files in different areas of the hard drive.
Picking an Image using a Dialog
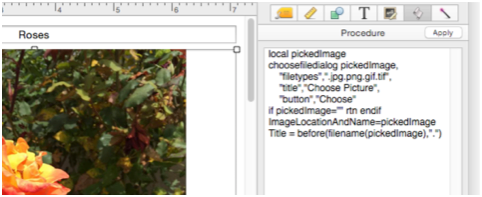
Panorama isn’t a page layout program, it’s a database. So you want to be able to change the image on the fly. Let’s look at one way to do that. In this example, the Formula doesn’t directly contain the path to the image. Instead it contains a variable named pictureLocationAndName.
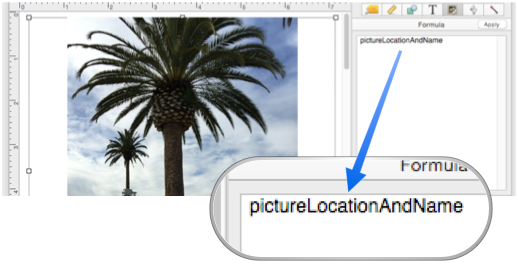
So what we need to do is get the path to the image into this variable. To do that, the object contains a program. The program will run when the object is clicked.

The program uses the choosefiledialog statement to display the choose file dialog, allowing any picture on the computer to be picked. The program will put the exact path and name of the picture into the variable, which is then displayed.
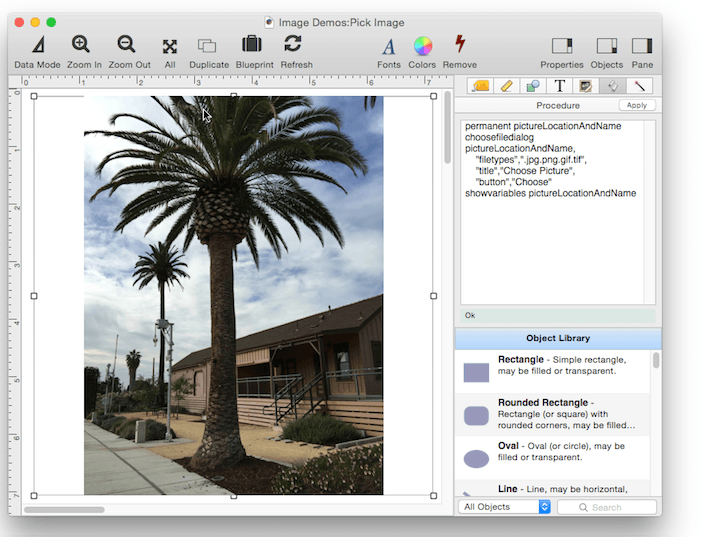
The important point of this exercise is that thru the formula, the contents of the variable control what image is displayed. By changing the value of the variable, the image is changed.
Creating a Database Image Catalog
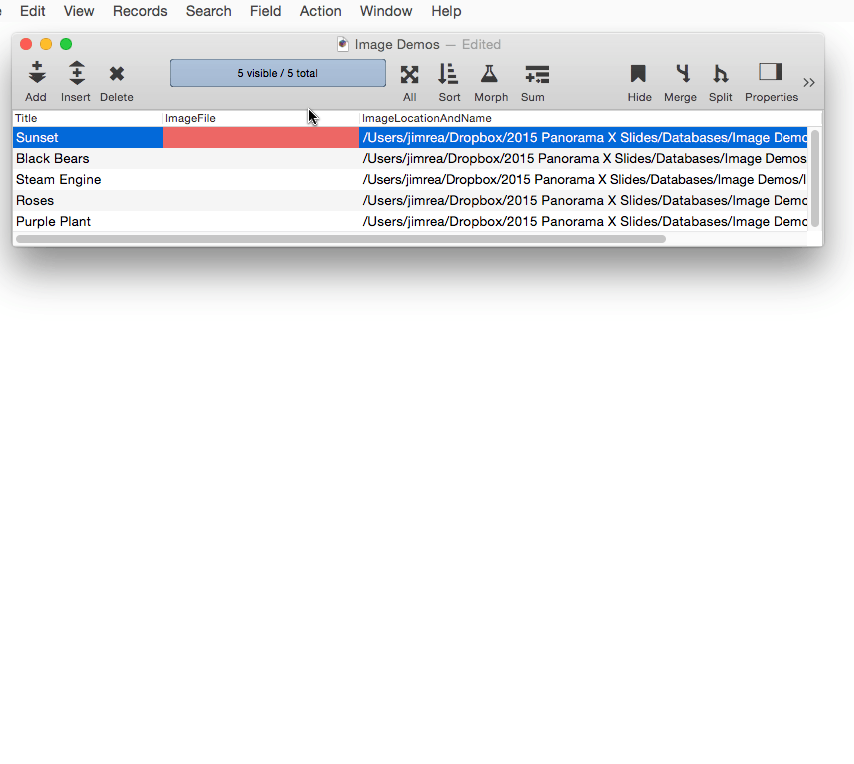
Now that we’ve laid the groundwork, let’s see how to keep a catalog of images in a database. To do that the database needs a field that contains the image name, or the image path and name if the image files aren’t in the same folder as the database. In this example the database contains a field named ImageLocationAndName. The exact name isn’t important, you can use any name you like, as long as you use the same name when setting up the Image Display formula. As you can see, in this example the ImageLocationAndName field contains complete paths to the image files.
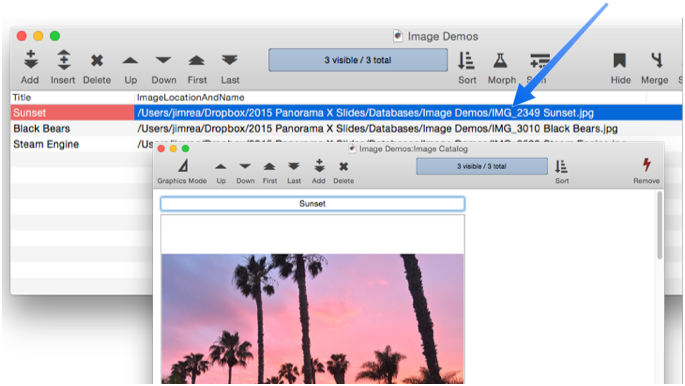
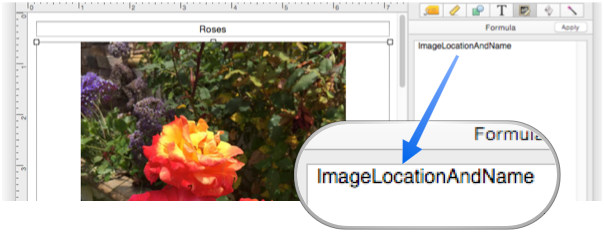
The formula to display the image is simply the field name – ImageLocationAndName
With the formula set up, navigating through the database causes the image associated with each record to be displayed.
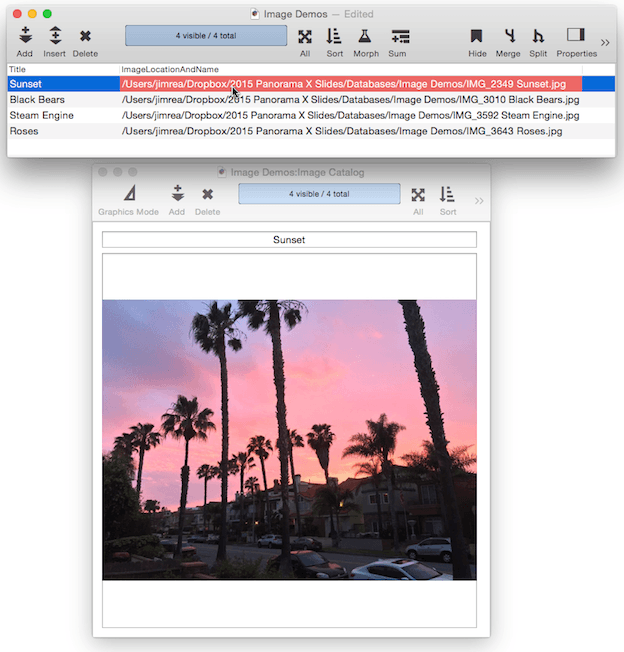
How do the image path and name get into the field? You could simply type them in, but that would be tedious and error prone. Instead, a procedure can be attached to the image just like in the previous example.
This code gets the image location and name into a local variable, so that it can check for the cancel button and abort if it is pressed. Otherwise the code updates the database field with the chosen image location and name. (This example code also fills in the Title with the image file name.) Let’s see this in action to add a new image to the catalog.
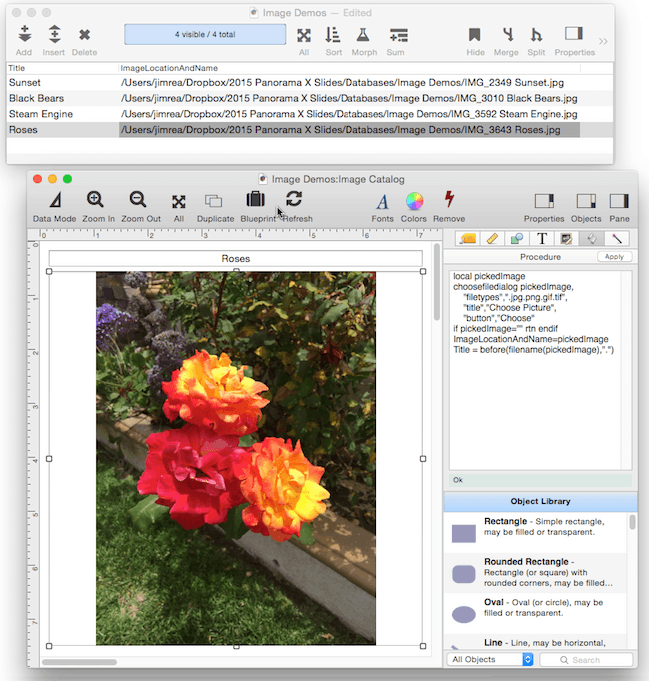
The final step is optional, editing the picture title. (The form was set up with a Text Editor Object for this purpose, and has nothing to do with the display of the image.)

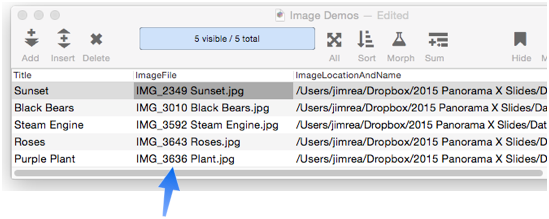
Eliminating Duplicate Folder Information – In this particular example, you’ll notice that there is a lot of duplicate information because all of the files are in the same folder. Since all of the information that is shown in gray is duplicated, it would be nice if we didn’t have to store it over and over.
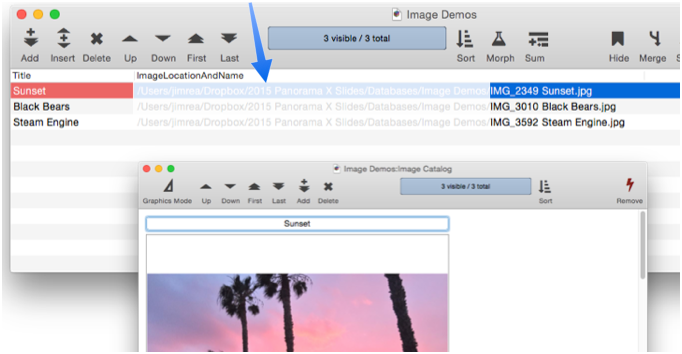
The duplicate folder information can be removed from the database if it is added to the formula. (Remember, though, that this trick only works if all of the images are in the same folder. If they are in different folders, you can’t do this.)
The first step is using the Insert Field tool to insert a new field, which in this example will be called ImageFile (but the name can be anything, as long as the same name is used in the formula).
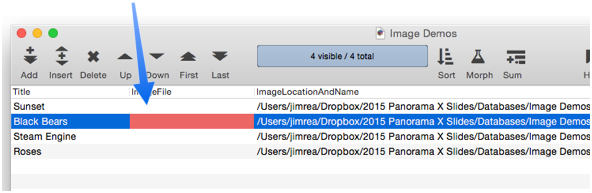
The next step is to use the Morph Current Field command with the filename( function to extract just the filename. This will quickly separate the file names even if you have thousands of images.
The new field is ready, so you can get rid of the old field with all the duplicate information.
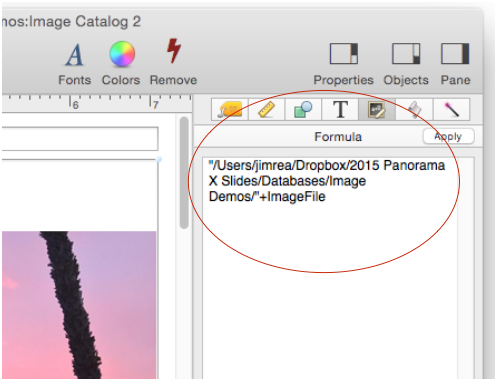
Now the formula in the Image Display object needs to be adjusted. Since the field doesn’t contain the path, the path needs to be included in the formula itself, as shown below. Of course, since the path is now hardcoded into the formula, this will only work for images in that folder, not for any other folder.
In the examples so far it’s been assumed that the images already exist and that the database has to be adjusted to work with the images you have. Often, however, you’ll do it the other way – create images in specific folders with specific names so that they will work with your database. For example, suppose you have a created a personnel database. You might want to take employee pictures, and give each image a name based on the employee identification numbers you already have in the database. In that case you don’t need a specific field for image locations or names, you just set up the Image Display formula according to the rules you’ve created.
Diagnosing Formula Problems
If your formula has a problem it can be a bit tricky to figure out what’s wrong since you can’t directly see the text produced by the formula. In that situation you can use the Object Value dialog to display the entire formula result. See Diagnosing a Formula embedded in a Form Object to learn how to use this dialog.
Another option is to turn on the Display Path option. That will show you the actual path that the Image Display option is using, the path that your formula has calculated. That will usually make it obvious what the problem is.
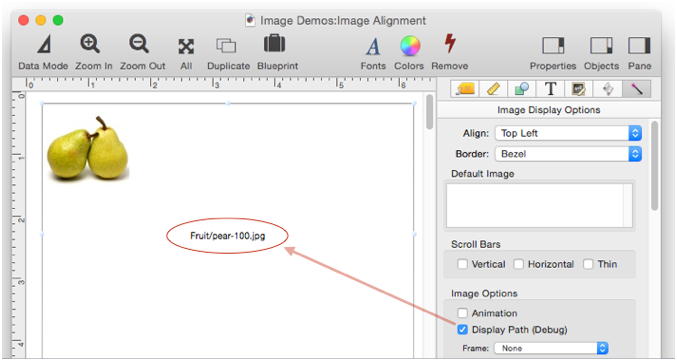
Image Display Options
Image Display objects have a huge array of available options:
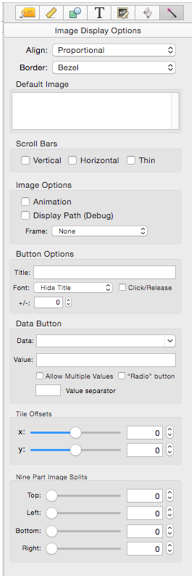
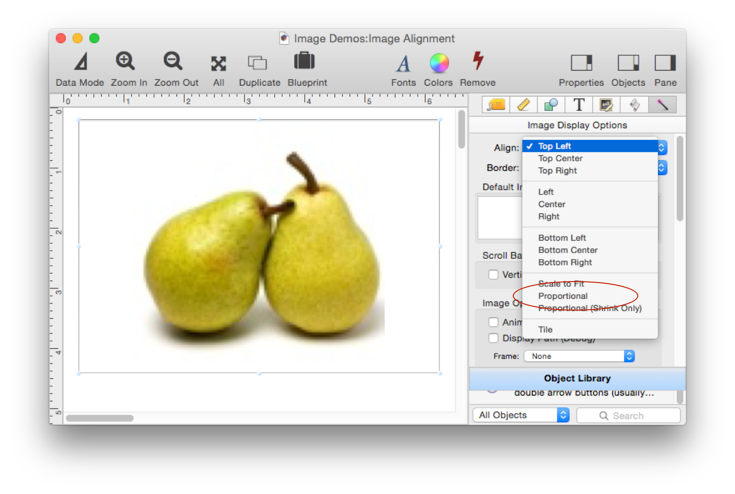
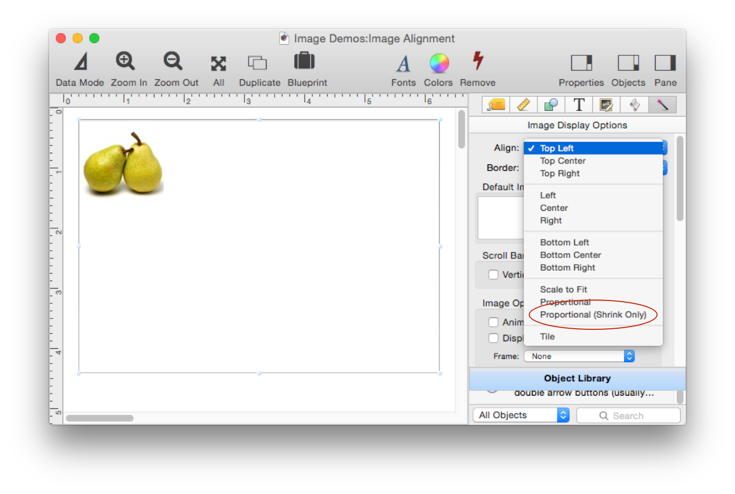
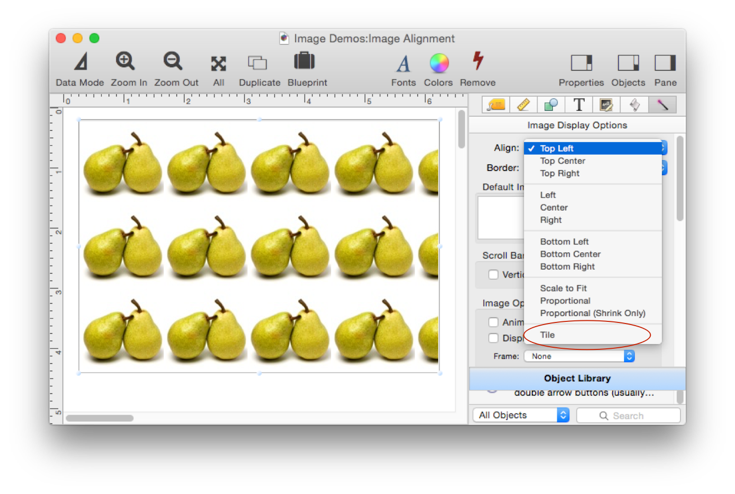
Align
The alignment pop-up menu specifies where the image should be displayed.
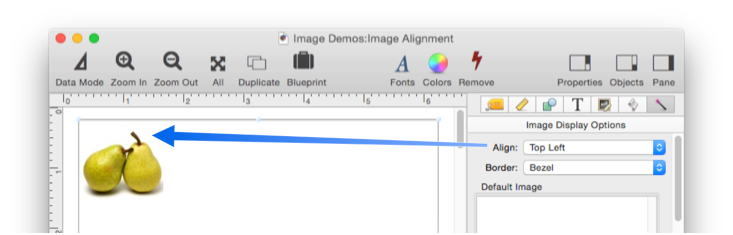
The first nine options display the image at actual size, in different positions (this illustration shows all nine positions).
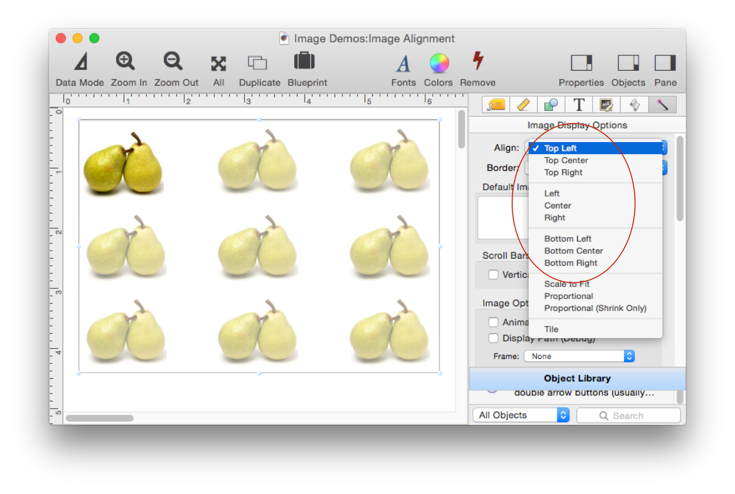
The Scale to Fit option resizes the image to completely fill the object, even if that distorts the image.
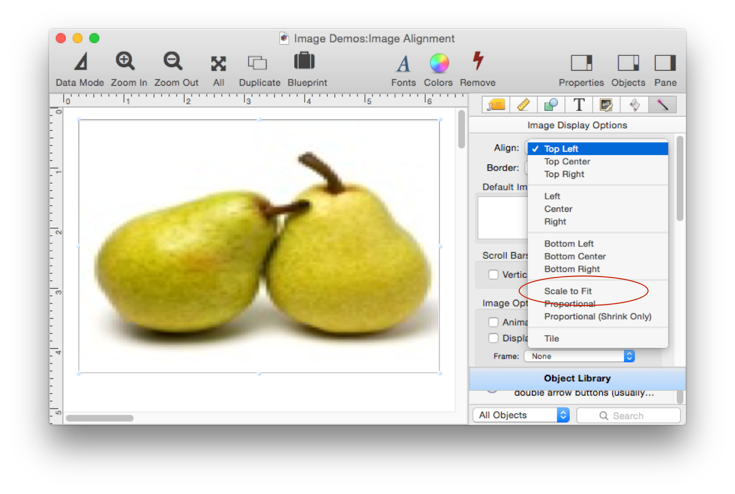
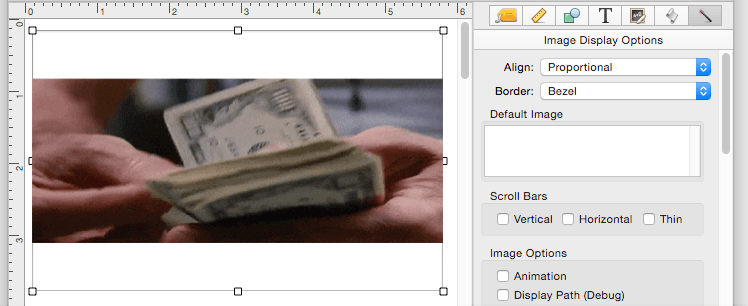
The Proportional option resizes the image to the largest size that will fit in the object without distortion.
The Proportional (Shrink Only) option reduces the image to the largest size that will fit in the object without distortion, but if the image is smaller than the object size, it does not expand it. In other words, this option may shrink the image, but it will not expand it to more than 100%.
The Tile option repeats the image over and over to fill in object space.
You can fill any size of space with a properly designed image. Here is an object displayed normally.
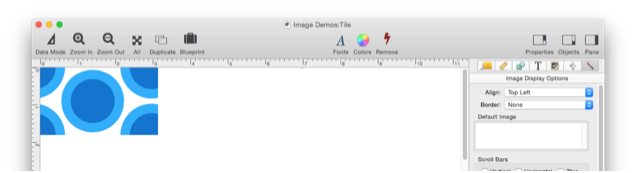
And the same object displayed as a tile.
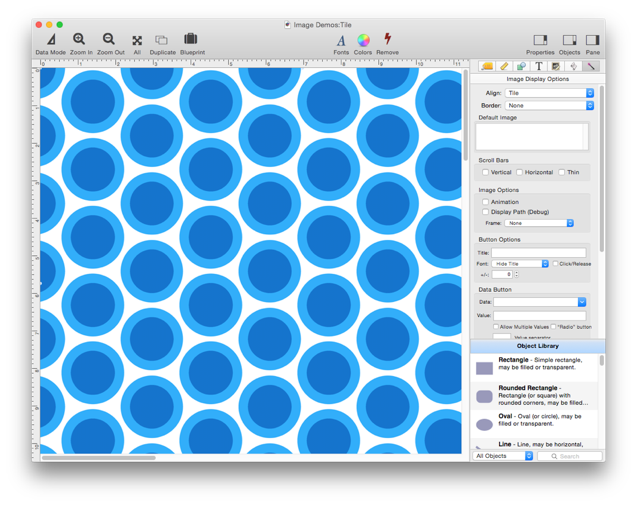
The property inspector has controls that allow you to shift the tiles vertically and horizontally.
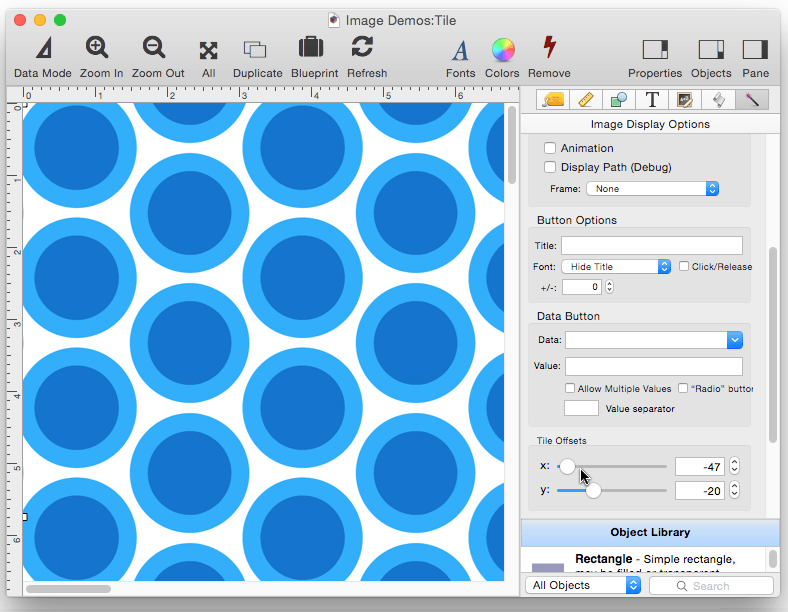
Patterno is a cool program for making tiles like this. It’s not free, but it does make it very easy to create this type of tiled image.
Border
There are two image border styles available.
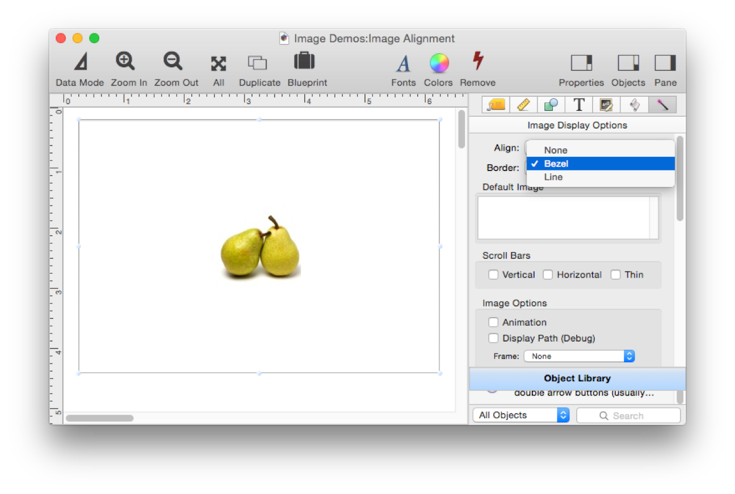
You can also pick None, and use the standard Panorama borders for dashed lines, drop shadows, etc.
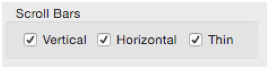
Scroll Bars
If the image to be displayed is larger than the object, you might want to add scroll bars instead of scaling the image.
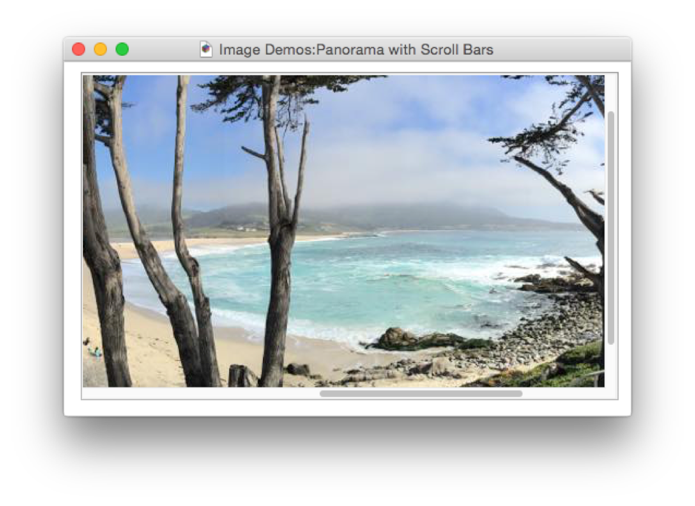
If you want scroll bars, simply enable them.
Animation
If the image being displayed is an animated GIF, you can make it animate.
See Image Display Animations for details.
Image Frame
The Frame option provides 4 standard frames you can pick from.
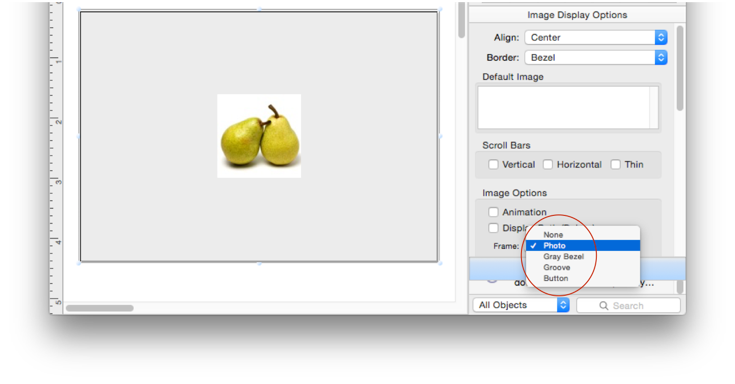
If you ask us, these frame options aren’t that attractive, but they are actually provided by Apple, so Panorama makes them available.
See Also
- clipboardimagesave -- saves an image on the clipboard as an image file (.jpg, .png, etc.).
- clipboardimagesize( -- returns the dimensions of whatever image is currently on the computer's clipboard.
- Fixed Image Object -- is used for fixed images (images that never change).
- Image Display Animations -- animated images.
- Image Display Colors and Gradients -- displaying pure colors and gradients
- Image Display Data Buttons -- checkboxes and radio buttons created from custom images.
- Image Display Push Buttons -- push buttons created from custom images.
History
| Version | Status | Notes |
| 10.0 | Updated | Carried over from Panorama 6.0, but also incoporates button features. |