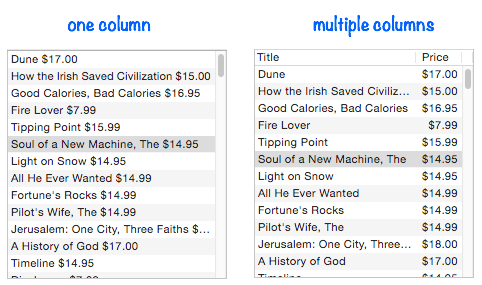
You’ll often want to display data that has two, three or more columns. For example, you could display a price list in a single column, as shown on the left, but two columns, as shown on the right, is a lot better.
There are two prerequisites for displaying a list with multiple columns:
- Definitions for each column (name, width, alignment, etc.)
- A source of data with tabs separating the columns
The rest of this page will describe how to satisfy these requirements.
Creating a Simple Two Column List
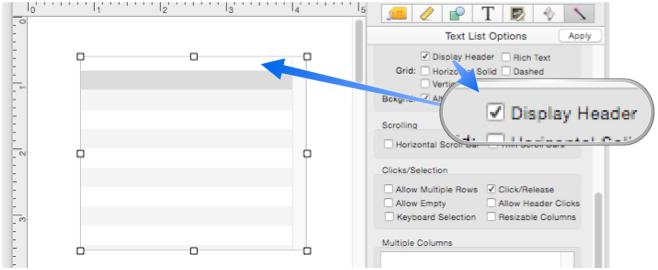
To create a multi-column Text List, start by creating a regular one column Text List. The next step is usually to enable the Display Header option. This will cause a blank header area to appear at the top of the list.
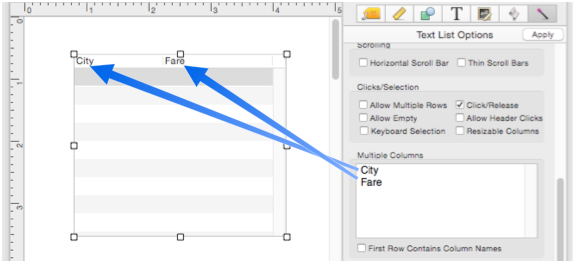
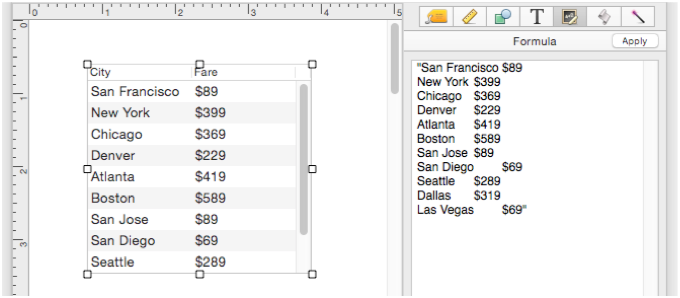
The next step is to specify the column name. Type in one column name per line in the Multiple Columns area, then press the Apply button.
Now the Text List has two columns, but it needs some tab delimited data. One way to do that is to type the data, with tabs, into the TextEdit application:
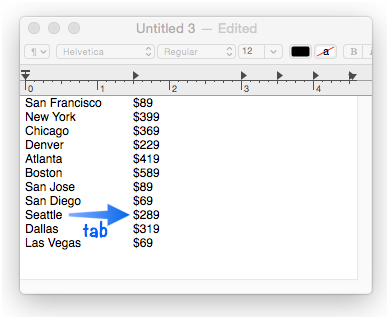
Then the text can be pasted into the Formula panel, with quotes to make it into a formula. When the Apply button is pressed – voila! A two column Text List object!
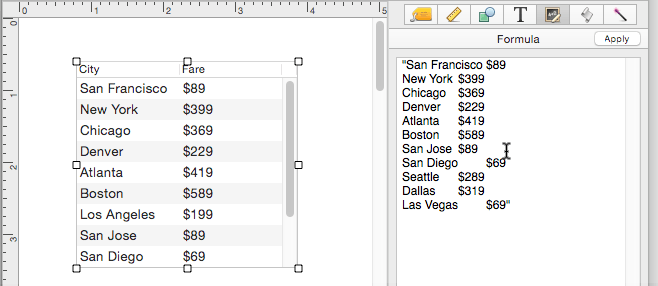
It’s not actually necessary to use TextEdit – you can type the data right into Panorama itself, including the tab keys.
Converting Comma Delimited to Tab Delimited Data
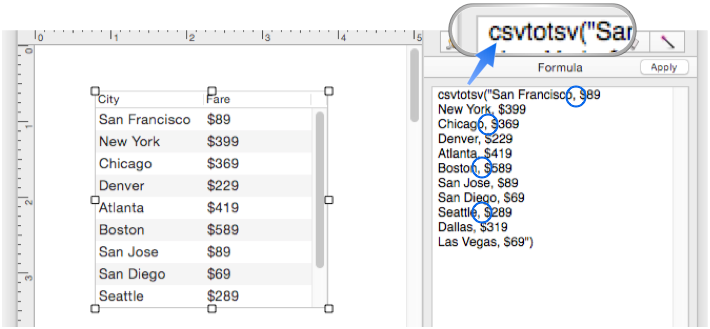
It’s very common to have comma delimited data instead of tab delimited data. Fortunately, Panorama has a function, csvtotsv(, that can perform this conversion. Here is the same example as the previous section, but rewritten to use comma separated values (CSV) instead of tab separated values (TSV).
Dynamic Data Sources
In the examples so far, the list has been fixed and unchanging, but that is unusual. In most applications the formula will be set up to get the text from a variable, a field, or thru a more complex calculation.
It’s very common for the list data to come from a database. To learn more about how to do that, see Text List Database Integration and Text List Searching.
Column Alignment (Left, Right, Center)
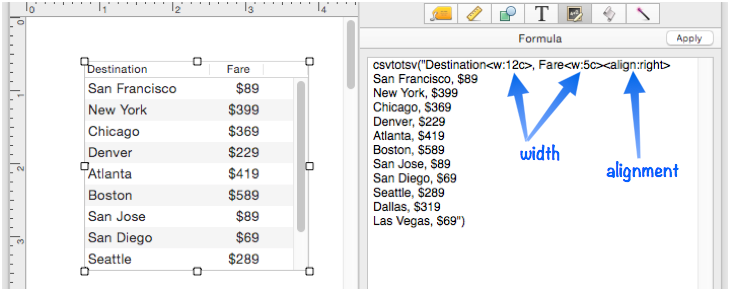
By adding special tags to the column specification, I can control the alignment and/or width of each column. The alignment is specified by an <align> tag and can be left (the default), center or right.
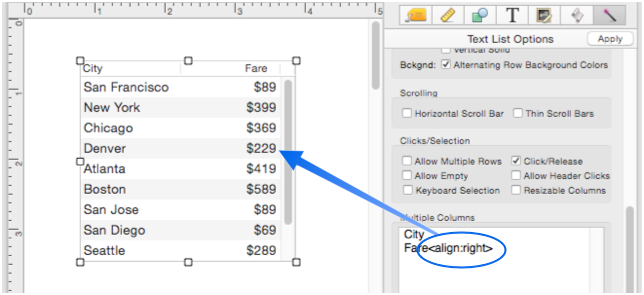
Each column can have a different alignment.
Column Width
The width tag (which can be abbreviated as w), normally specifies the column width in points (1 point is equal to 1/72 inch).
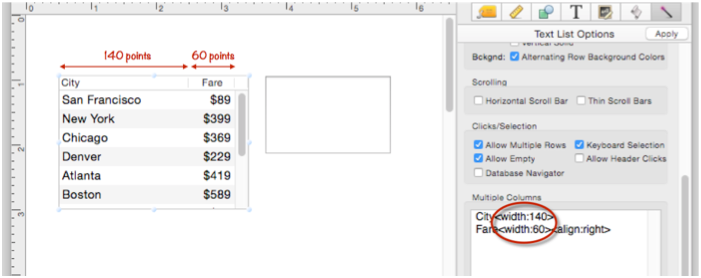
When the column widths are specified in points, the widths remain constant no matter what the text size.
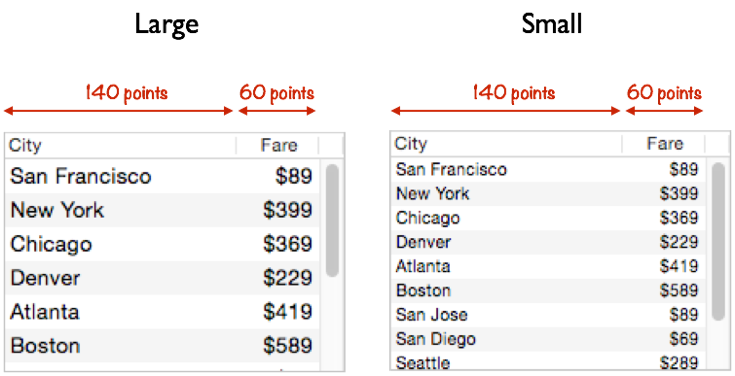
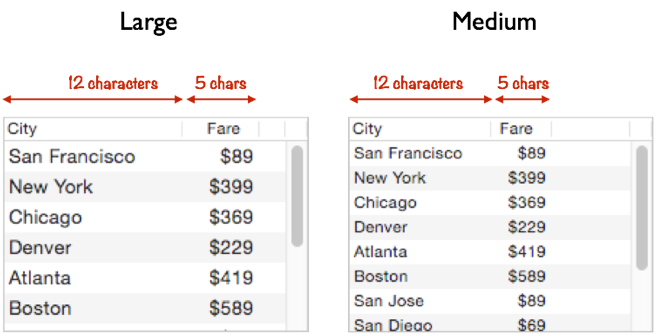
If you append a c to the dimension, that means that the dimension is specified in characters instead of points. Since different characters have different widths (a W is wider than an I, for example), this is an approximate measurement. Depending on what characters are being displayed, you might be able to display more or less than the exact number of characters specified.
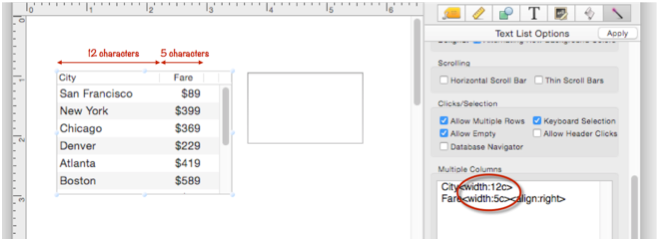
The nice thing about specifying widths in “characters” is that the widths will automatically adjust if you change the size of the text. You may have to fiddle a bit to get something that works well at all the sizes you want to use, but it is usually possible.
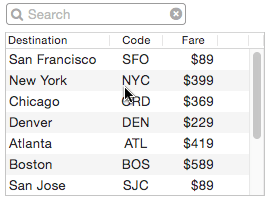
Resizable Column Widths
If the Resizable Columns option is checked, the column widths can be changed “on-the-fly” while the list is being used.
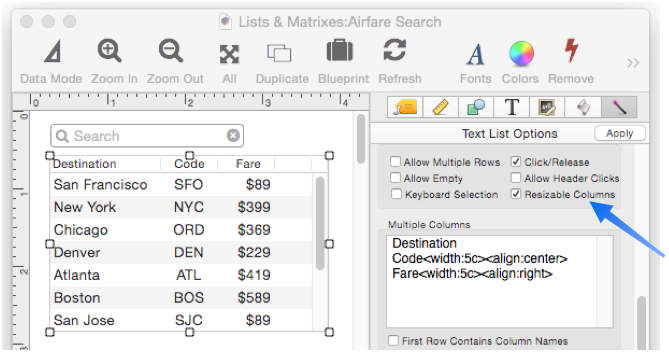
To resize a column, simply drag the separator between the column titles.
There are a couple of caveats in regard to resizable columns:
- On-the-fly resizing is temporary. Columns will revert to the default widths the next time the object is instantiated.
- If the Resizable Columns option is enabled, clicking on a column will not trigger a procedure even if the Allow Header Clicks option is enabled (see Text List Programming. However, right clicks will work.
The Resizable Columns option can only be enabled or disabled for the entire Text List Object, not for individual columns. There is also no way to specify minimum or maximum widths for columns.
Embedding Column Names & Attributes in the Data
Another way to set up multiple columns is to put the column specifications in the first line of the data itself. With this option, you leave the column specifications area blank, and check the First Row Contains Column Names option.
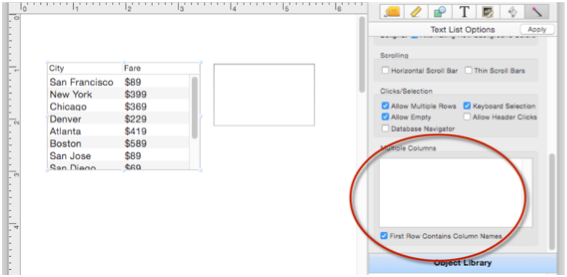
When this option is used, the column names must be embedded in the first line of the data, like this.
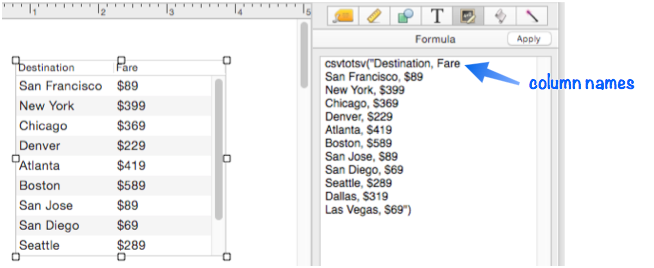
Width and alignment tags can also be placed into the first line.
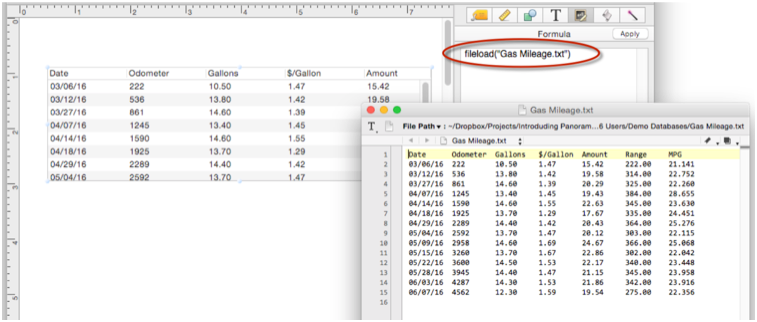
Any formula that generates a text value can be used. In this example, the Text List object is reading the text data straight from a text file on the disk. The front window shows what the text file looks like in BBEdit.
There are a couple of caveats you need to know about the First Row Contains Column Names option. You can’t use this option when you link the Text List object to a database (see Text List Database Integration), and it doesn’t work with Text List Searching.
Horizontal Scroll Bar
If the data you need to display is very wide, you can enable the Horizontal Scroll Bar option. I’ve also switched to thin scroll bars, which makes the scroll bars a bit narrower.
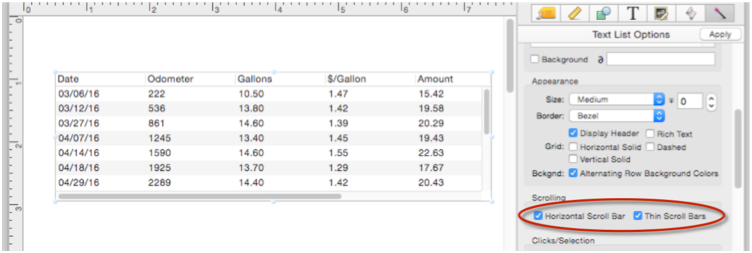
With this option enabled, the list can be scrolled horizontally as well as vertically.
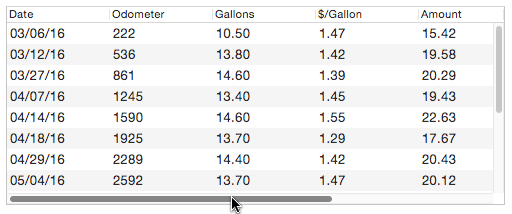
There is no option for the vertical scroll bar – it is automatically enabled if there are more rows than will fit in the height of the object.
See Also
- Displaying Data in a Grid -- fundamentals of displaying data in a grid (Text List/Matrix).
- Matrix Clicking -- handling clicks in a Matrix Object.
- Matrix Constructor -- quickly creating a Matrix Object from a template.
- Matrix Database Integration -- synchronizing a Matrix Object with a database.
- Matrix Geometry -- customizing the size and geometry of Matrix Object elements.
- Matrix Header and Horizontal Scrolling -- setting up a custom header for a Matrix Object grid.
- Matrix Object -- displaying a grid of items with a custom arrangement.
- Matrix Object Frame -- setting up the arrangement of items within a Matrix Object.
- Matrix Programming -- programming a Matrix object.
- Text List Appearance -- customizing the appearance of a Text List Object.
- Text List Constructor -- quickly creating a Text List Object from a template.
- Text List Database Integration -- synchronizing a Text List Object with a database.
- Text List Object -- displaying a grid of text.
- Text List Programming -- programming a Text List Object.
- Text List Searching -- searching within a Text List Object.
- Text List Selection -- selecting items in a Text List Object.
History
| Version | Status | Notes |
| 10.0 | New | New in this version. |