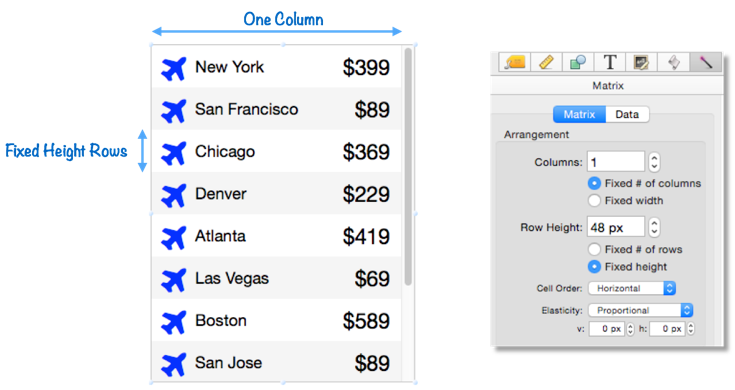
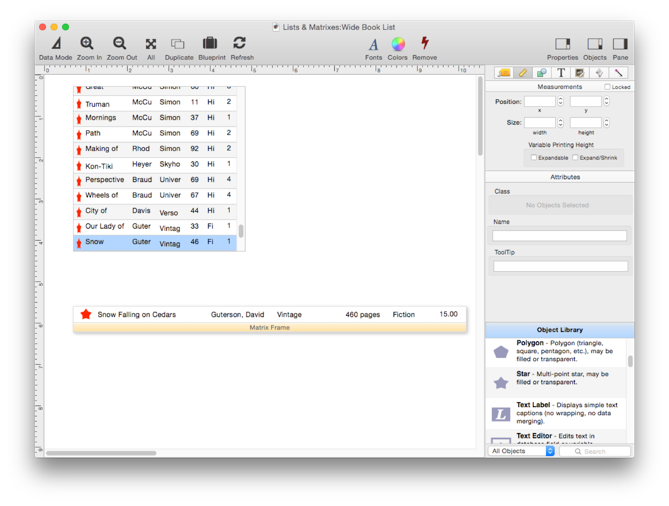
Most matrixes are single column with fixed height rows and a scroll bar, like this:
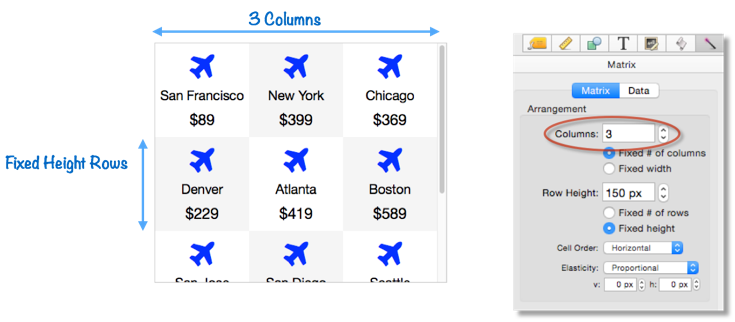
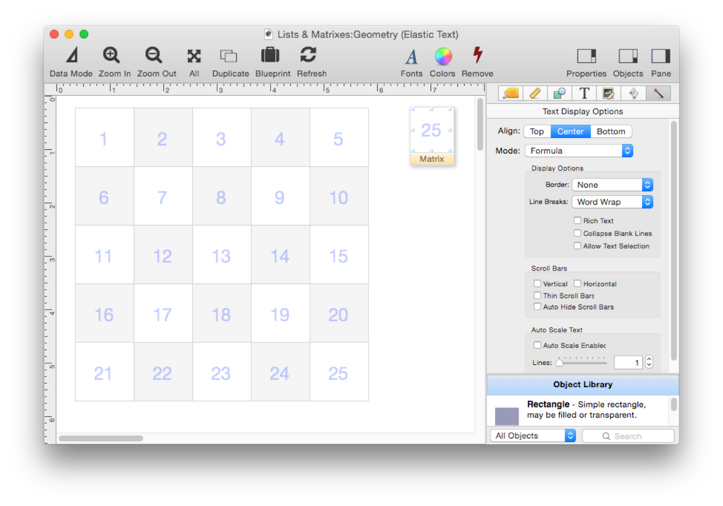
But Matrix objects do have a lot of flexibility in how they are arranged. Here is another matrix that displays the same data with 3 columns instead of one (still using fixed height rows).
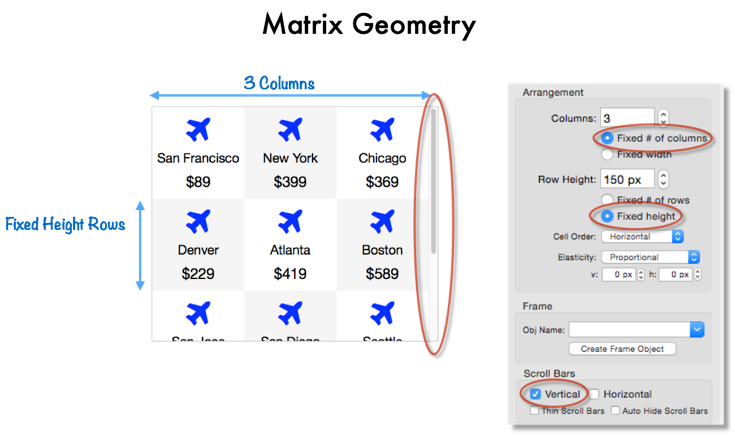
Important: If your matrix has a vertical scroll bar, it must use fixed height rows and a fixed number of columns. Panorama won’t stop you from using other options, but it won’t work properly.
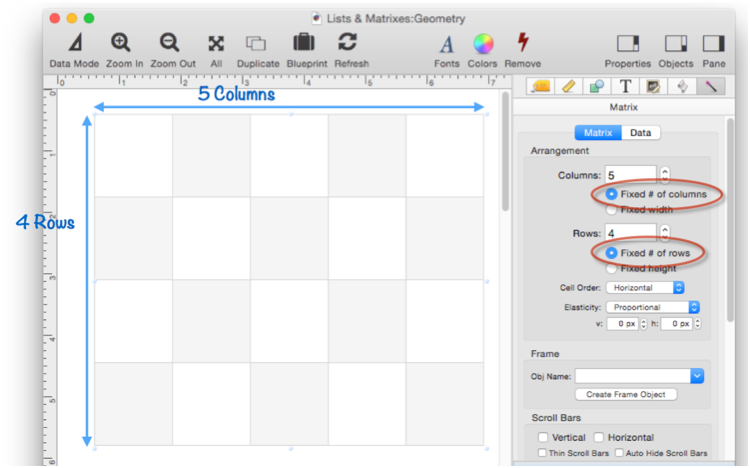
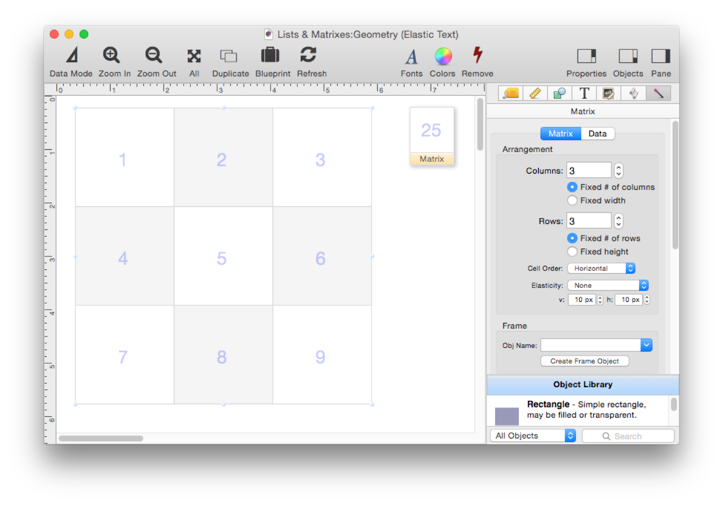
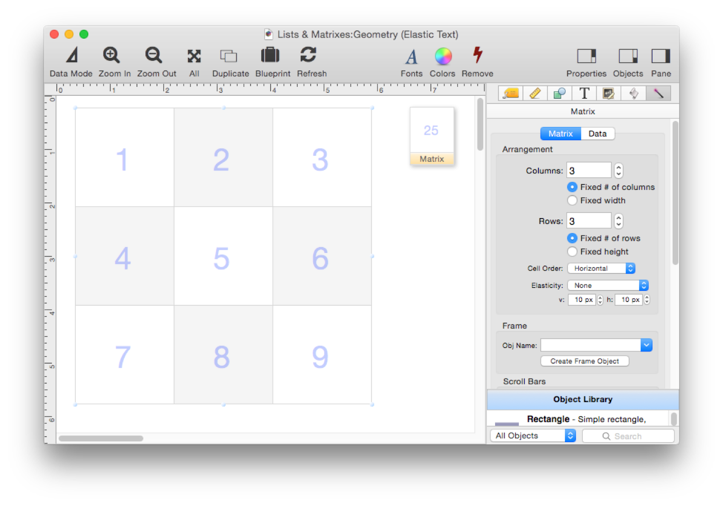
Fixed Number of Rows and Columns
Instead of specifying the height and width of each item, you can instead specify the number of rows and columns.

If the size of the object is changed, the number of rows and columns remains fixed. Each cell expands and shrinks to fit the available size.
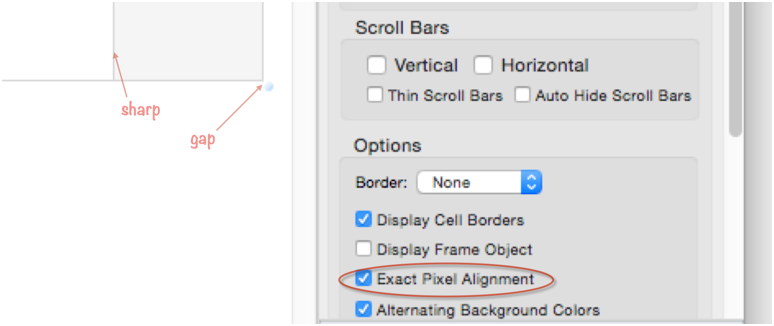
Exact Pixel Alignment
If you look closely at the bottom right corner of the matrix in the previous example, you’ll notice that there is a small gap. This is because of the Exact Pixel Alignment option, which is turned on by default. With this option enabled, each cell of the matrix is rounded down to an integer dimension. For example, suppose your matrix has five columns, and is 103 points wide. With this option, each column will be 20 points wide, leaving a 3 point gap on the right edge.
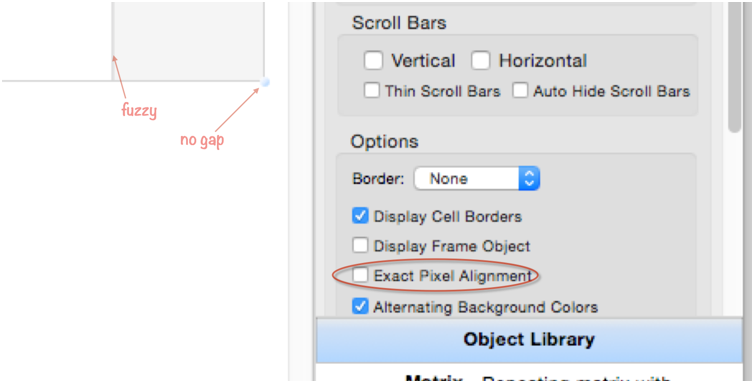
If the Exact Pixel Alignment option is turened off, the gap disappears. With this option off, the cells can have fractional dimensions. In this example of a five column 103 point wide matrix, the columns would now be 20.6 points wide. This eliminates the gap, but it also makes the edges between the borders fuzzy (switch back to previous slide to see). Panorama gives you the option of whether you want no gap or fuzzy borders. Of course, if you make the matrix dimension an even multiple of the row/column dimensions, it doesn’t matter.
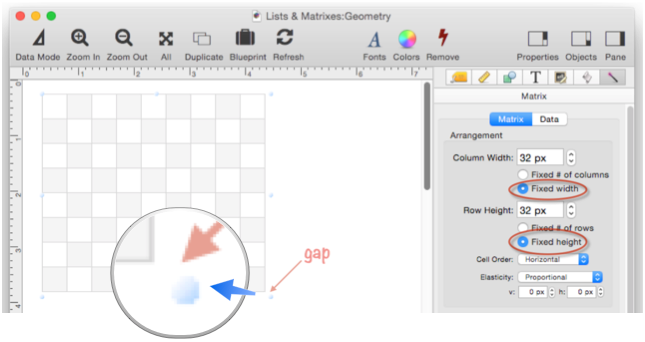
If the matrix has fixed column width and row height, Panorama will pack in as many rows and columns as will fit. However, it will not include any partial rows or columns, so there will always be a gap on the bottom/right unless the overall dimensions are an exact multiple of the cell width/height. This gap can be quite large, up to 1 point less than the row height or column width (so in this case up to 31 points).
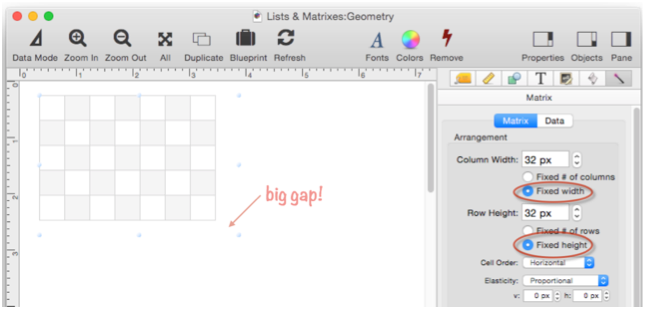
When you change the size of a matrix with fixed column width and row height, the number of cells changes as you change the size, but the cell size remains fixed. Also notice, that as I mentioned, the gap at the bottom right can be almost as big as a cell. Since the cell size is fixed, there is nothing to be done about this.
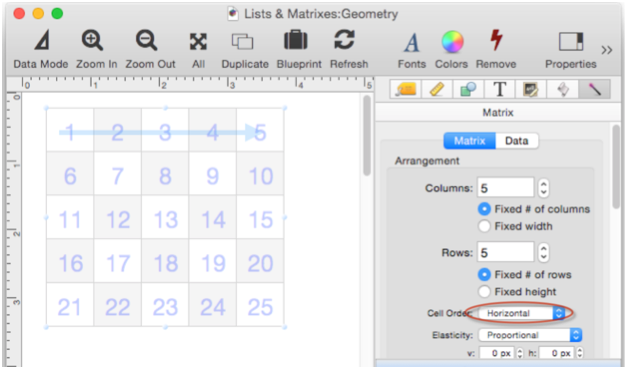
Matrix Cell Order
Each cell has a number. Cells are usually ordered horizontally first (within each row), then vertically.
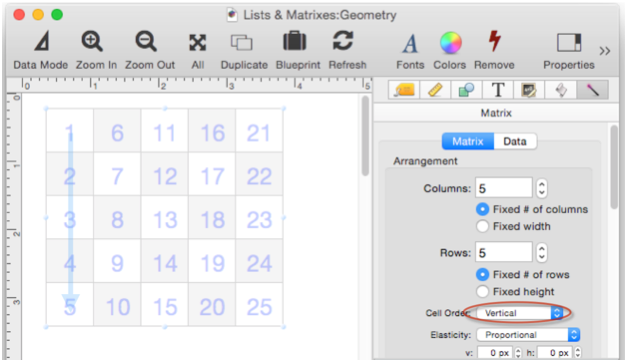
You also have the option to order cells vertically first (within each column), then horizontally. (However, the Vertical option doesn’t work if the matrix has a vertical scroll bar – in that case, the cells must be ordered horizontally.)
Matrix Elasticity
Earlier I showed you how if a matrix has a fixed number of rows and columns, the cell size changes when the object size changes. But what about objects within the matrix frame, how do they react to changing sizes?
Suppose the matrix frame has a blue star, and looks like this.
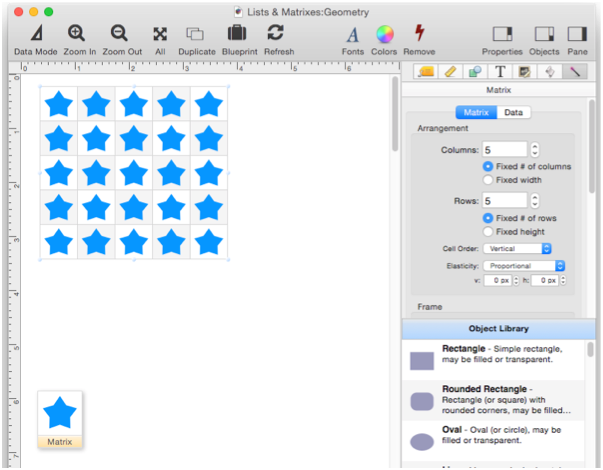
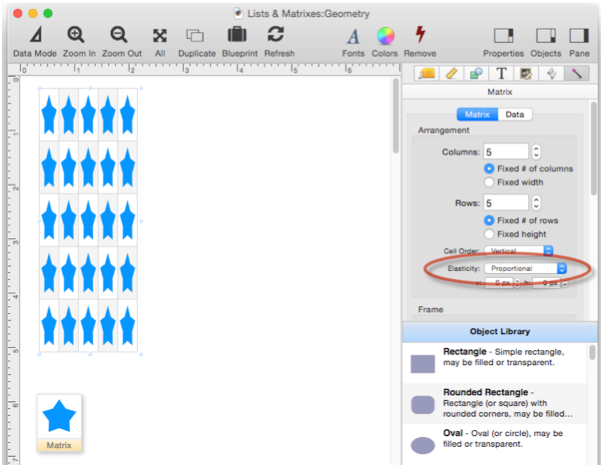
If the matrix is made larger the stars automatically get larger also.
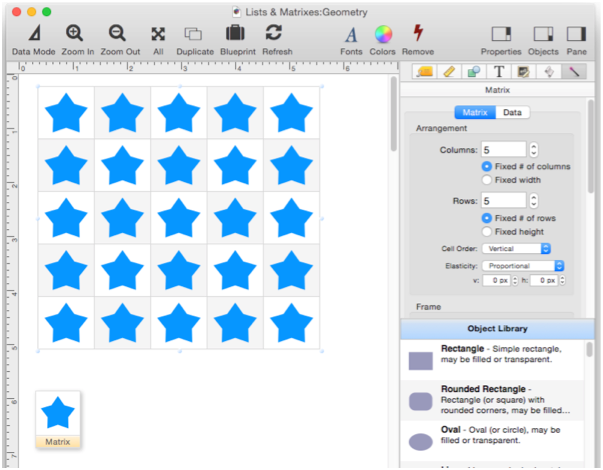
In fact, the objects in the frame scale proportionally to the matrix cells. This is because the Elasticity option of the matrix is set to Proportional.
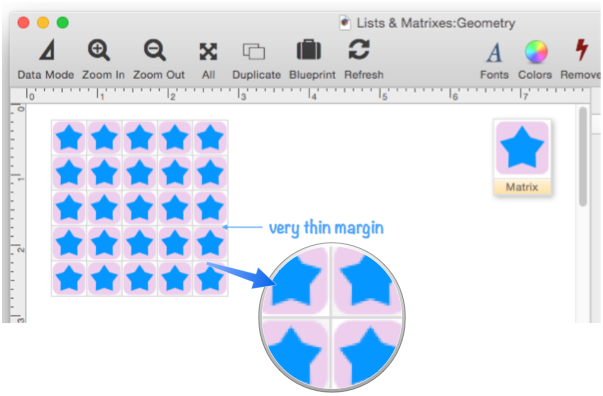
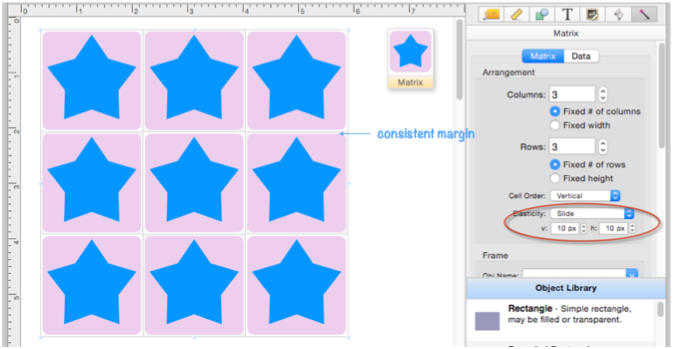
Sometimes the Proportional option isn’t really what you want. In this example, I’ve added a round rectangle for a backdrop, that creates a thin margin around each cell. With these small cells, the margin is very thin, almost invisible.
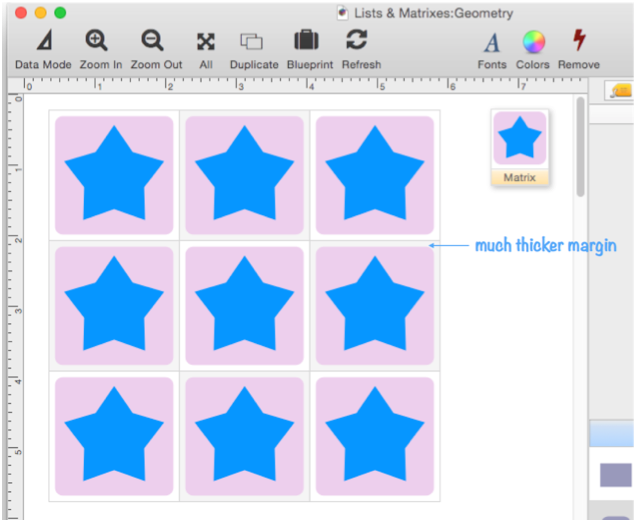
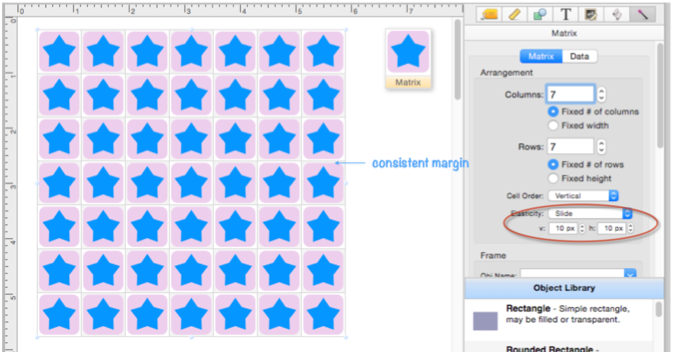
Now I’ve made the cells much bigger, both by increasing the size of the matrix and by reducing the number of rows and columns. Since the Proportional option is enabled, everything in the matrix frame has gotten proportionally bigger, including the margin. Maybe that’s ok, but maybe you’d like the margin to remain constant while everything else grows and shrinks.
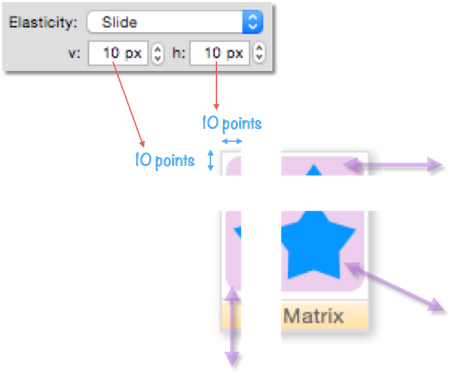
To make this change, I change the Elasticity from Proportional to Slide, and set v and h to 10 points.
Now even when the cell size changes drastically, the margin stays consistent.
How does this work? In Slide mode the matrix frame is divided into four quadrants based on the dimensions you supply. Different points within the frame move differently depending on which quadrant they are in.
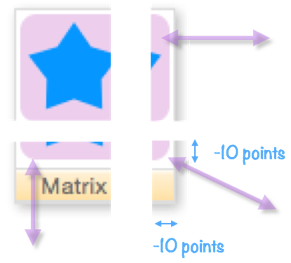
You can also specify one or both dimensions as negative numbers, in which case the quadrants are measured from the bottom right. In this particular example, it doesn’t make any difference, the result is the same as with a positive number.
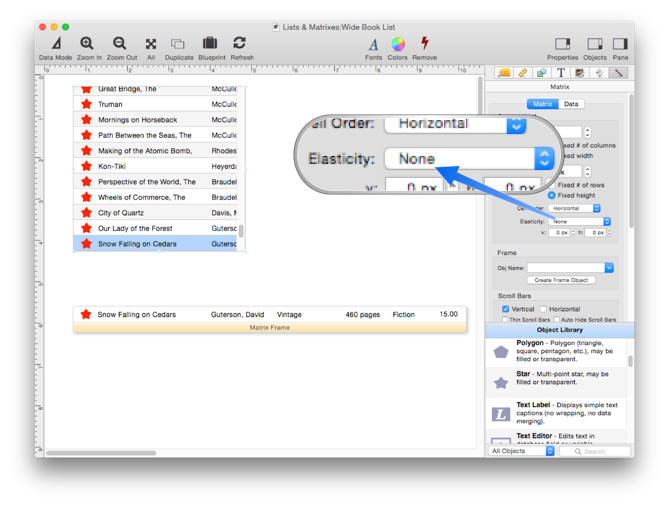
There is one other Elasticity option: None. This option is usually the same as Proportional, but it does serve a special role when horizontal scrolling is enabled (see below).
Text Elasticity in Matrix Objects
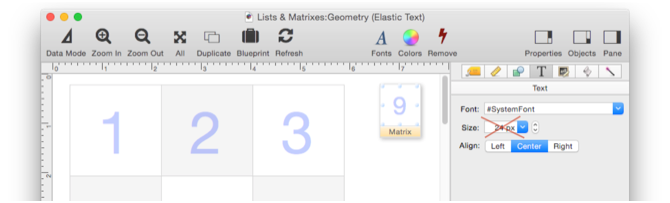
Text is often displayed in a matrix, and normally text has a fixed size. This example uses a text display object with 24 point text. The text is centered both vertically and horizontally, but the size doesn’t change no matter how the matrix geometry changes.
Now the number of cells in the matrix has been reduced, making the individual cells larger. But the text size is still 24 points.
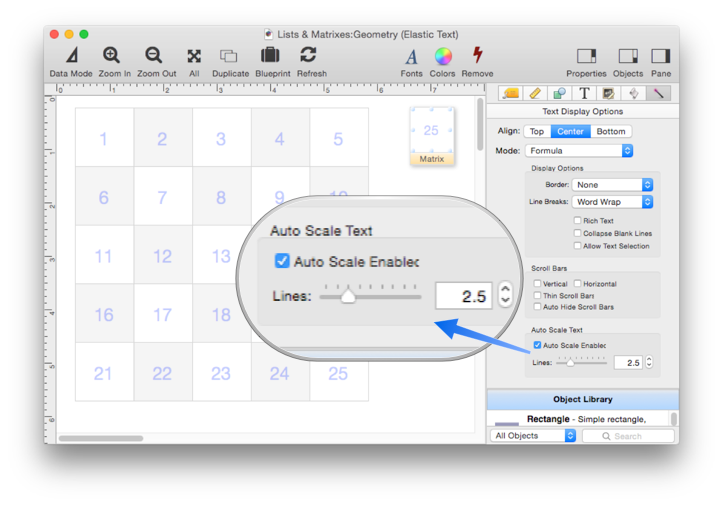
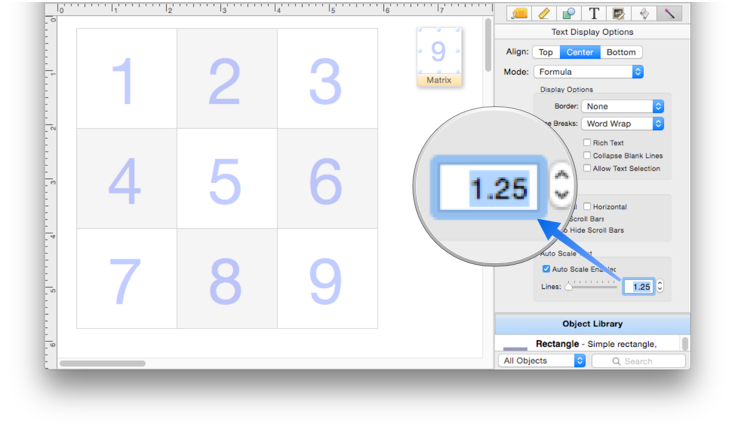
Now fixed size text may be fine – but if you want it to, the text can scale as the cell size changes. To do this, select the Text Display Object and enable the Auto-Scale option. In this example this option has been set to 2.5 lines, which leaves the text at about 24 points at this cell size.
With the Auto-Scale option enabled, when the cells get bigger, the text also gets bigger.
When the Auto-Scale option is enabled, the point size of the text is ignored.
Instead, you specify how many lines of text will fit in the text display object (this includes ascenders, descenders and leading). The lower this number is, the bigger the text will be.
(Remember, you have to refresh the matrix to see changes made to the content inside the matrix frame.)
Matrix Automatic Row Height
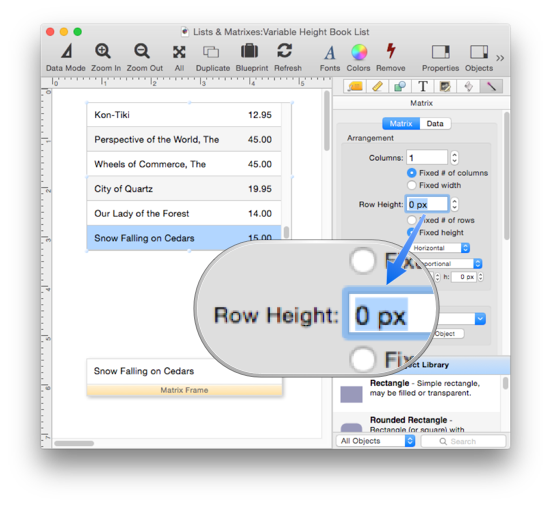
The most common Matrix Object configuration is a one column matrix with a vertical scroll bar. There are some extra tricks that are possible in this configuration. As you have learned, if you’re using a vertical scroll bar you have to use a fixed row height, and in this example the row height is 36 points.

This example looks almost exactly the same, but look closely – the Row Height is set to ZERO points. But clearly, the row height isn’t zero, it is still 36. The reason is because if the row height is set to zero, Panorama actually sets the row height to whatever height the frame is. In this case, that is still 36 points.
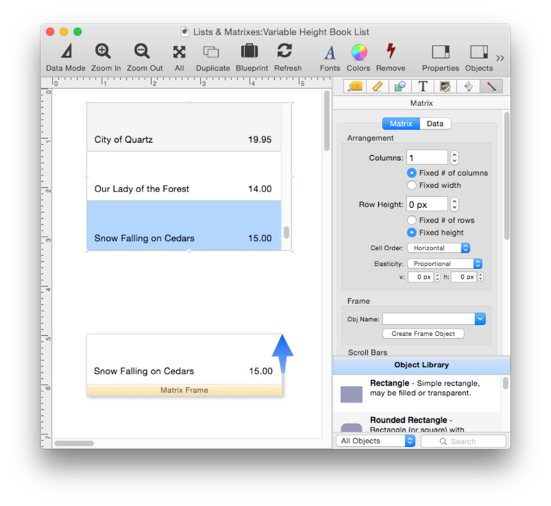
Now the row height is still 0, but the height of the matrix frame has been increased to 72 points (and the Refresh button has been pressed). This automatically sets the row height to 72 points as well. Nothing revolutionary, but convenient.
Matrix Horizontal Scrolling
As described earlier on this page, Panorama scales the objects in the matrix frame to fit inside the items in the matrix. If the matrix frame is wider than the matrix object, everything will be “smushed” to fit into the item. In the image below, you can clearly see how the star is distorted to fit. The dimensions of the text display objects are also distorted, but the text itself isn’t (it is simply cut off).
In a situation like this, you would probably prefer that the objects in the frame not be distorted, but instead have them scroll horizontally within the matrix. The first step is to turn off the scaling, which is done by setting the Elasticity to None. Now the contents of the frame aren’t “smushed” any more – instead they are cut off.
The final step is to enable the Horizontal scroll bar.
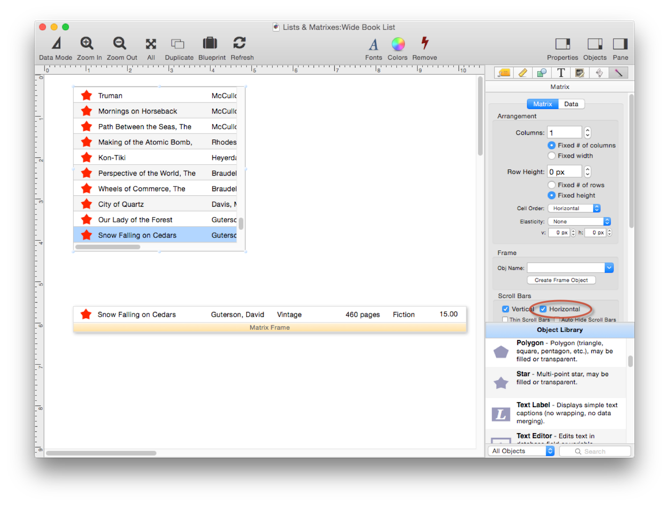
You can switch into data mode to try out the horizontal scroll bar.

See Also
- Displaying Data in a Grid -- fundamentals of displaying data in a grid (Text List/Matrix).
- Matrix Clicking -- handling clicks in a Matrix Object.
- Matrix Constructor -- quickly creating a Matrix Object from a template.
- Matrix Database Integration -- synchronizing a Matrix Object with a database.
- Matrix Header and Horizontal Scrolling -- setting up a custom header for a Matrix Object grid.
- Matrix Object -- displaying a grid of items with a custom arrangement.
- Matrix Object Frame -- setting up the arrangement of items within a Matrix Object.
- Matrix Programming -- programming a Matrix object.
- Text List Appearance -- customizing the appearance of a Text List Object.
- Text List Constructor -- quickly creating a Text List Object from a template.
- Text List Database Integration -- synchronizing a Text List Object with a database.
- Text List Multiple Columns -- displaying multiple columns in a Text List Object
- Text List Object -- displaying a grid of text.
- Text List Programming -- programming a Text List Object.
- Text List Searching -- searching within a Text List Object.
- Text List Selection -- selecting items in a Text List Object.
History
| Version | Status | Notes |
| 10.0 | New | New in this version. |