Some applications require a rectangular array (or matrix) of data, pictures, and/or pushbuttons (for example a monthly calendar or a thumbnail artwork preview).
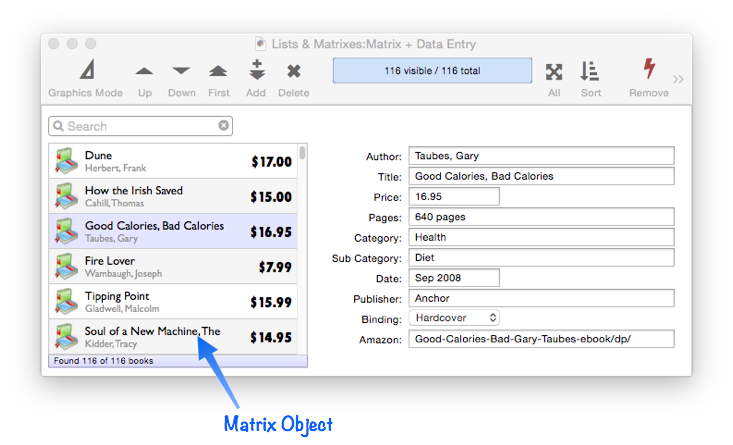
Such a matrix consists of a series of cells assembled into rows and columns. Of course, you can build up such a matrix from individual objects, but the Matrix Object allows the entire matrix to be built by repeating a single template. The template may contain artwork and text that will be repeated over and over again for each cell in the matrix. The template can use formulas to display the appropriate information in each column and row. This system has several advantages: 1) The array can be built quickly, 2) If changes are necessary later, they only have to be made once in the template and are automatically repeated throughout the entire matrix, 3) It is very easy to change the number of columns or rows in the matrix, 4) The matrix and template can be constructed to adjust automatically as the window changes size and shape.
A Matrix Object handles data exactly the same way that a Text List Object does, but give you the flexibility to design your own custom layouts. Text Lists are great for basic rows and columns, but if you want layout flexibility, Matrix Objects are the way to go.
The Matrix Template (and Frame Object)
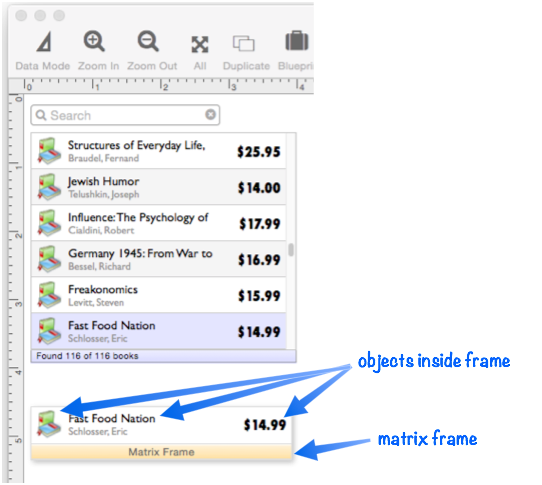
Unlike most other objects, a Matrix Object is not completely self contained – it requires a template that tells Panorama what to draw within each matrix cell. This template consists of Panorama objects enclosed within an object you designate as the frame object. We call the object a frame object because it surrounds the objects inside, just like a picture frame. Any object that is inside the frame object will automatically appear inside the cells of the matrix. The frame is usually placed off to the side or below, somewhere where it will not normally be visible.
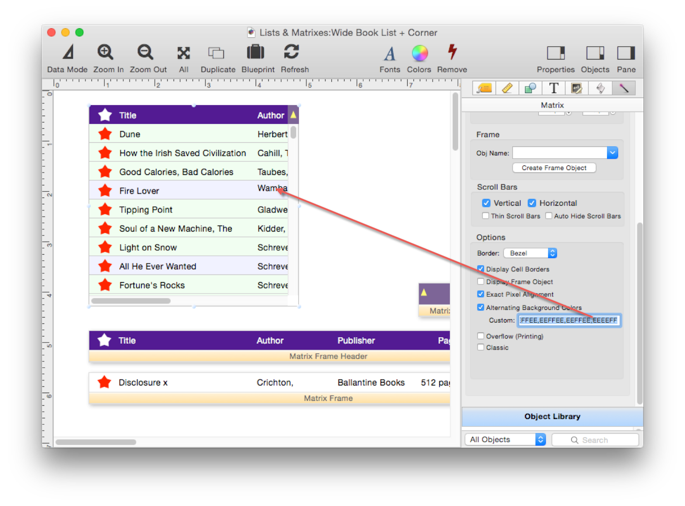
Matrix frame objects can be created manually, but usually the easiest way is to let Panorama create the frame object for you, as described below.
Creating a Matrix and Frame
Here are the basic steps to creating a Matrix Object and associated frame.
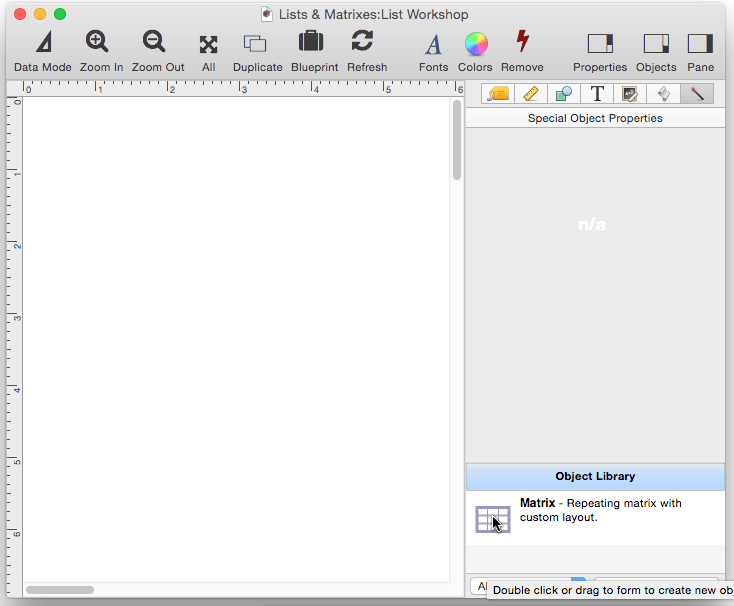
- Drag Matrix Object from Object Library to the form.
- Adjust overall size of object, and height of matrix elements
- Press the Create Frame Object button.
Panorama has automatically created a correctly sized matrix frame object below the matrix object. Any objects that you place inside this frame will be repeated over and over within the body of the matrix.
Matrix Formula
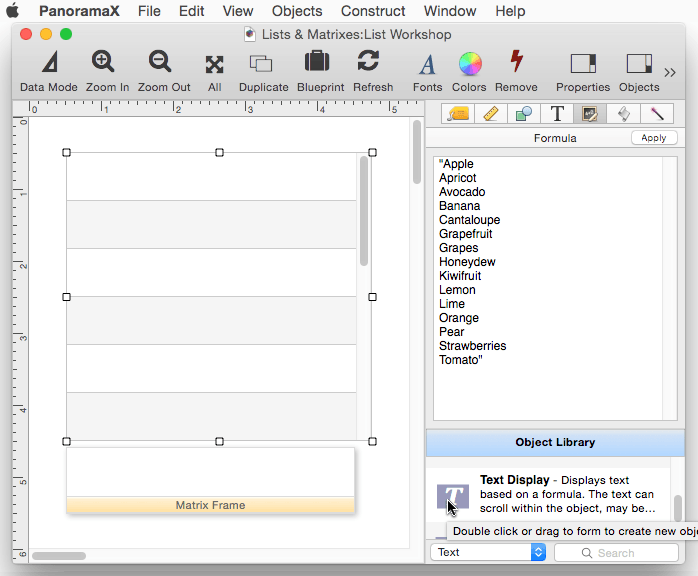
The Formula panel is used to specify the list of data items that will appear in the matrix. Each line generated by the formula becomes a row in the matrix.
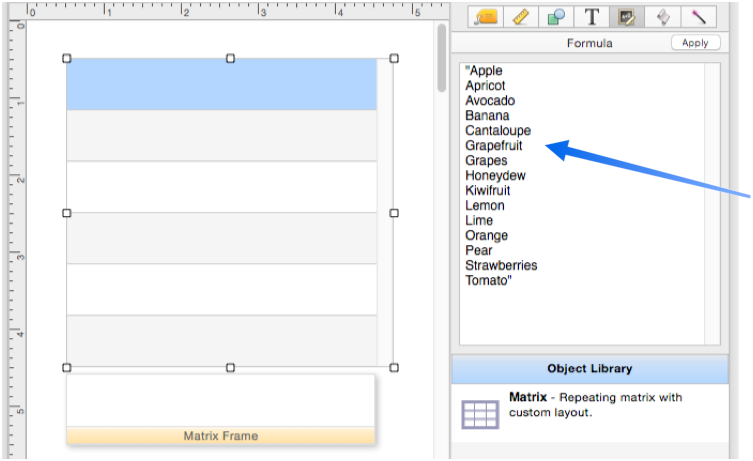
In this example the list is fixed and unchanging, but that is unusual. In most applications the formula will be set up to get the text from a variable, a field, or thru a more complex calculation.
It’s very common to set up a formula to use a database as the source of the data for the list. See Matrix Database Integration for details on how to do this.
Diagnosing Formula Problems
If your formula has a problem it can be a bit tricky to figure out what’s wrong since you can’t directly see the text produced by the formula. In that situation you can use the Object Value dialog to display the entire formula result. See Diagnosing a Formula embedded in a Form Object to learn how to use this dialog.
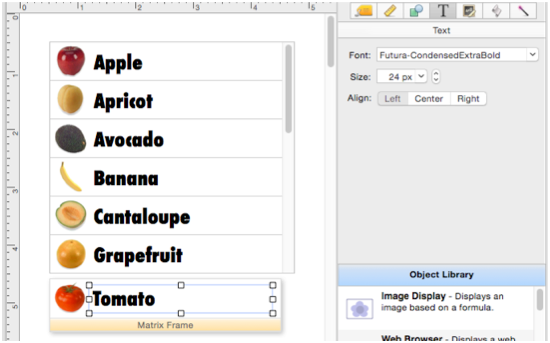
Placing Objects in the Matrix Frame
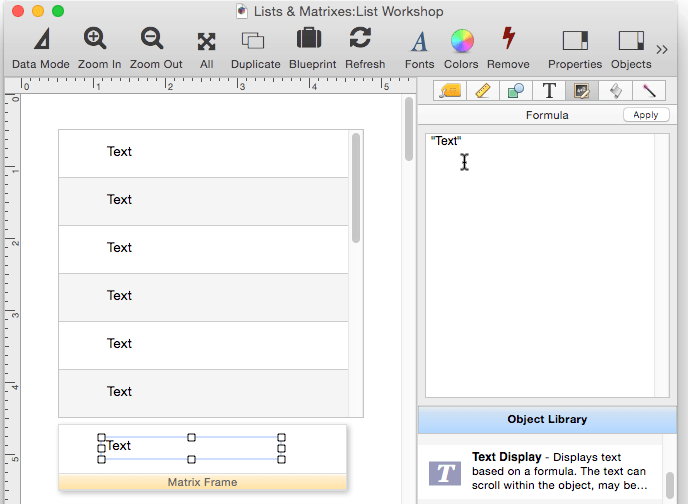
In the last section, the formula for the matrix data was set up. Even though the formula is now set up, there is no data visible in the matrix. To make the data visible, one or more objects must be placed in the Matrix Frame, for example a Text Display Object like this.
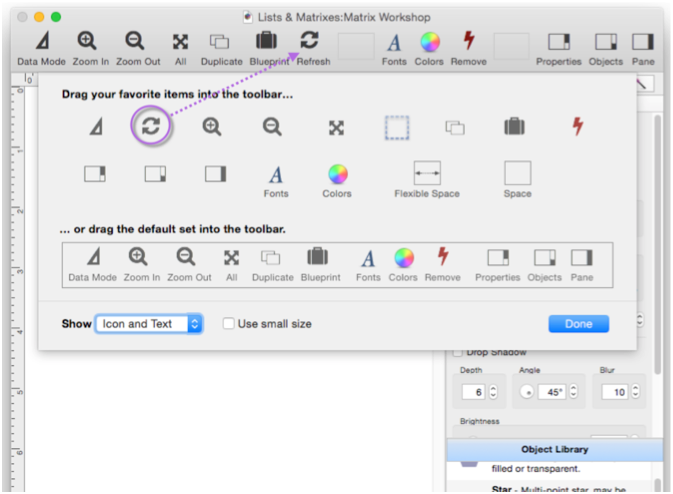
As you can see in the movie above, simply placing an object in the frame isn’t enough. To update the matrix itself, you have to choose Objects>Refresh Matrixes. This updates any Matrix Objects on the form to reflect the contents of the Matrix Frame. When working with matrixes, you’ll probably need to refresh a lot. To make this easier, you can add the Refresh tool to the toolbar – choose Window>Customize Toolbar…, then drag the Refresh tool into the toolbar.
A moment ago, I placed a Text Display Object object in the matrix frame. However, I didn’t fully set up this object, so it is only displaying the word Text instead of the actual data. To display the actual matrix data, the formula needs to use the info(“matrixcelldata”) function, as shown here. Once this function is entered (and the mode is changed from Literal to Formula), I simply press the Refresh tool and the data appears in the matrix.
The info(“matrixcelldata”) function can be used in any type of object that takes a formula. In this example, an Image Display Object has been added (for this to work, there must be a folder named Fruit in the same folder as the database that contains the images of various types of fruit).
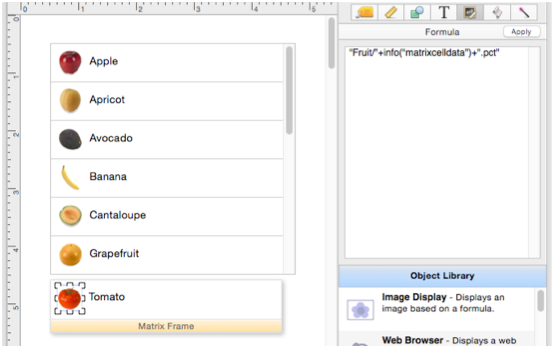
The beauty of the Matrix Object is that you can customize the graphics in the Matrix Frame any way you want – any arrangement, fonts, sizes, images, etc. Just remember than whenever you make a change you need to refresh to see that change in the matrix itself.
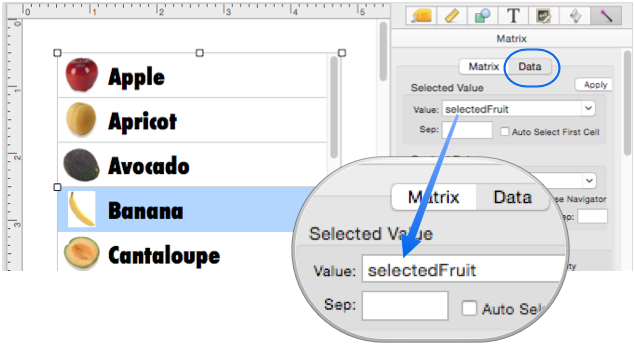
Matrix Selected Item
You must set up a field or variable that will be linked to the selected value in the list. (There is one exception – no variable is needed if you are using the Database Navigator option, see Matrix Database Integration.) In this example, selected value is linked to a fileglobal variable named selectedFruit. (You must click the Data button to get to this option.)
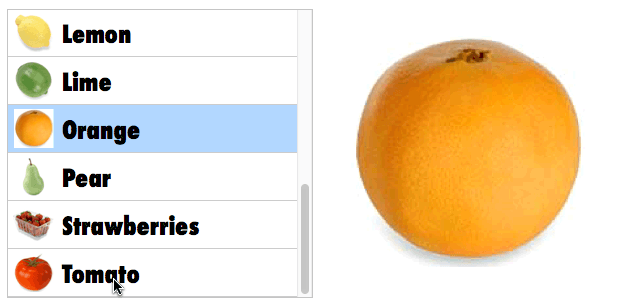
Whenever an item in this list is clicked, the value in the selectedFruit variable is updated. To illustrate this, an Image Display Object that displays the selectedFruit variable has been added to this form. As different items are clicked, they appear in the Image Display Object.
Selecting items in a Matrix Object works just like selecting items in a Text List Object. To learn more about selecting, including using the keyboard for selection and selecting multiple items, see Text List Selection.
Selected Item Color
The selected cell is normally tinted light blue, but you can customize to any color you want.
Background Colors
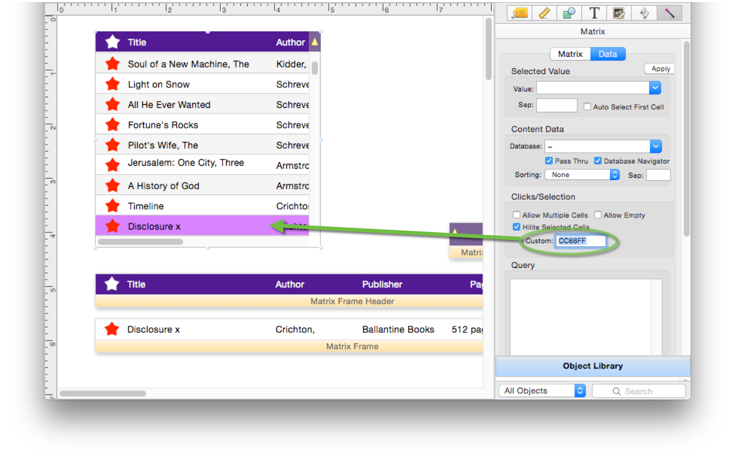
Normally items in the matrix are displayed with a white background. If the Alternate Background Colors option is checked, an alternating white/gray background is used. However, you can also customize the background colors with the Custom option – enter one or more HTML color specifications separated by commas.

You are not limited to two alternating background colors, in this example there are 4 background colors – three green, and one blue.
See Also
- Displaying Data in a Grid -- fundamentals of displaying data in a grid (Text List/Matrix).
- Matrix Clicking -- handling clicks in a Matrix Object.
- Matrix Constructor -- quickly creating a Matrix Object from a template.
- Matrix Database Integration -- synchronizing a Matrix Object with a database.
- Matrix Geometry -- customizing the size and geometry of Matrix Object elements.
- Matrix Header and Horizontal Scrolling -- setting up a custom header for a Matrix Object grid.
- Matrix Object Frame -- setting up the arrangement of items within a Matrix Object.
- Matrix Programming -- programming a Matrix object.
- Text List Appearance -- customizing the appearance of a Text List Object.
- Text List Constructor -- quickly creating a Text List Object from a template.
- Text List Database Integration -- synchronizing a Text List Object with a database.
- Text List Multiple Columns -- displaying multiple columns in a Text List Object
- Text List Object -- displaying a grid of text.
- Text List Programming -- programming a Text List Object.
- Text List Searching -- searching within a Text List Object.
- Text List Selection -- selecting items in a Text List Object.
History
| Version | Status | Notes |
| 10.0 | New | New in this version. |