The appearance of a Text List Object can be customized for particular applications. This page will discuss how to change the size and style of the text in a list.
Text Size
There are three standard sizes – Small, Medium and Large (Default is currently the same as Large). All three of these sizes automatically use the current System font (San Francisco on OS X 10.10 or later, Helvetica Nueue on OS X 10.9), so if you use these sizes, your list will match standard Apple user interface practices.
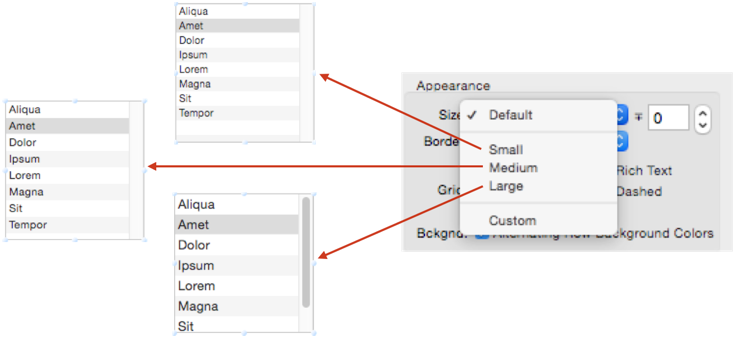
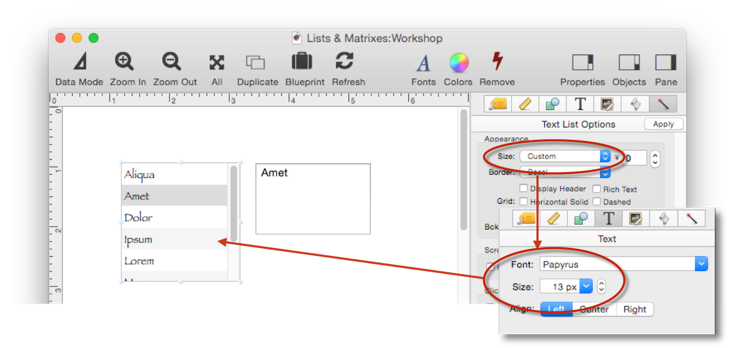
If you switch the size to Custom, the font and size will be specified from the Text panel. This allows any font to be used.
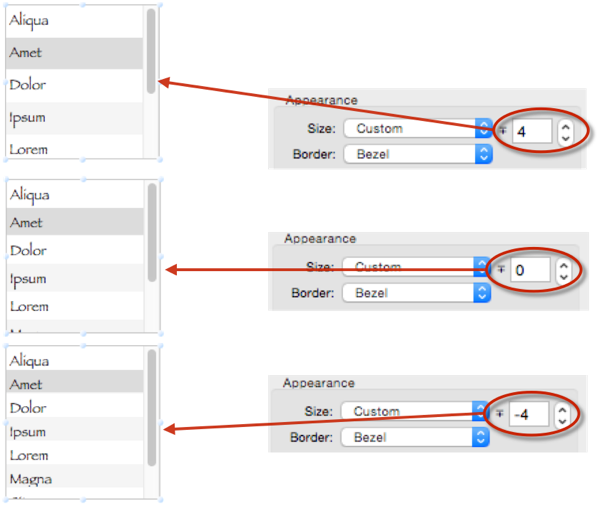
Panorama attempts to set the correct row height for the text font and size you have selected. For some fonts this works well, but for other fonts it doesn’t work very well, and a manual adjustment is necessary. You can use the ± option to manually increase or decrease the height of the rows. Positive values increase the row height, negative values decrease it.
Row & Column Borders
A new Text List object defaults to alternating background colors, but you can use the Grid options to customize the appearance, adding borders, and optionally removing the background colors.
The Vertical Solid option enables vertical borders between multiple columns, see Text List Multiple Columns.
Rich Text
Text in a list is normally displayed all in a single style, but if you enable the Rich Text option the list can include multiple styles. In this example, several cities are displayed in bold.
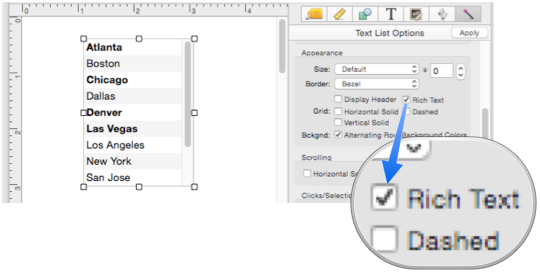
To control the styles, you must embed Rich Text style tags into the text being displayed. In this example the <b> tag has been used to make Atlanta, Chicago, Denver and Las Vegas bold.

Using different tags, text can be displayed in different styles, sizes, fonts, colors – even with embedded icons. To learn about all of the different tags that are available, see Rich Text.
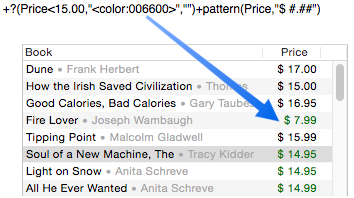
In the previous example, both the list data and the styling tags were fixed. It’s much more common for the list data to be derived dynamically, for example from a database. In that case, the style tags will also need to be calculated dynamically by the Text List formula. Here is a more realistic example that displays styled data from a database of books.
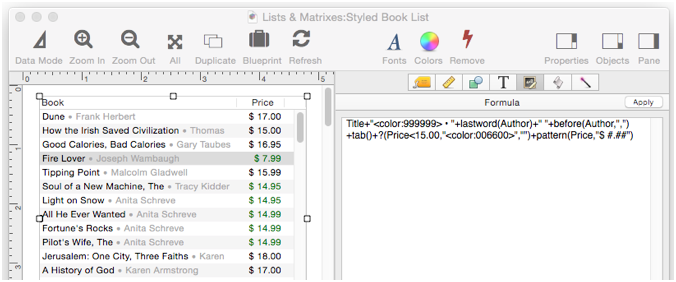
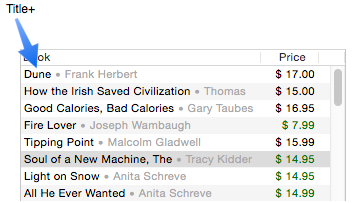
The formula calculates both the data and the style tags. The first part of the formula simply displays the book title in regular style.
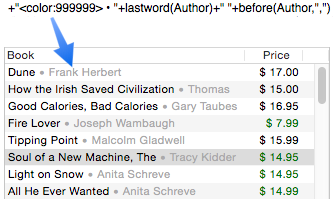
The second part of the formula displays the author name in gray, which it does by setting the color to 999999 with a <color> tag.
The final part of the formula displays the Price in a second column (see Text List Multiple Columns). The formula checks to see if the Price is less than $15, and if so, adds a <color> tag to switch to green (006600). So if the price is less than $15, it will be green, otherwise it is black (the default).
Important Note: The style resets to the defaults at the start of each item in the list. So you don’t need to restore the defaults at the end of an item (though if you want to, it won’t hurt anything to do so).
See Also
- Displaying Data in a Grid -- fundamentals of displaying data in a grid (Text List/Matrix).
- Matrix Clicking -- handling clicks in a Matrix Object.
- Matrix Constructor -- quickly creating a Matrix Object from a template.
- Matrix Database Integration -- synchronizing a Matrix Object with a database.
- Matrix Geometry -- customizing the size and geometry of Matrix Object elements.
- Matrix Header and Horizontal Scrolling -- setting up a custom header for a Matrix Object grid.
- Matrix Object -- displaying a grid of items with a custom arrangement.
- Matrix Object Frame -- setting up the arrangement of items within a Matrix Object.
- Matrix Programming -- programming a Matrix object.
- Text List Constructor -- quickly creating a Text List Object from a template.
- Text List Database Integration -- synchronizing a Text List Object with a database.
- Text List Multiple Columns -- displaying multiple columns in a Text List Object
- Text List Object -- displaying a grid of text.
- Text List Programming -- programming a Text List Object.
- Text List Searching -- searching within a Text List Object.
- Text List Selection -- selecting items in a Text List Object.
History
| Version | Status | Notes |
| 10.0 | New | New in this version. |