Previous: 120: Extra Credit: Running Code Automatically
Suppose a colleague has sent you a spreadsheet with names you need to add to your mailing list. The names are formatted differently from your list, but I’ll show you how Panorama can take care of that. This example really shows off the power of Panorama for manipulating data. In real world use, the techniques shown here could save hours of work. (The spreadsheet below is in Apple’s Numbers program, but the techniques I’m about to show you also work with data from Microsoft Excel or any other source of text data.)
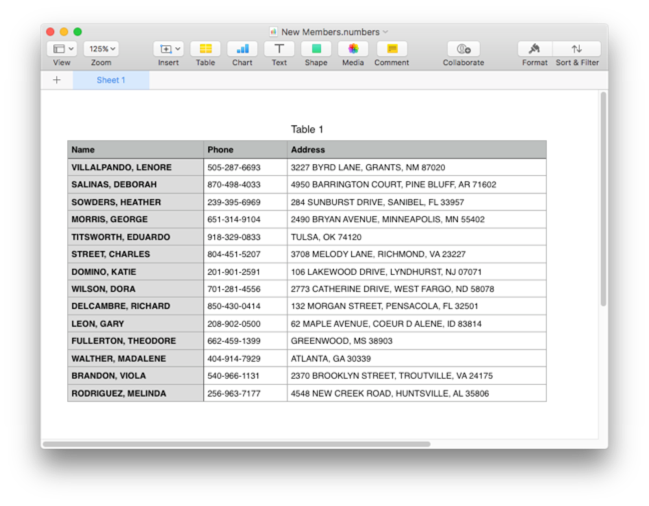
Since the data is in the wrong format I can’t import it directly into my mailing list. Instead, I’ll import it into a new database, fix up the data, and then add it to the mailing list. I’ll start by creating a new database, selecting all of the data in the spreadsheet, and then dragging it onto the new database.
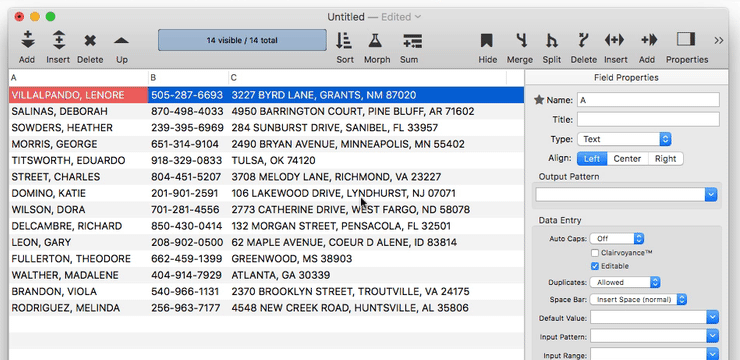
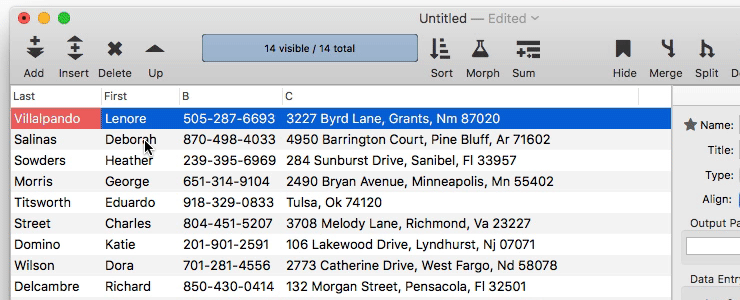
Now that the data has been transferred to Panorama I can get to work on fixing the data so that it matches my mailing list. The first step is to fix the capitalization — I hate all caps! So I click on the Morph tool, choose Morph All Fields from the pop-up menu, choose Word Caps, then press Morph All Fields (see Morph All Fields Dialog to learn more about this dialog).
Keep in mind that in any point in the process described on this page, if a mistake is made, you can always undo. Feel free to experiment without worrying about permanently damaging data.
Now I need to split the names into separate first and last names, and the addresses into separate street address, city, state and zip fields. I start by clicking anywhere in the first field, then choosing Split Field from the tool bar (or from the Field menu). Using the dialog, choose the options to split the first and last names at the comma (see Splitting a Field to learn more about this dialog).
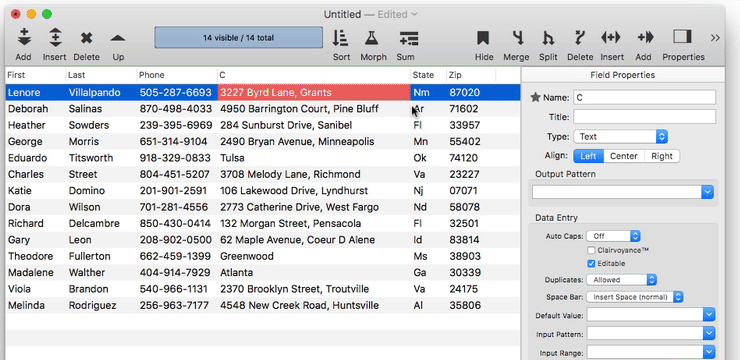
The first and last names are reversed so I click on the column header of one of them and drag to reverse the order.
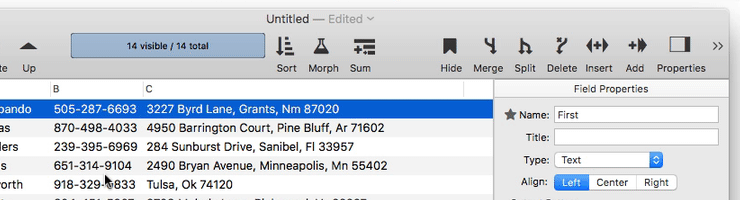
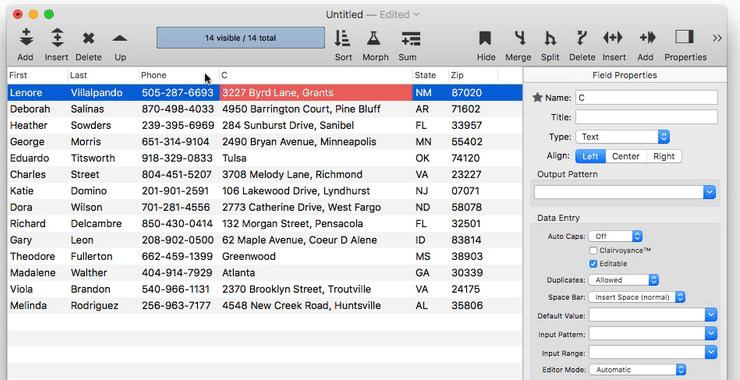
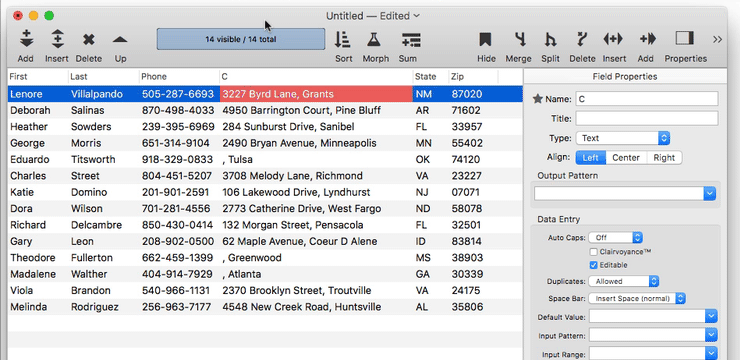
To rename the B field to Phone, simply click anywhere in the field and then type in the new name in the property inspector panel.
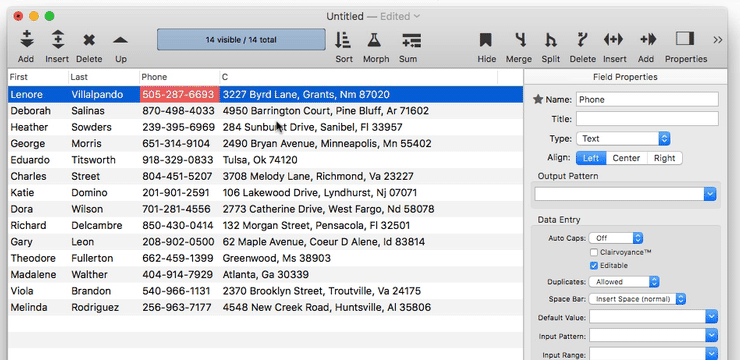
Splitting the address is similar to splitting the name. Again I start by clicking anywhere in the Address field and opening the Split Field dialog. It will take three passes to split this into four fields, I’ll start with the zip code field, as shown here. Once again, actually splitting the field only takes a fraction of a second.
Splitting off the state is pretty much the same as splitting off the zip except that the split is at the last comma instead of the last space. (The states need to be all caps, but I’ll fix that in a moment.)
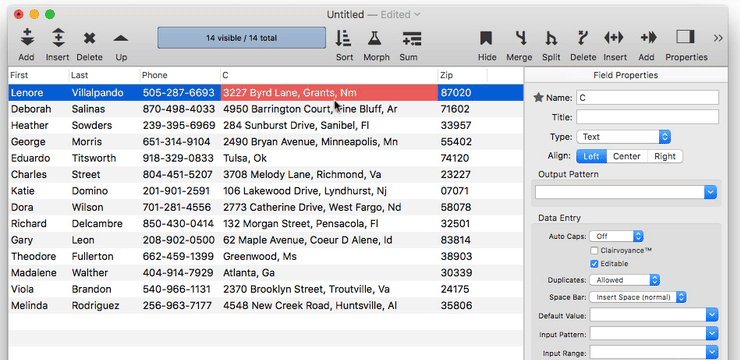
The states need to be all caps. To fix the capitalization, I right click in the title of this field and choose Morph>All Upper Case from the pop-up menu (you can also choose this from the Field menu).
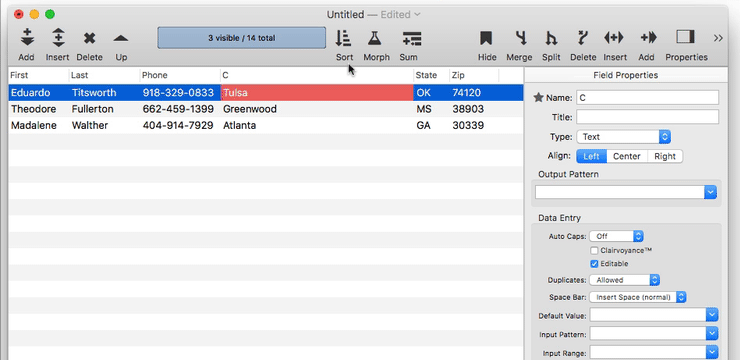
The final step is to split off the city from the street address, also at the last comma. However, there’s a potential glitch – some of the street address are missing, so there’s no comma in those cells. That needs to be fixed before splitting the field. The first step is to use the Find/Select Dialog to select the cells with no commas.
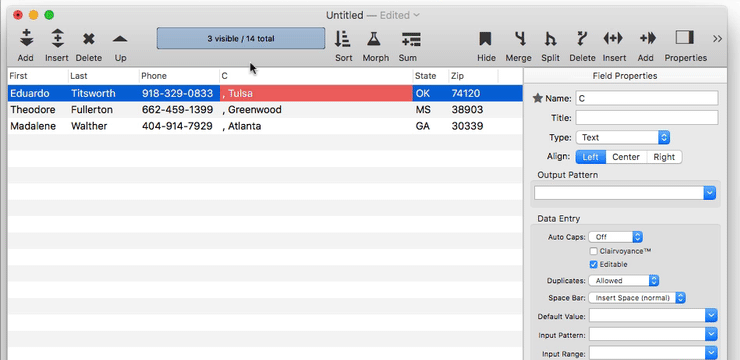
Now I can use the Morph Field Dialog to add a comma before each of these cells.
I’ll use the Select All command (Command-A) to make all of the data visible again.
Now I’m ready to split the field.
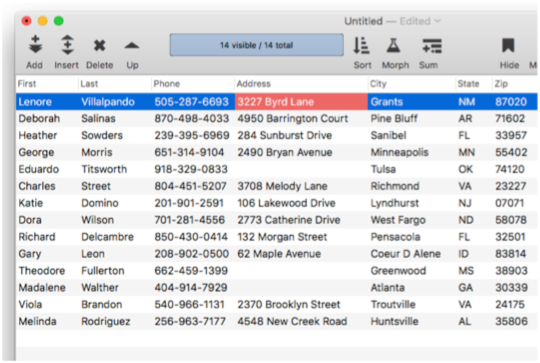
Here’s the finished result, with all the fields split. To learn more about splitting fields, see Splitting a Field. You can also merge fields, see Merging Adjacent Fields.
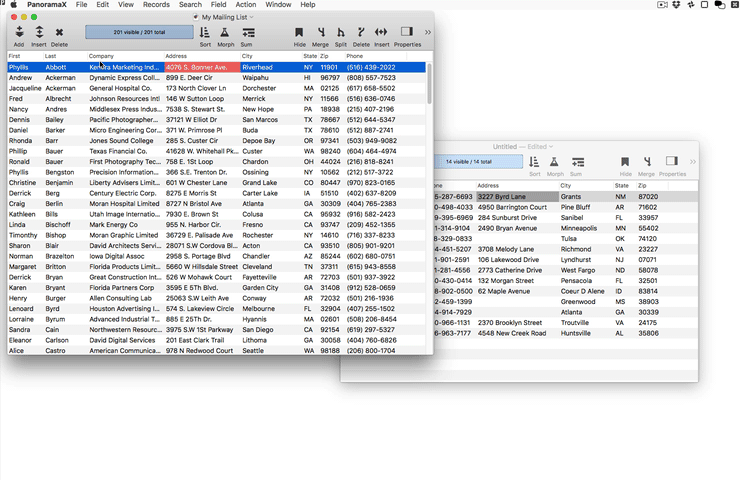
Now the new data has the same fields as the original mailing list, and I can append the new data to the original database using the Import Database dialog.
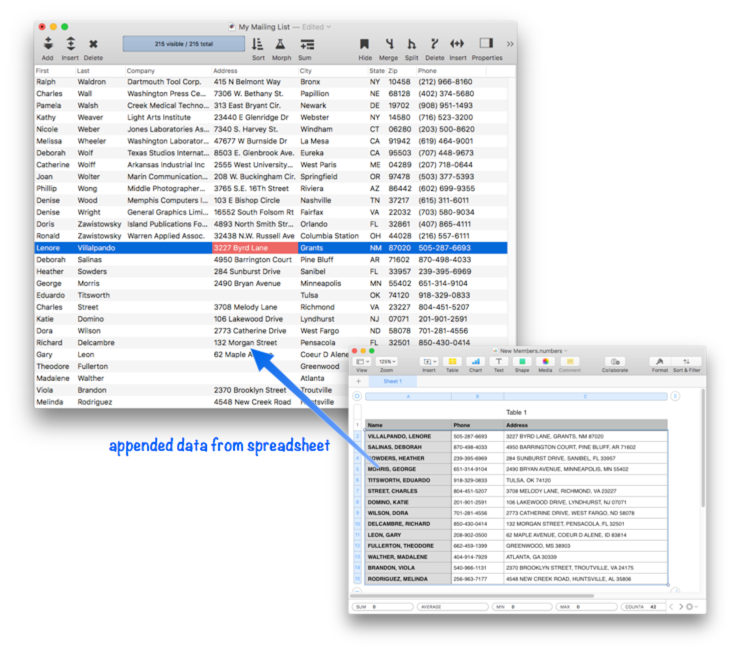
The data has been transferred from the spreadsheet to the mailing list database, without any retyping and without any programming or formulas.
Next: 201: Introducing Forms (Graphical Layout)
See Also
- Field Properties -- available field attributes.
- Field Properties Panel -- examining and modifying field attributes.
- Find/Select Dialog -- using a dialog to search for specific data.
- Import Database -- importing another database into the current database.
- Merging Adjacent Fields -- merging two fields into one.
- Morph All Fields Dialog -- morphing the contents of the entire database.
- Morph Field Dialog -- morphing the contents of an entire field.
- Searching -- searching a database to find or select information.
- Splitting a Field -- splitting a field into two fields.
History
| Version | Status | Notes |
| 10.0 | Updated | Carried over from Panorama 6.0, with updates. |