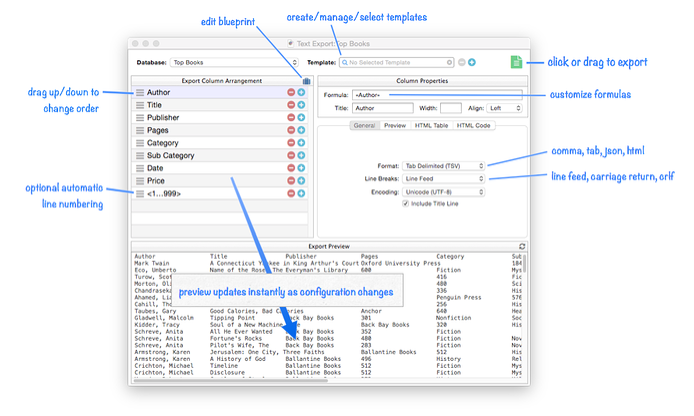
The Text Export Wizard is used to export text in a custom arrangement. The wizard can export text as tab or comma separated text, JSON, or HTML (using <table> tags), and allows the arrangement to be configured with graphical controls, or by editing a textual specification (blueprint). A live preview immediately shows the effect of configuration changes. The wizard also allows you to set up templates with export configurations that can be saved and re-used.
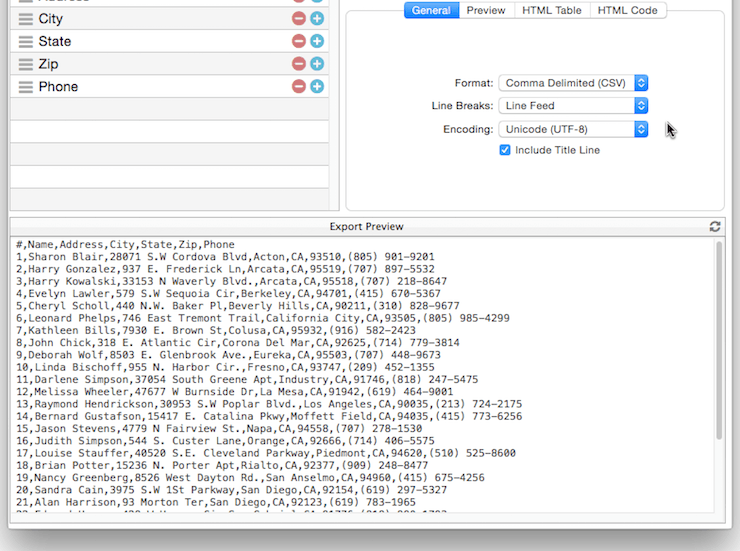
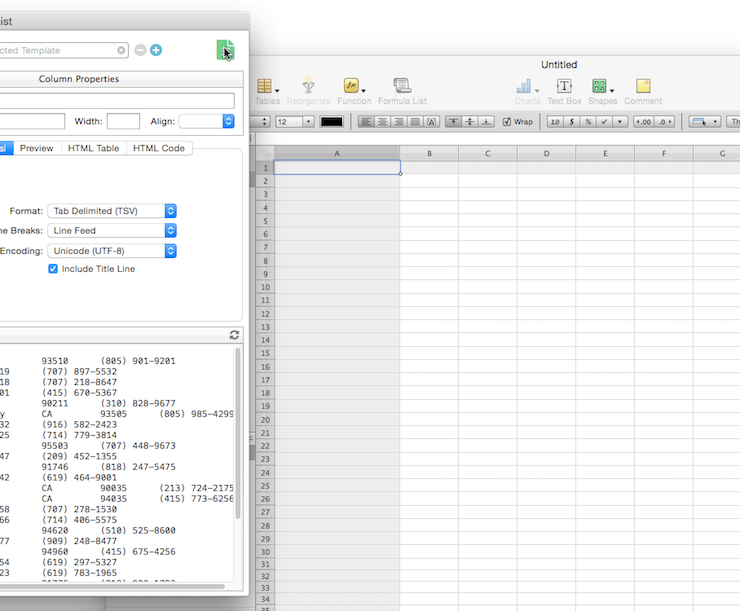
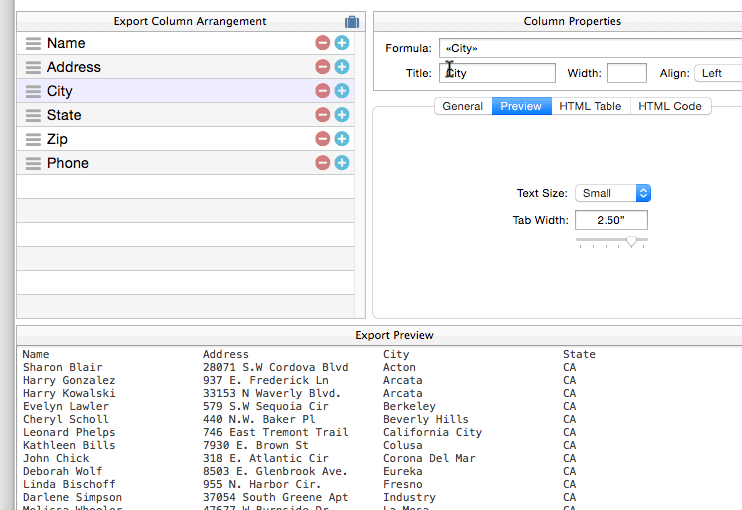
To open the wizard, choose File>Export>Custom Text Export. Here’s an overview of the main window of this template.
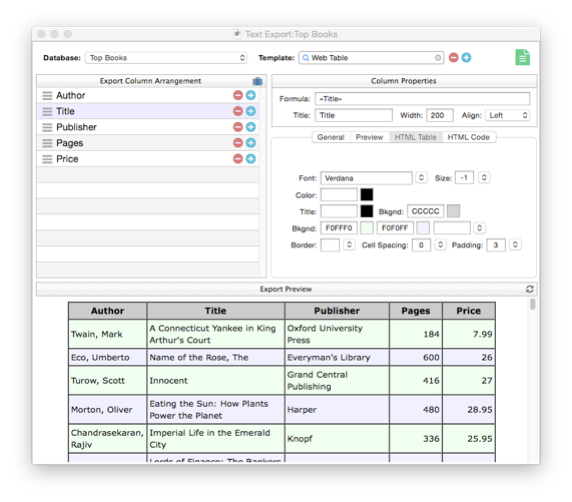
When you are exporting HTML, the preview can show the actual web view as you work.
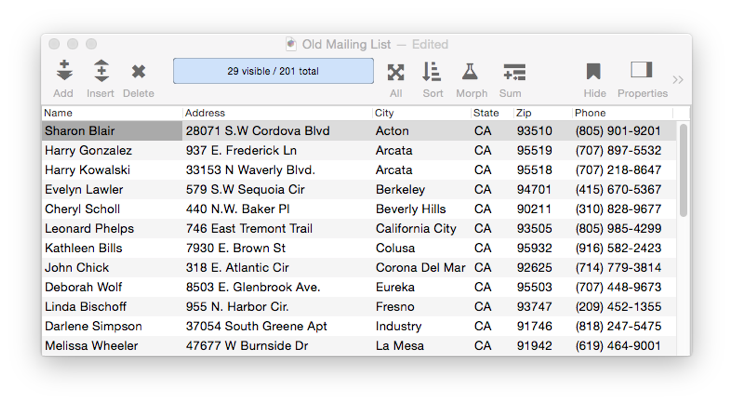
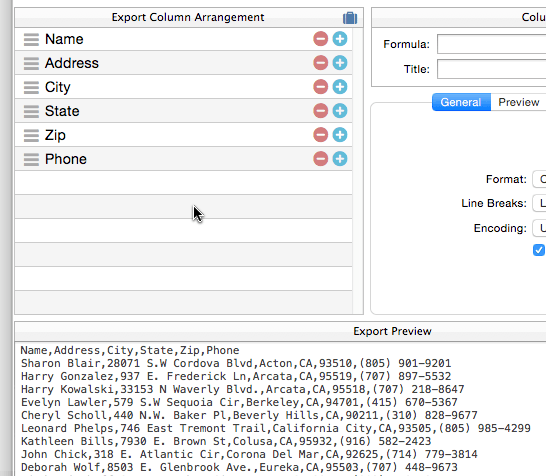
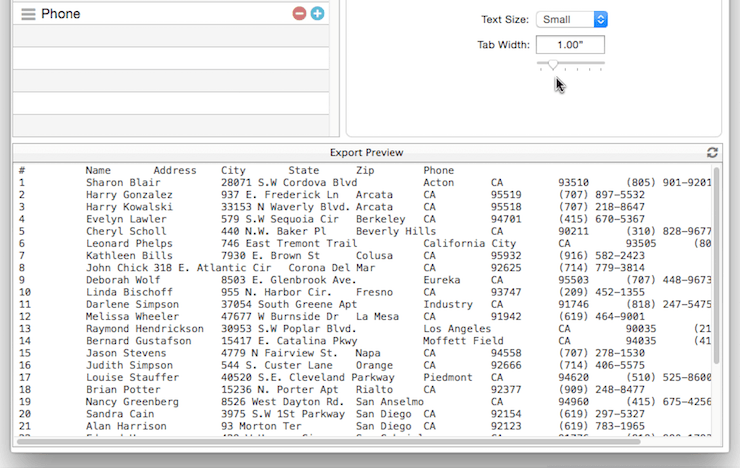
Let’s walk thru the process of exporting text step-by-step. We’ll be exporting text from this simple mailing list:
Opening the Wizard
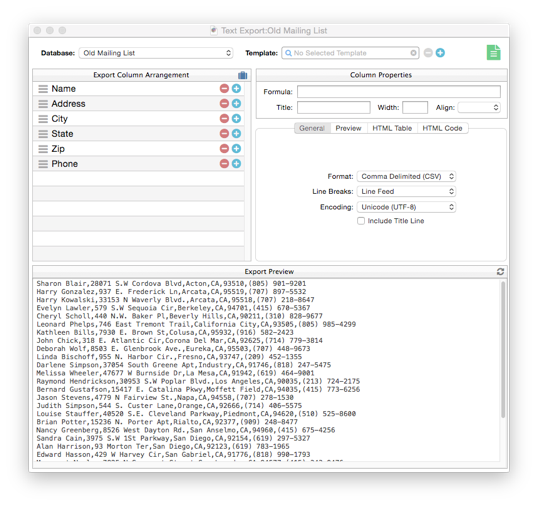
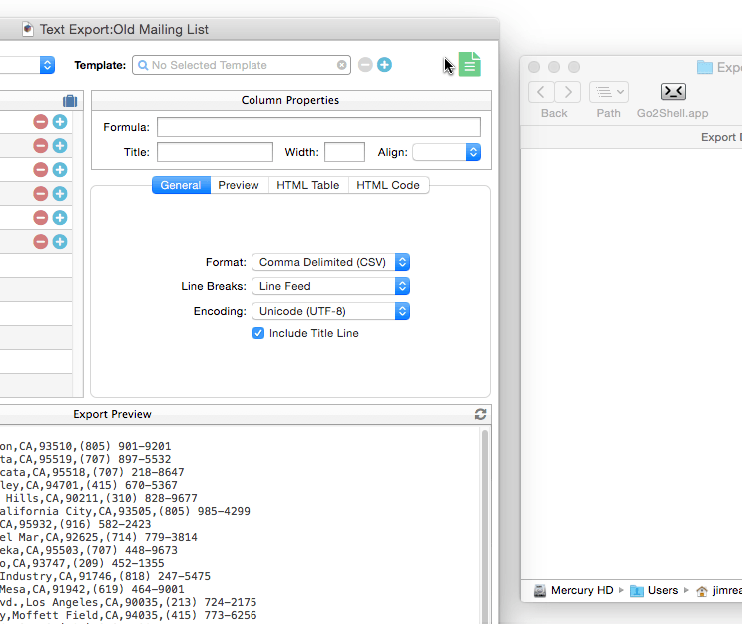
To start, choose File>Export>Custom Text Export to open the wizard. The wizard starts out with a default arrangement of exporting all fields, in order, in comma separated format.
Arranging the Fields
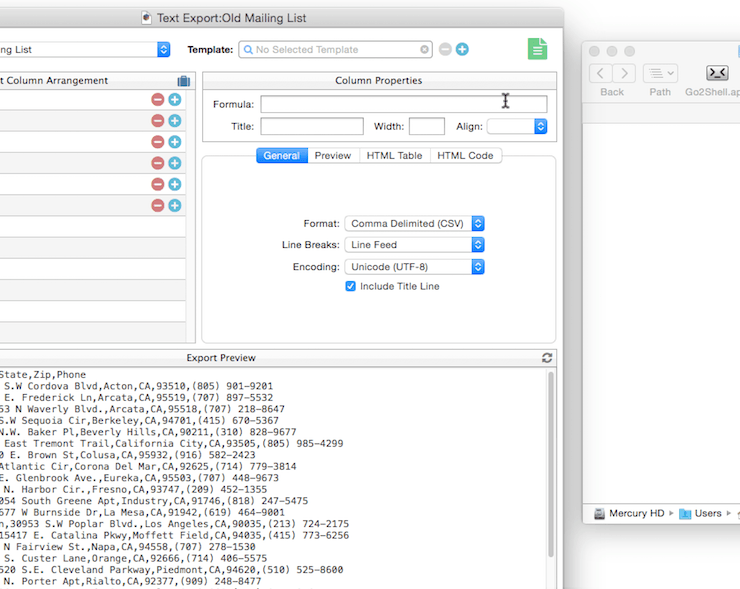
Use the Export Column Arrangement section of the wizard to change the order of the exported fields, or to add or delete fields from the arrangement.
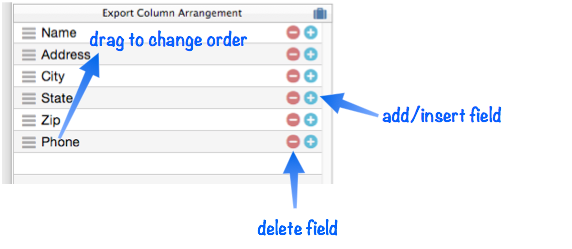
In this movie, the Phone field is moved to the second position in the export, then deleted, then added back to the end. You can see the preview at the bottom update as each change is made.
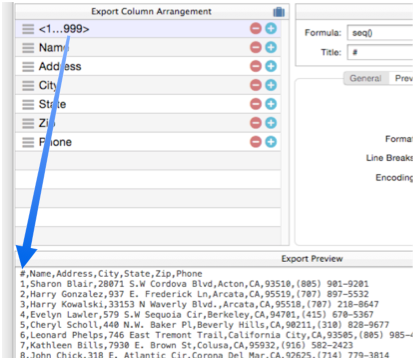
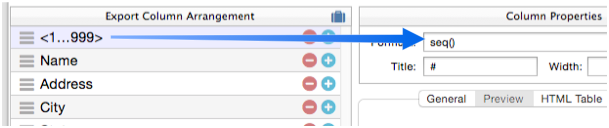
Adding Line Numbers — Use the <1..999> option to add line numbers to the exported data.
General Export Options
These options modify how text is exported.
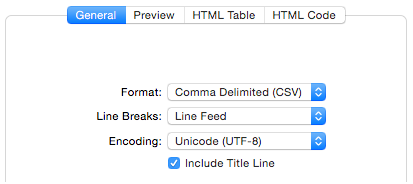
Format – There are four available formats:
- Comma Delimited (CSV)
- Tab Delimted (TSV)
- JSON
- HTML
When you change the format, you can immediately see the result in the preview section at the bottom of the wizard.
JSON is a data interchange format that is used by many web APIs. See http://www.json.org for more information. To learn more about exporting HTML, see HTML Export.
Line Breaks – There are three line break options:
- Line Feed — default for UNIX systems, including OS X/macOS
- Carriage Return — used by “classic” Mac OS (up to Mac OS 9)
- CR-LF — used by Microsoft Windows
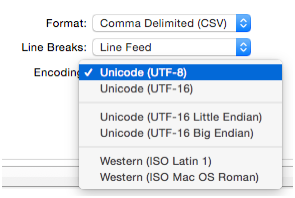
Encoding – The default encoding is Unicode UTF-8, which is used by virtually all modern systems. However, for special applications you can choose an alternate encoding from this pop-up menu. In particular, if you want to export data so that it can be imported by Panorama 6, you should use the Western (ISO Mac OS Roman) encoding.
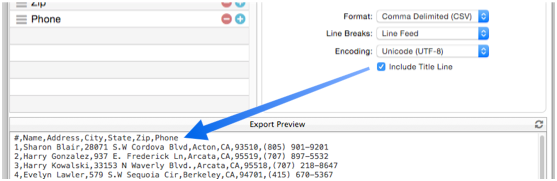
Include Title Line – Check this option if you want the field titles to appear in the first line of the exported text.
Exporting the Text
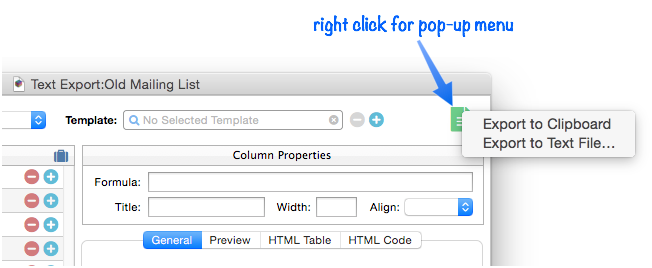
Once the field arrangment and general options are set up, it’s time to actually export the text. This is done by clicking on the document icon in the upper right.
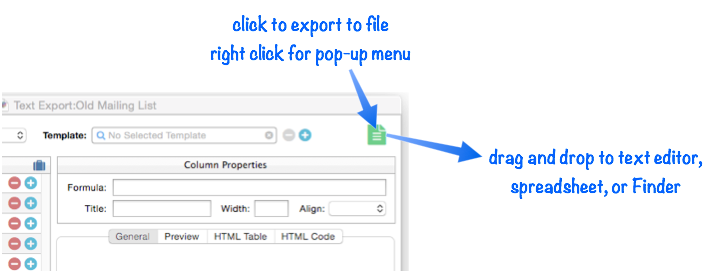
You have several choices:
- Drag the icon to an application that accepts dropped text, for example a text editor or a spreadsheet.
- Drag the icon to a Finder window to create a text clipping file.
- Click the icon to save the file with a dialog.
- Right-click the icon to save the file with a dialog or copy the exported text to the clipboard.
Dragging to an Another Application — This movie shows how to use drag and drop to transfer the data to a spreadsheet, in this case Apple Numbers.
Dragging to a Finder window — Drag the icon to a Finder window to create a text clipping file.
Click to Save As Text — Clicking opens a dialog that allows you to choose the name and location of the exported text file.
Pop-Up Menu — Right-click the icon to save the file with a dialog or copy the exported text to the clipboard.
Our step-by-step export is complete. The rest of this page will cover more advanced export options.
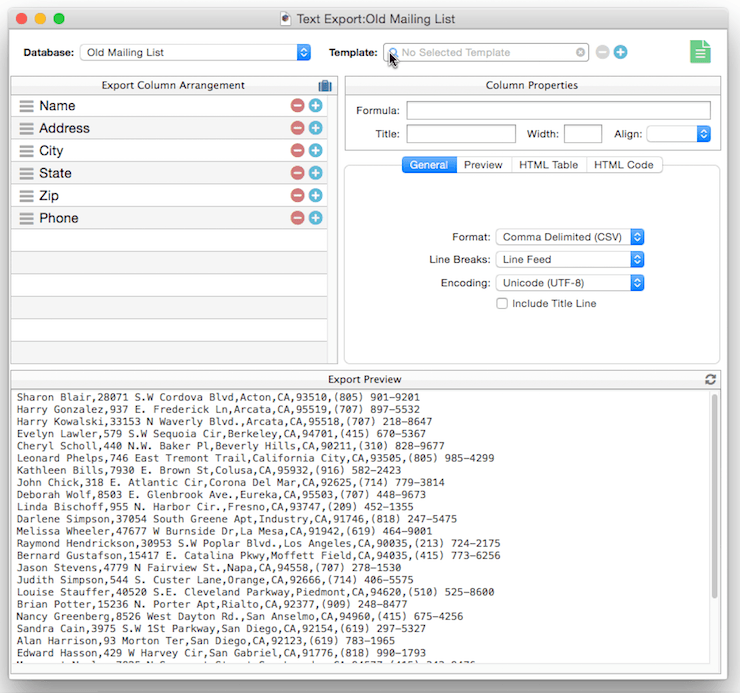
Column Formulas and Title
Each export column has a formula and a title associated with it. By default Panorama sets these up for you automatically, but you can customize both the formula and the title. When you click on an export column in the arrangement section, the formula and title appear in the Column Properties section to the right. (There are also two additional properties: Width and Alignment. These are only used when exporting HTML, see HTML Export).

You can edit these properties to customize the export. Watch the preview as the Formula and Title are changed.
Here’s a more practical application — customizing the export so that the first and last names are exported in separate columns. These calculations are done on-the-fly as the data is exported, with no change in the database itself.
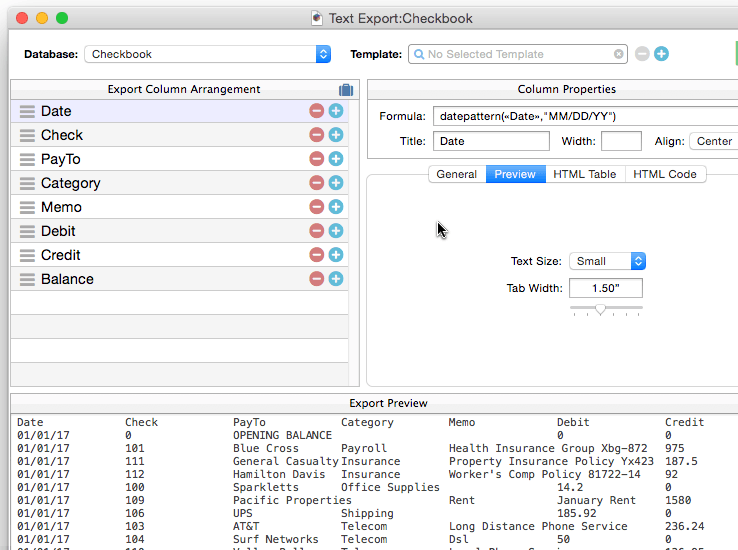
Exporting Numbers and Dates — Panorama uses a formula when exporting numeric and date fields. The correct formula is set up for you automatically, but you can modify it if you want.
Line Sequence — Earlier we showed you how to set up a sequence number for each line. Now you can see that this is actually done with a formula using the seq() function.
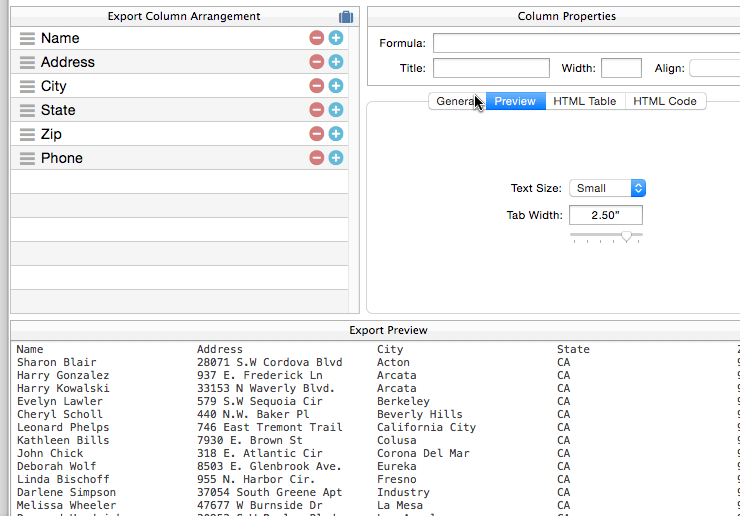
Preview Options
The Preview Options allow you to customize the appearance of the preview at the bottom of the wizard. These options have absolutely no effect on the actual exported text.
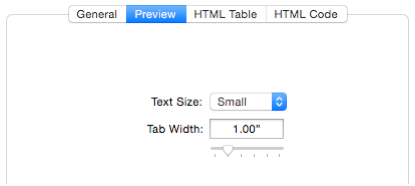
Text Size – The text size can be Regular, Small or Mini.
Tab Width — The tab width can be changed with the slider. This only affects the preview when the export format is Tab Delimited (TSV).
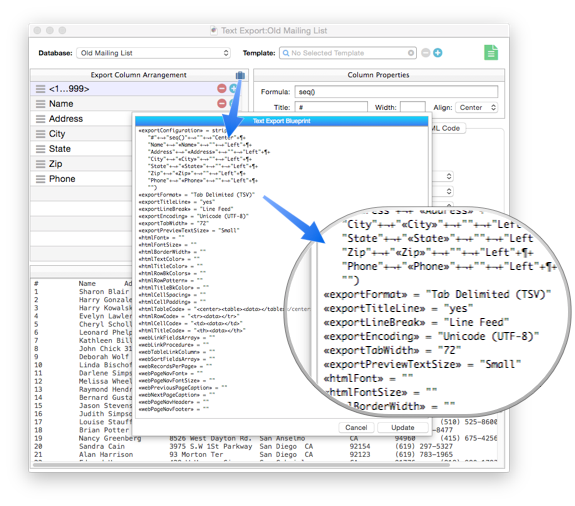
Blueprint
The Text Export Blueprint provides an alternate way to view and modify the export configuration. Instead of a graphical interface, the blueprint expresses the arrangement as text that can be edited, or copied and used elsewhere. To open the blueprint, click the briefcase icon.
Export Configuration Templates
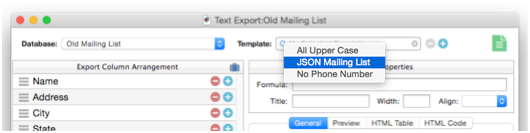
Once you’ve created a complicated export arrangement, you may want to save it so that you can re-use it later. The wizard allows you to save multiple “templates” that you can recall as needed. To select a template, click on the magnifying glass icon and choose it from the pop-up menu.
Creating a New Template — To create a new template, first set up the input arrangement the way you want. Then press the + button, type in the template name you want, and then press the Return key to save the template and make it active.

Once the template has been saved you can make it active at any time by selecting it from the pop-up menu.
The Active Template — Whenever a template name appears, that template is active.
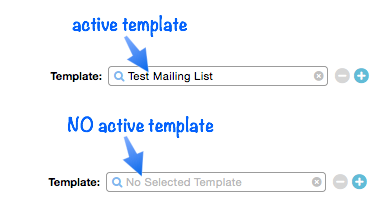
When a template is active, any changes you make to the arrangement will modify the template. In other words, be careful about making changes to the import arrangement when a template is active – those changes are permanent (and unlike most operations in Panorama, changes to the import arrangement are not undo-able, though they are usually easily reversed).
To make the current template inactive, press the x button to the right of the name.
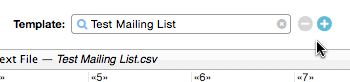
Now you can make changes to the arrangement without affecting any templates.
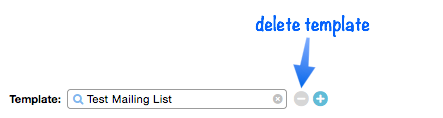
Deleting a Template — To delete a template, first make it active, then press the - button.
Permanently Saving Template Changes — Export templates are stored as part of the database that is being imported into. To make your changes to templates permanent, you must save the database. This will happen automatically if you make other changes to the database, but if you don’t make any other changes, you’ll need to click on the database window and use File>Save to permanently save any changes you’ve made to the templates. You can do this at any time before you close the database.
See Also
- csvexportline( -- generates a comma delimited line of data containing all the fields in the current record.
- csvexportlinevisiblecells( -- generates a comma delimited line of data containing all the visible (non hidden) fields in the current record.
- csvquoted( -- adds quotes if necessary for CSV text (RFC 4180).
- databaseexportcsv -- exports selected records in the current database in CSV format (comma separated) to a text file.
- databaseexporttsv -- exports selected records in the current database in TSV format (tab separated) to a text file.
- databaseexportusingformula -- exports selected records in the current database to a text file, using a formula.
- downloadpartialdatabase -- downloads specified components of the current database from the server. The current database must be shared.
- export -- exports the selected rows in the current database into a text file.
- HTML Export -- custom exports into an HTML file.
- savepartialdatabase -- saves specified components of the current database, leaving other components out.
- Text Export -- exporting a database into a text or HTML file.
- tsvtocsv( -- converts tab separated text into comma separated text.
- tsvtojson( -- converts tab separated text into JSON formatted text.
History
| Version | Status | Notes |
| 10.0 | New | New in this version. |