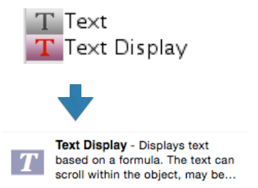
Text Display objects are used to display text using a formula. Text Display objects are workhorses, they will be one of your most frequently used objects. They can be simple or complex, as the two examples below illustrate:
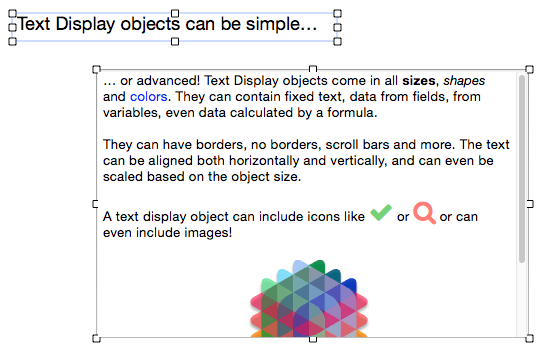
Text Display objects are not limited to fixed text, they can display data from fields, variables, and complete formulas. Text Display objects are not limited to a single style, they can include multiple fonts, styles, and colors, and even images. And last but not least, Text Display objects are dynamic – they can scroll, trigger procedures, and you can select and copy text in one of these objects.
In addition to the material below, there is also an intensive Panorama X video training session entitled Text Objects which covers text display objects in depth. Choose Panorama X Video Training from the Help menu to access the training sessions.
Text Display Formula
The text displayed by the object is controlled by the Formula panel of the Object Inspection Panel. To make a change, simply click in the formula, edit it, then press the Apply button to see the effect of the revision.
If you’re finished editing, you don’t have to press the Apply button, you can simply click on another object or an empty spot in the form.
Panorama interprets this formula differently depending on the Mode pop-up menu in the Magic Panel.
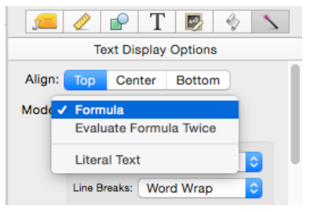
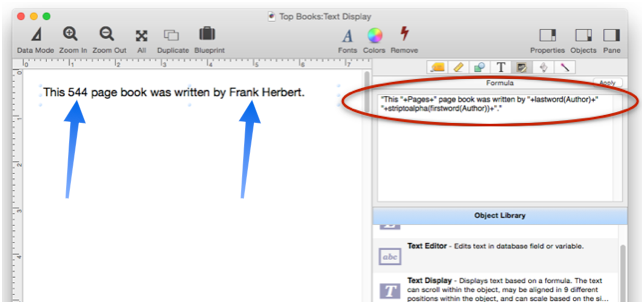
If the Mode is set to Formula, the formula is interpreted as an ordinary Panorama formula. You can use any formula operator, function, field, variable or constant you want. Remember that if you want to include constant text like Hello, the text must be quoted, for example "Hello".
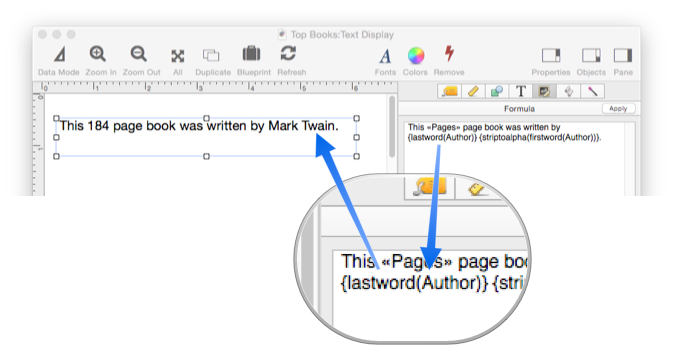
In this example, the formula incorporates both fixed text and two fields from the current database: Pages and Author. The formula specifies how the fixed text and fields should be merged together.
If the Mode is set to Evaluate Formula Twice, the formula is interpreted as an ordinary Panorama formula, and then the result of the formula is then interpreted as a Panorama formula. The purpose of this feature is to allow you to store the “real” formula separately in a global or permanent variable. This mode is rarely used. In Panorama 6 and earlier versions, this mode would sometimes be used to get around the 255 character formula length limit, but that is no longer necessary since Panorama X has no limit on the length of the formula.
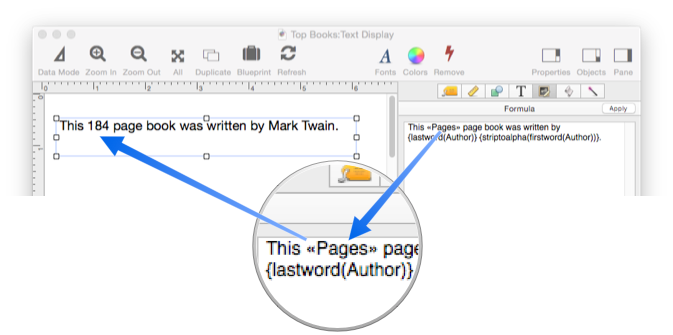
If the Mode is set to Literal, the formula is treated as literal text, not as a formula. For example, if you want the text to be Hello, you would simply type in Hello, without any quotes.
In Literal mode you can substitute in data from fields by typing in the field name surrounded by the « and » chevron characters. In this example, the database’s Pages field is merged into the text. The result is the same as the previous example above (Formula mode), but the formula is quite different.
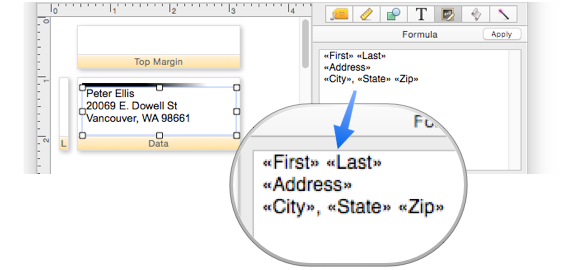
Here is an example that shows how to create a mailing label using Literal mode:
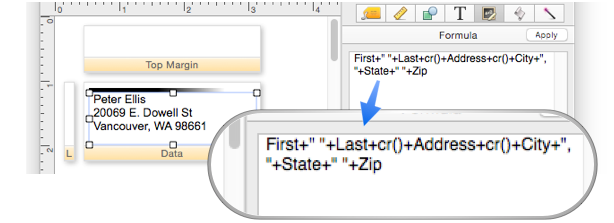
In contrast, here is the formula that would be needed to create the same label if the Formula mode option is enabled.
You can also insert a complete formula into the literal text by surrounding the formula with the { and } characters. (However, if you find yourself doing a lot of this it might be better to switch to the Formula mode.) In the database used in this example, the author names are stored in the format Last, First. The formula is used to reverse the order and display the name in the format First Last (actually there are two formulas).
Note: When an auto-wrap text object is imported from a Panorama 6 database, it is converted into a Text Display Object with the mode set to Literal (see bottom of his page).
Diagnosing Formula Problems
If your formula has a problem, you can usually immediately see the problem simply by looking at the Text Display Object. However, if the object is small, you may not be able to see all of the text, making it difficult to determine the problem. In that situation you can use the Object Value dialog to display the entire formula result. See Diagnosing a Formula embedded in a Form Object to learn how to use this dialog.
Text Display Options
The Magic Panel for Text Display objects contains about a dozen options (see Object Inspection Panel). There are also several relevant options in the Text panel (see Fonts to learn how to modify the font and/or text size of a Text Display object, and Text Object Background Color/Gradient for backgrounds).
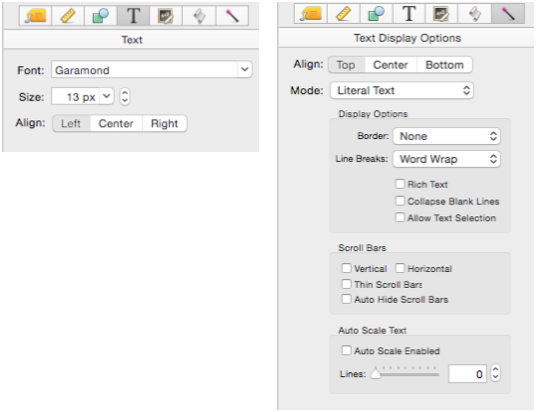
Align – Text Display objects can be aligned both horizontally and vertically. Horizontal alignment is in the Text Panel, while vertical alignment is in the Magic Panel.
Mode – See the Text Display Formula section above.
Border – This options controls the type of border (if any). The bezel option creates a 3D border using the standard OS X border style for text editing. The line option creates a 1 pixel border.
You can also create a border using the Appearance Palette (see Object Inspection Panel).
Line Breaks – This option controls how text is wrapped within the object’s rectangle. The truncate options will display ellipsis at the end, middle or beginning of the text if it is too long to fit inside the object’s rectangle.
Rich Text – This option enables multiple styles of text within the object. Rich text is an entire topic on its own, see Rich Text to learn more.
Note: Rich Text is compatible with the Word Wrap and Don’t Wrap line break options (see previous section), but it does not work with any of the other line break options, including Character Wrap, Clip or any of the Truncate options.
Collapse Blank Lines – If this option is checked, Panorama will automatically remove any blank lines from the displayed text. This is handy for applications like mailing labels.
Allow Text Selection – The displayed text cannot be edited in Data Mode, but if this option is checked the user can click on, select, and copy the text to the clipboard.
Note: The little black pop-up at the end of the movie is not part of Panorama X, it is a utility called PopClip that is installed on the demo system.
Scroll Bars – This section controls what scroll bars (if any) will be available when editing this text, and their appearance.

If the Auto Hide Scroll Bars option is checked, the scroll bars will only appear if the text is too large to fit within the editor object’s dimensions. In the example below, the scroll bar completely disappears when the object gets tall enough to display all the text, but more commonly, the scroll bar would appear and disappear as the data itself changed.
The Horizontal scroll bar option is rarely used. When it is used, the Text Display object doesn’t wrap the text into paragraphs, instead, long lines extend far out to the right so that the ends can only be seen by scrolling.
Auto Scroll to Bottom – When the Auto Scroll to Bottom option is checked, Panorama will automatically scroll the text to the bottom whenever the text is changed. This is useful for applications like displaying a log file, where the information you are most interested in is usually at the very bottom of the text (since it is the most recent).
Auto Scale Enabled/Lines – Usually the Text Display Object displays text in a fixed size, controlled by the Text palette or the Font window. The text size remains fixed no matter what the height of the object is, as shown below:
However, if the Auto Scale Enabled option is turned on, the text size will be proportional to the height of the Text Display Object. The taller the object, the bigger the text. This option can be very useful when used with a form that adjusts as the window size changes (see Elastic Forms).
When the Auto Scale Enabled option is enabled, Panorama ignores the normal font size setting. Instead the value in the Lines box tells Panorama what ratio to use for scaling the text. If the value is 2, the text height will be one half of the object height. If the value is 3.5, the text height will be 1/3.5 of the object height. You may need to play with the value to get the effect you want, and the value may need to change depending on the font you select.
Importing Auto-Wrap and Text Display Objects from Panorama 6
“Classic” versions of Panorama (6 and earlier) had two types of objects for displaying text – Auto-Wrap Text, and Text Display SuperObjects. Panorama X incorporates the features of both of these into a single type of object, the Text Display object.
When your Panorama 6 databases are converted to Panorama X, all Auto-Wrap Text objects are converted to Text Display objects with the mode set to Literal. Panorama 6 Text Display SuperObjects become Text Display objects with the mode set to Formula.
See Also
- Adjusting Object Spacing -- adjust the spacing between multiple selected objects so that the same amount of space is in between each pair of objects.
- adjustobjectspacing -- adjusts the spacing of selected objects in a form.
- adjustobjectspacingdialog -- opens a dialog sheet to adjust the spacing of the currently selected objects.
- Aligning Objects -- so that two or more object edges are made even with each other.
- Automatic Form Construction -- creates a column of form elements for editing data fields (or variables).
- Automatic Mailing Label Construction -- creates a mailing label.
- Automatic Report Construction -- creates a tabular report with columns of data.
- Cocoa Objects -- discussion of how objects are implemented in Panorama X compared to earlier versions
- Creating a New Form Object -- with the Object Library.
- Data Button Object -- is used to create checkboxes and radio buttons.
- Diagnosing a Formula embedded in a Form Object -- diagnosing problems with formulas embedded in form objects.
- Displaying Data in a Grid -- fundamentals of displaying data in a grid (Text List/Matrix).
- Duplicating Objects -- to make copies of one or more objects.
- Fixed Image Object -- is used for fixed images (images that never change).
- Fonts -- setting the font and text size of form text objects.
- Form Object Appearance -- changing the color, fill, stroke, opacity and drop shadow attributes of selected objects.
- Form Object Blueprint -- display and edit raw object specifications
- Form Object Code -- associating programming code with an object
- Grouping Objects -- allows you to manipulate multiple objects as if they were a single object.
- Image Display Animations -- animated images.
- Image Display Colors and Gradients -- displaying pure colors and gradients
- Image Display Data Buttons -- checkboxes and radio buttons created from custom images.
- Image Display Object -- is used for dynamic images (images that change depending on the data).
- Image Display Push Buttons -- push buttons created from custom images.
- info("clickedobjectname") -- returns the name of the button that was just clicked.
- Line Item Grid Constructor -- creates a grid of form elements for displaying and editing line item fields.
- Line Object -- draws a line within a form.
- Matrix Clicking -- handling clicks in a Matrix Object.
- Matrix Constructor -- quickly creating a Matrix Object from a template.
- Matrix Database Integration -- synchronizing a Matrix Object with a database.
- Matrix Geometry -- customizing the size and geometry of Matrix Object elements.
- Matrix Header and Horizontal Scrolling -- setting up a custom header for a Matrix Object grid.
- Matrix Object -- displaying a grid of items with a custom arrangement.
- Matrix Object Frame -- setting up the arrangement of items within a Matrix Object.
- Matrix Programming -- programming a Matrix object.
- Object Inspector Panel -- is used to view and modify the attributes of selected objects in a form.
- Object Library -- is used to create new objects in a form.
- Object Names -- can be used to identify an object in a program.
- Oval Object -- draws an oval or circle within a form.
- Polygon Object -- draws a polygon within a form.
- Popup Menu Button Object -- is used to create popup menus anywhere on a form.
- Progress Indicator Object -- is used to create progress indicators
- Push Button Object -- triggers a procedure when it is pushed.
- Rectangle Object -- draws a rectangle or square within a form.
- Report Tile Object -- component for assembling a custom report.
- Rounded Rectangle Object -- draws a rectangle with round corners within a form.
- Scroll Bar Object -- is used to create scroll bars.
- Segmented Button Object -- is used to created segmented buttons.
- Selecting Form Objects -- so that they can be modified.
- Slider Object -- is used to create sliders and knobs.
- Smart Resize -- adjusts the sizes and locations of the other selected objects to match the change of one object.
- Star Object -- draws a star within a form.
- Stepper Object -- is used to create numeric steppers for use with Text Editor objects.
- Tab Panel Appearance -- appearance options for a Tab Panel Object.
- Tab Panel Buttons and Selection -- button options for a Tab Panel Object.
- Tab Panel Constructor -- quickly creating a Tab Panel Object from a template.
- Tab Panel Content -- setting up the content for a Tab Panel Object.
- Tab Panel Forms -- setting up the forms for a Tab Panel Object.
- Tab Panel Object -- switchable tab panels.
- Text Editor Object -- is used to edit text in a field or variable.
- Text Label Object -- displays a short, fixed, text item within a form.
- Text List Appearance -- customizing the appearance of a Text List Object.
- Text List Constructor -- quickly creating a Text List Object from a template.
- Text List Database Integration -- synchronizing a Text List Object with a database.
- Text List Multiple Columns -- displaying multiple columns in a Text List Object
- Text List Object -- displaying a grid of text.
- Text List Programming -- programming a Text List Object.
- Text List Searching -- searching within a Text List Object.
- Text List Selection -- selecting items in a Text List Object.
- Text Object Background Color/Gradient -- text object background colors and gradients.
- Web Browser Object -- is used to display web pages from within a Panorama form.
History
| Version | Status | Notes |
| 10.2 | Updated | Now allows custom background colors and gradients. New Auto Scroll to Bottom option forces the text to jump to the bottom whenever it is changed, for example for displaying a log file. |
| 10.0 | Updated | Carried over from Panorama 6.0 from Text Display SuperObjects, but with many new features. |