If a form doesn’t contain any margin tiles (like the examples on the Report Tiles in Action page) Panorama will automatically start printing as far up and to the left as possible on the current printer. In this case the exact margins will depend on the printer and on the Page Setup options you have chosen.
Top Margin Tile
The top margin tile allows you to modify the distance from the top of the page to the top of the first tile printed. Unlike most other tiles where both dimensions are important, Panorama only cares about the height of the top margin tile. If the report contains a top margin tile, the height of that tile becomes the top margin of the report.
To create a top margin tile, drag a Report Tile Object from the Object Library. Adjust the size of the tile (in particular the height), then choose the magic panel inspector and click on the Top Margin button.
Now that the object is created, you can adjust its position and size as described on the Report Tile Objects page. Remember that the position of a tile doesn’t matter, any empty spot on the form will do, and in the case of a top margin tile, the width doesn’t matter either, Panorama only considers the height of the top margin tile when laying out the report.)
Now that it has a top margin, this report will have a blank spot at the top of the page when printed.
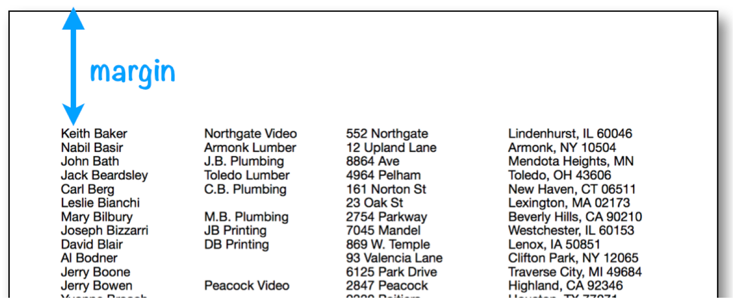
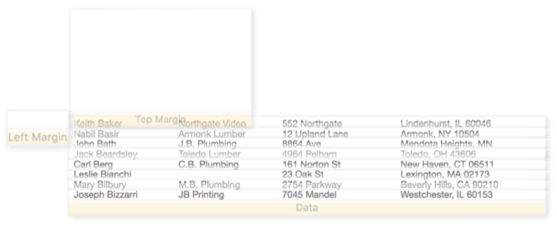
The illustration below shows how Panorama assembles the report using the top margin and data tiles. The top margin is always the top tile on the page, with any other tiles stacked below it.

Unlike other tiles, Panorama will not print text or graphics that are placed on the surface of the top margin tile. The top margin tile has only one purpose — to set the top margin distance.
Note: If the height of the top margin tile is less than the minimum printer margin (which varies for different printer models), the text may be cut off.
Left Margin Tile
Panorama normally prints the header, footer, and data tiles with the smallest possible left margin, usually about 1⁄4 inch. (The actual minimum left margin depends on the type of printer you are using, and on the current Page Setup.)
You can use the left margin tile to change the left margin. Unlike other tiles where both dimensions are important, Panorama only cares about the width of the left margin tile. If the report contains a left margin tile, the width of that tile becomes the left margin of the report.
To create a left margin tile, drag a Report Tile Object from the Object Library, then choose the magic panel inspector and click on the Left Margin button. Adjust the width of the tile object to the margin you want.
When it’s printed, this report will now shift to the right like this.
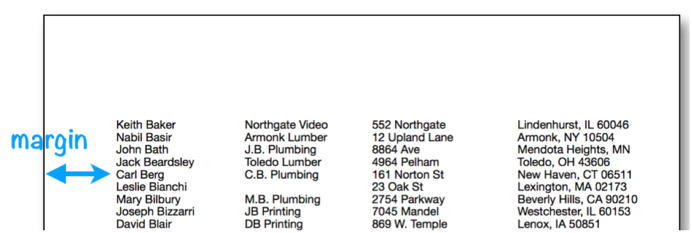
This illustration shows how Panorama assembles the report using the top margin and data tiles. The left margin is always the leftmost tile on the page, with any other tiles stacked to the right of it.
Unlike other tiles, Panorama will not print text or graphics that are placed on the surface of the left margin tile. The left margin tile has only one purpose — to set the left margin distance.
Right Margin Tile
The right margin tile is rarely used. Panorama normally tries to use the entire printed area of the page, right up to the minimum right margin. The usual right margin is about 1⁄4 inch, but like the left margin, it can vary depending on the type of printer you are using and the current Page Setup.
You can use the right margin tile to set a larger right margin. Like the left margin, Panorama only cares about the width of the right margin tile. If the report contains a right margin tile, the width of that tile becomes the right margin of the report. However, there is one exception — if your right margin tile is less than the minimum width, the report will ignore the tile and use the minimum right margin.
Increasing the right margin has two effects. First, when you are using automatic multiple columns (see Printing Multiple Column Reports), increasing the right margin can reduce the number of columns printed. Panorama will stop printing columns when the right margin is reached. However, it is usually simpler not to use a right margin and instead set the number of columns explicitly using the Report Preferences panel.
The right margin also affects the position of the center and right header/footer tiles (see Custom Report Headers and Footers). The centered tiles will be centered between the left and right margins, while right flush tiles will be flush against the right margin.
The right margin does not have any effect on normal header/footer tiles, or on the first column of data tiles. For example, suppose that the header tile is wider than the space between the left and right margins. The header will overlap and print in the right margin area.
Unlike other tiles, Panorama will not print text or graphics that are placed on the surface of the right margin tile. The right margin tile has only one purpose — to set the right margin distance.
Bottom Margin Tile
The bottom margin tile allows you to modify the distance from the bottom of the page to the bottom of the last tile printed on the page. Unlike most other tiles where both dimensions are important, Panorama only cares about the height of the bottom margin tile. If the report contains a bottom margin tile, the height of that tile becomes the bottom margin of the report.
See Also
- Automatic Mailing Label Construction -- creates a mailing label.
- Automatic Report Construction -- creates a tabular report with columns of data.
- Custom Report Headers and Footers -- setting up custom report headers and footers.
- Printing Multiple Column Reports -- printing reports with two, three or more columns (for example mailing labels).
- Printing Multiple Page Records -- Panorama can print up to 9 pages for each record in a custom report (for example multi page invoices, etc.)
- Printing Summary Information -- printing a database that has been organized into categories with summary records.
- Report Tile Object -- component for assembling a custom report.
- Reports -- Panorama has a very flexible system for printing custom reports, labels and forms.
- setreportcolumns -- allows a procedure to control the number of columns of a report, and the direction (across or down).
- Tiles In Action -- basic rules for using tiles to print custom reports.
- Variable Height Records -- custom reports with different heights for each record.
- View-As-List Forms -- displaying a custom data layout as a continuous sheet.
History
| Version | Status | Notes |
| 10.0 | Updated | Carried over from Panorama 6.0, with some updates. |