Many reports have headers at the top of each page and footers at the bottom. As you might guess, these headers and footers are set up with report tiles!
Header Tile
The header tile is printed at the top left of each page. The header can be used to print the report title, page number, date or anything else you want.
To create a top header tile, drag a Report Tile Object from the Object Library, then choose the magic panel inspector and click on the Header button.
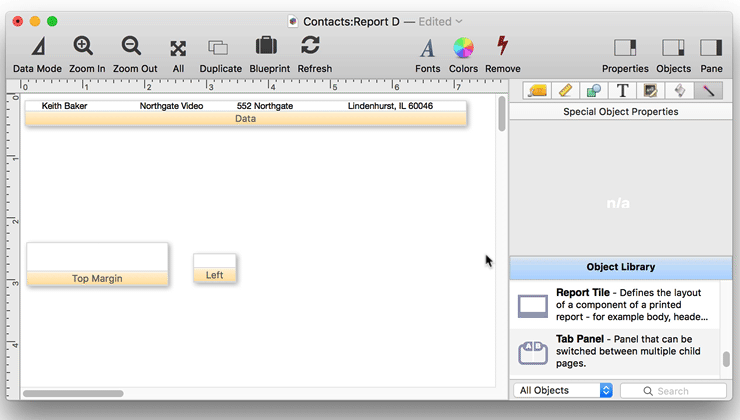
Adjust the tile size for the footer area you need. You really don’t care only about the absolute position of the tile, just as long as it is the correct height and width, it can be in any empty position on the form, in other words it should not overlap any other tile.
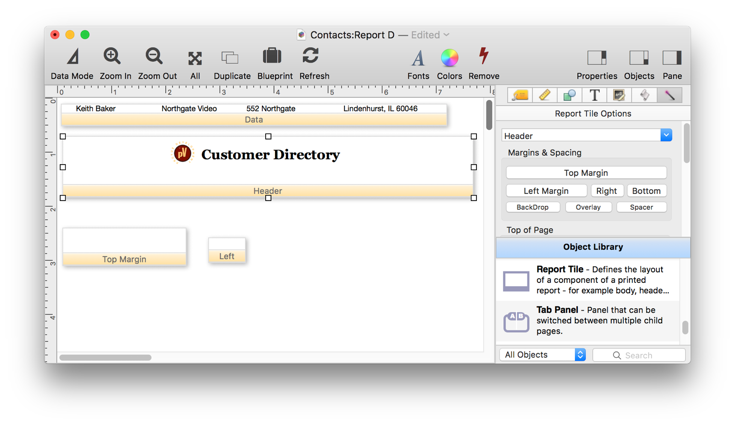
This example uses a header tile to print a logo at the top of each page.
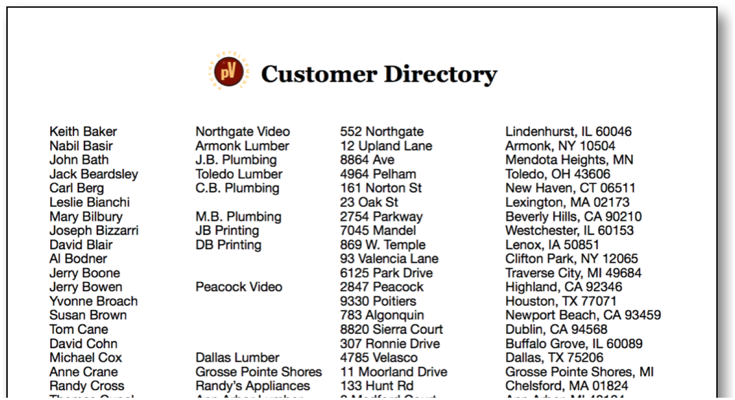
When it’s printed, this report will look like this. Notice that even though the header tile template is below the data tile template in the form, in the printed report, the contents of the header tile appear first, above the data.
This illustration shows how Panorama assembles the report using the margin, header and data tiles.

Footer Tile
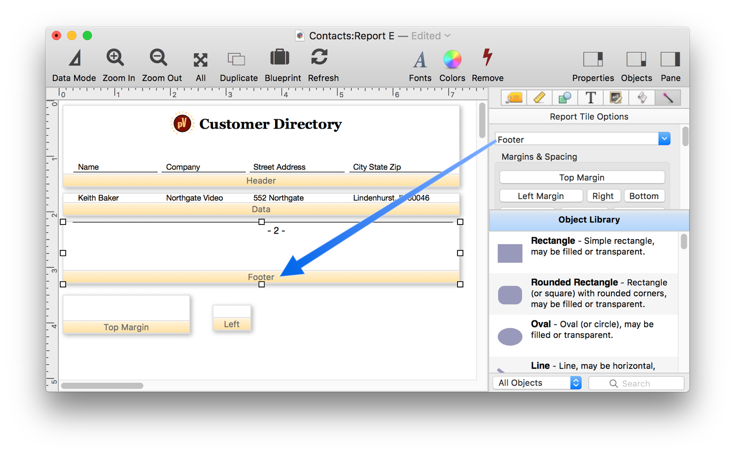
The footer tile is printed at the bottom left of each page. The footer can be used to print the report title, page number (see below), date (see below) or anything else you want. Here is an example the prints the page number at the bottom of the page, along with a divider line.
Here’s what the bottom of this printed page looks like.
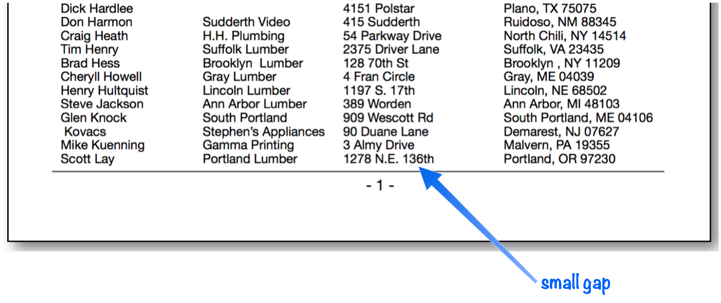
Notice that there is a small gap between the bottom of the last line of data and the footer tile. This is because the Panorama always aligns the footer with the bottom of the page. In this example the gap is not very large, but if the data tile is taller, the gap can also be taller. The footer is printed as close to the bottom of the page as possible.
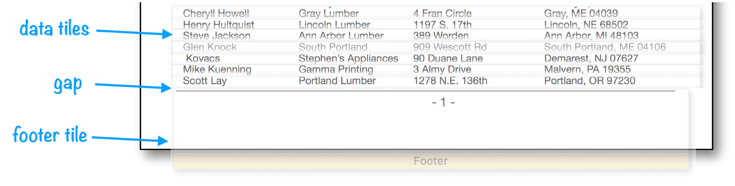
If you want to create a footer that is right below the data tiles with no gap, use the Data Footer tile. In that case, any gap will appear below the Data Footer tile, instead of above the tile. If both Data Footer and Footer tiles are used, any gap will be in between these two tiles.
Including Page Numbers
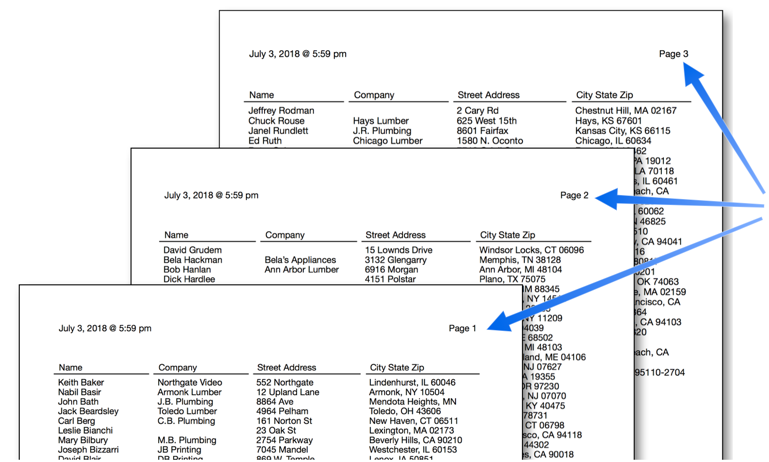
Panorama can automatically calculate and print a page number on each page of your report. To do this, use a Text Display Object in with the position, style, color and alignment you want to use for the page number. The page number is merged into the text by typing «page#» into the object (be sure to use literal mode for this Text Display Object object). (Note: the « chevron is Option-\ and the » chevron is Shift-Option-\ . The illustration below shows how to print page numbers on the upper right hand corner of a report. Notice that the text object has been set to right justify so that the page number will be flush with the right edge of the report.

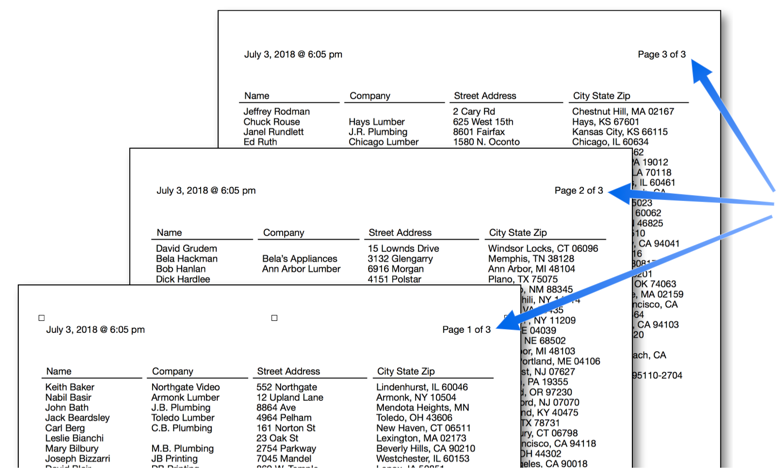
Here is what the first three pages of this report look like when printed. As you can see the page number is printed in the upper right corner of each page.
Embedding a Formula
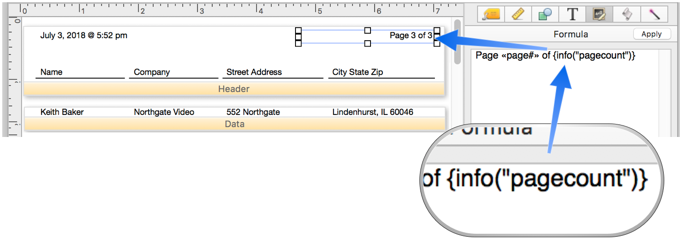
You can also embed a complete formula in the text by enclosing the formula with { and } characters (also known as “curly braces”). This allows you to use any function or operator that is included with Panorama. For example, suppose you wanted both page numbers and the total page count printed at the top. Panorama has a formula function that can calculate the number of pages: info(“pagecount”). Using curly braces, this formula can be embedded into the Text Display Object.
Here’s the printed report.
To center the page number at the bottom of each page, place a Text Display Object in the center of the footer tile. To make sure that the page number is centered, the text object should be centered within the footer tile. You also need to check the center justify option in the Text panel.

Printing the Current Date and Time
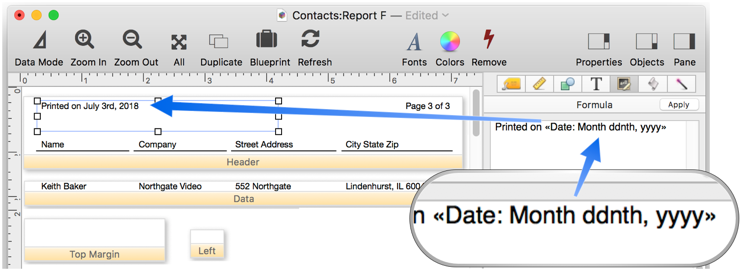
Panorama can automatically print the current date and time on each page of your report. One technique for printing the date is to use a Text Display object. The date value is merged into the text by typing «date:pattern» into the object. (To type the « chevron press Option-\ and for the » chevron press Shift-Option-\) . Don’t actually type in the word pattern, instead choose one of the patterns from the choices below.
mm/dd/yy
MM/DD/YY
mm-dd-yyyy
dd-MON-yy
dd-Month-yy
Month dd, yyyy
Month ddnth, yyyy
DayOfWeek, Month dd
The illustration below shows how to print the current date in the upper left hand corner of a report.
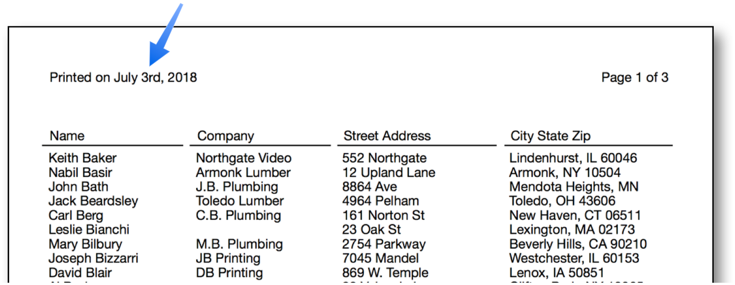
Here’s the top of the first page of this report.
To include the current time in a printed report you must use the now() and timepattern( functions. Simply merge these functions into a Text Display Object. The example below prints both the date and time using a formula.
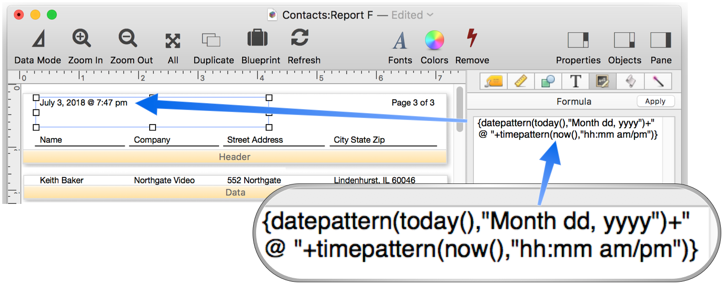
Here is the printed report.
You can actually merge in any formula you want into the header and/or footer.
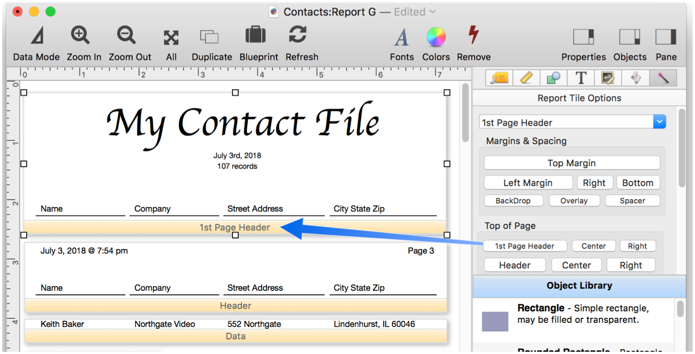
First Page Header Tile
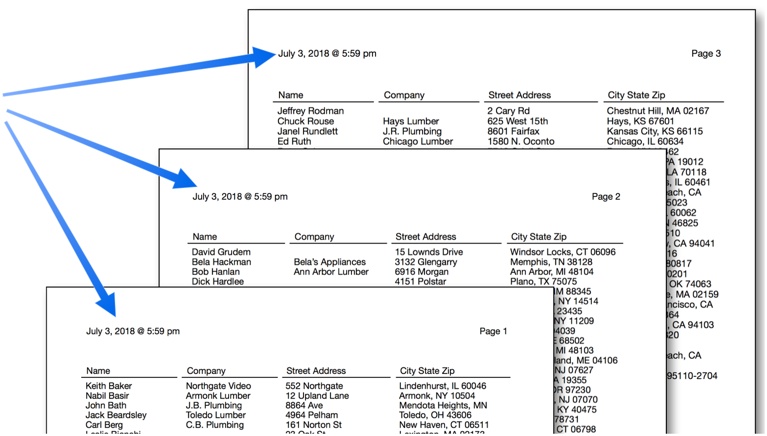
Panorama normally prints the header tile (or tiles) at the top of each page (see above). However, if the report includes a first page header tile, that tile will be printed at the top of the first page. All subsequent pages will print using the normal header tile (or tiles). Here is an example of a form that contains both a first page header and a regular header that will print on the second, third, and any additional pages.
Here are the first two pages of the printed report generated by this form. The first page includes the First Page Header, while the second (and subsequent pages) use the regular Header tile.
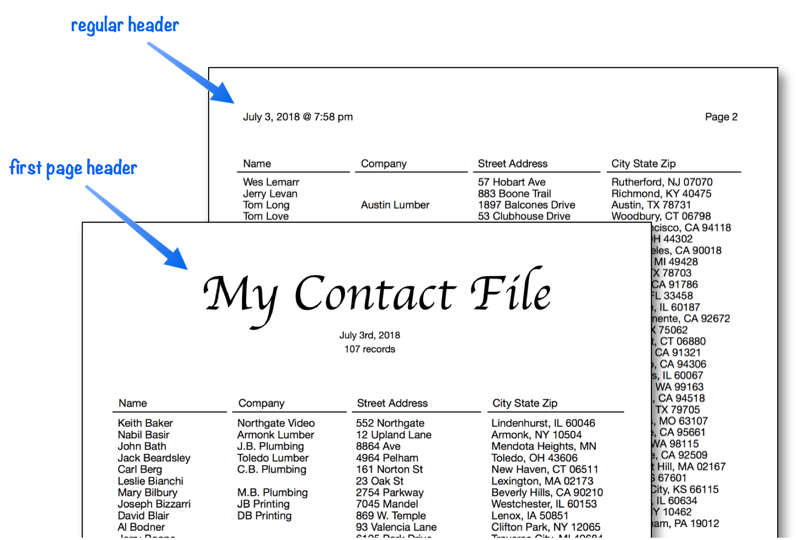
The First Page Header tile can also be used to create a title page for the report. To do this simply enlarge the First Page Header tile until it is large enough to cover an entire page. In that case Panorama will print only that tile on the first page. The regular report will begin on the second page.
BackDrop and Overlay Tiles
The backdrop tile can be used to print an overall graphic design on each page of the report. The backdrop tile actually overlays all of the other tiles on the page. For example, the backdrop tile could be used to print the word Confidential across each page of the report or to print a border around the page. Here’s an example of a backdrop tile. (The slanted red “Confidential” text was created in Keynote, saved to a PNG file, then dragged onto the report. See Fixed Image Object.)
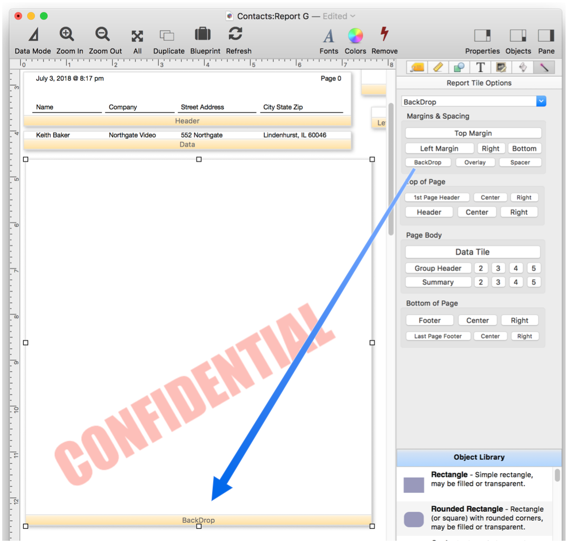
The contents of the Backdrop tile will print underneath every page in the report.
The Overlay tile is similar, but is printed on top of every page instead of underneath (so whatever is placed on the Overlay tile will cover the material underneath it).
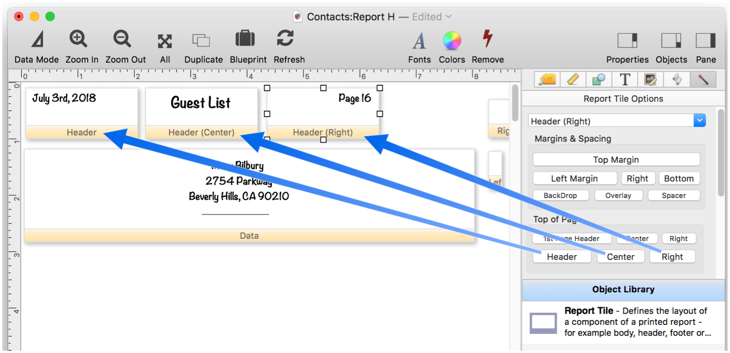
Designing Headers and Footers For Changing Page Sizes
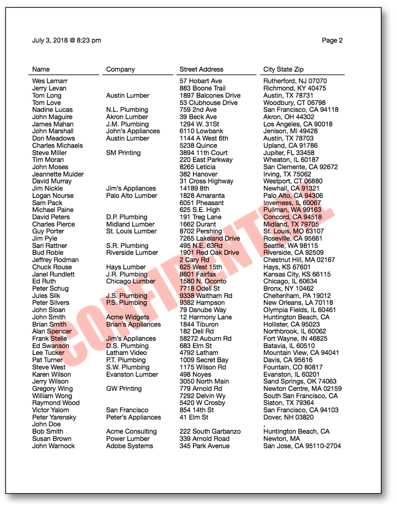
Most reports are designed for a specific page size. It is possible, however, to design headers and footers that automatically adjust for different page sizes. The key is to divide the header and footer into three components: left flush, centered, and right flush. Here is a report with three headers.
On a standard 8 1/2 by 11 page this report will look like this.
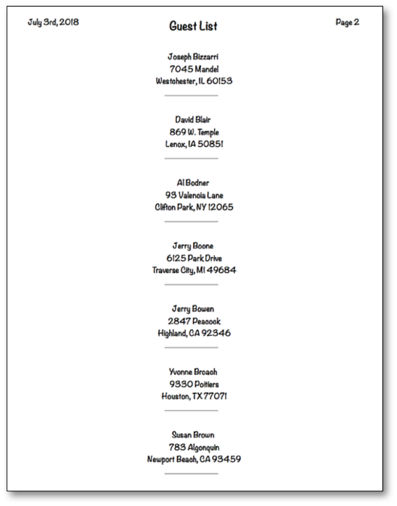
If you print this report on a different size page (or switch from portrait to landscape orientation or use a different page reduction factor) the titles will adjust automatically. Here is the exact same report printed in landscape orientation.

You don’t need to use this technique unless you think that the page size may change. If the page size is fixed, just use the regular header and footer tiles.
See Also
- Automatic Mailing Label Construction -- creates a mailing label.
- Automatic Report Construction -- creates a tabular report with columns of data.
- Custom Report Margins -- specifying the top, left, right and bottom margins of a custom report.
- Printing Multiple Column Reports -- printing reports with two, three or more columns (for example mailing labels).
- Printing Multiple Page Records -- Panorama can print up to 9 pages for each record in a custom report (for example multi page invoices, etc.)
- Printing Summary Information -- printing a database that has been organized into categories with summary records.
- Report Tile Object -- component for assembling a custom report.
- Reports -- Panorama has a very flexible system for printing custom reports, labels and forms.
- setreportcolumns -- allows a procedure to control the number of columns of a report, and the direction (across or down).
- Tiles In Action -- basic rules for using tiles to print custom reports.
- Variable Height Records -- custom reports with different heights for each record.
- View-As-List Forms -- displaying a custom data layout as a continuous sheet.
History
| Version | Status | Notes |
| 10.0 | Updated | Carried over from Panorama 6.0, with some updates. |