The first step in creating a shared database is to create a single user database. This database can be old or new, empty or full. For this example, we’ll use a single user database we have handy called Real Estate Listings, which happens to be in a folder named Orange County.

Warning: Before you start, the single user database should be in an unshared folder on the local hard drive for this computer. It should never be placed in any kind of shared folder, for example inside a DropBox or iCloud Drive folder, or a folder on a file server. Placing a database in a shared folder or shared volume will interfere with Panorama X server’s synchronization process. *Panorama databases should only be placed in locations that are accessible ONLY to the local computer. If it’s not already open, double click on the database to open it. Here’s what our single user database looks like.
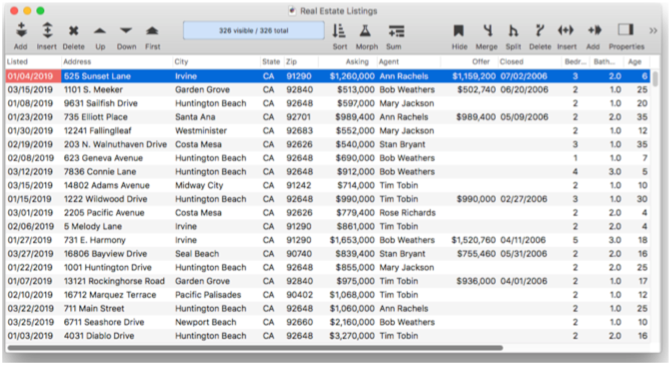
So far this is a garden variety single user database. You can sort, select, add data, delete data — it all happens on your computer and has nothing to do with anyone else. In other words, the data is not shared with any other users, but we’re about to change that.
To start the process of changing this database into a shared database, open the Database Options dialog (in the File menu) and switch to the Server panel.
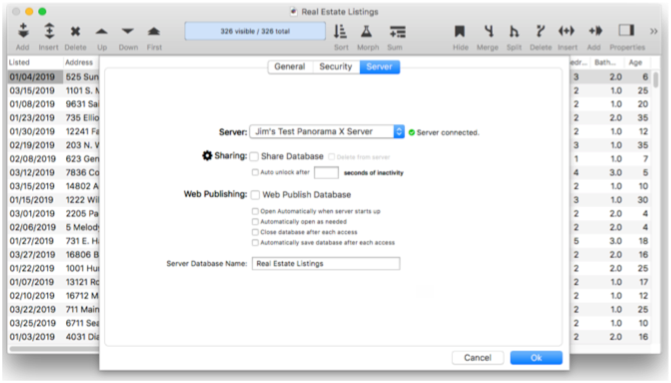
The first step in sharing a database is to select the server. If there is only one server available it will be selected for you automatically, otherwise, use the pop-up menu to choose the server.

Note: If a master computer has been designated for this server (see Restricting Server Access), you won’t be able to upload a shared database unless you are using the master computer. If you are using any other computer you’ll see a message similar to the one shown below. If this message appears you’ll either need to change the Master Computer preference for the server, or you’ll need to move to the computer that has been designated as the master.

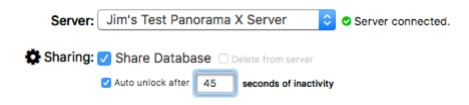
Once the server is selected, the next step is that the Share Database option must be checked. The next choice is whether to enable an auto-timeout that will unlock records automatically if someone walks away from their computer in the middle of making a change. This is usually a good idea, so we’ll set the timeout to 45 seconds.
The bottom section of the panel deals with database web publishing options. If you just want to share the database with other Panorama users, you can simply leave all of these options blank. You can always come back and enable web publishing later.
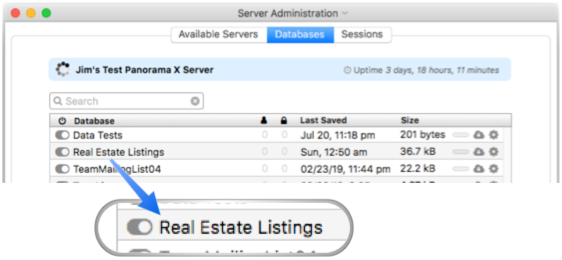
Once you’ve selected the server and checked the Share Database option, all you have to do is press the Ok button to upload the database to the server. However, in this case there is a problem – there is already a database named Real Estate Listings on this server!
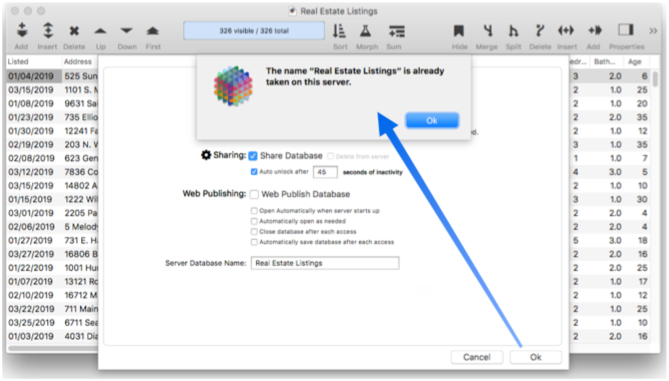
You can’t have two server databases with the same name. To check what names are already in use, open the Server Administration Wizard (in the Panorama menu) and switch to the Databases panel. In this case you can see that the name Real Estate Listings is already taken.
If you encounter this situation, one solution is to rename the original single user database before you share it. However, sometimes that is not possible. For example, the database may be part of a set with extensive lookups and programming between different databases in the set. In that case renaming a database could take hours or even days of work. To get around this problem, the Database Options>Server panel allows you to specify a Server Database Name that is different from the actual database name. You’ll find this at the very bottom of the panel.
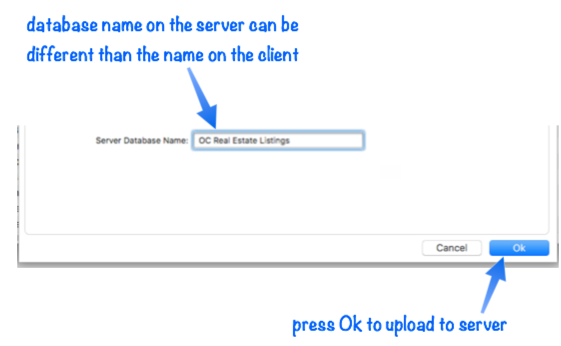
In this case we’ve changed the Server Database Name to OC Real Estate Listings. This allows this database to co-exist on the server with the original Real Estate Listings database. The client database (on the local computer) is still called Real Estate Listings, so you won’t need to reprogram any of the lookups or procedures.
Now that you’ve specified a database name that is available on the server, pressing the Ok button will upload the database to the server. You’ll be notified when this process is complete. (Tip: Use the Notifications panel in System Preferences to make sure that notifications are enabled on your Mac. If notifications are disabled, or do not disturb is turned on, you won’t see the notifications generated by Panorama.)
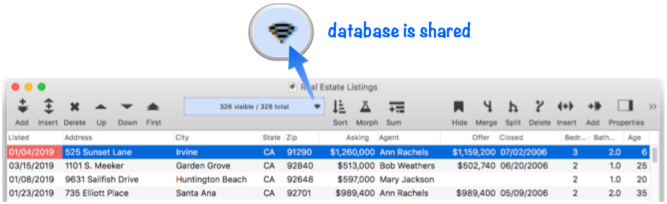
Our database is still open, and it looks almost the same as it did before we started. But it is now a fully shared multi-user database that can be viewed and modified by anyone that can connect to this server. To indicate that the database is shared, a wifi icon is displayed in the toolbar. You’ll see this icon whenever the database is in shared mode.
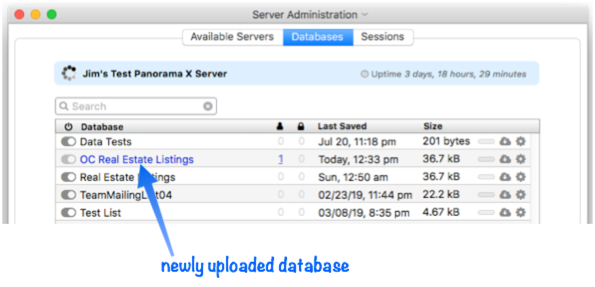
This database is now shared and ready to go. If you wish, you can double check by opening the Server Administration Wizard (in the Panorama menu) and switching to the Databases panel. This displays a list of all databases on the server, including our newly uploaded database. (Note: The newly uploaded database is shown in blue because it is currently open on one or more clients, not because it is newly uploaded.)
To learn more about this panel, see the Server Administration Wizard page.
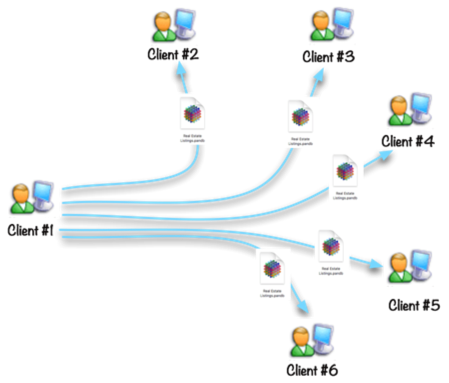
Copying the Database to Other Client Computers
The original single user database has been transformed into a shared database on the server. At the moment, there are two copies of this database — on the original computer, and on the server. The final step is to transfer copies of this database to all of the other clients that need to access the data. Each client computer needs to have its own local copy of the database. Usually the easiest method of doing this is to use the Server Administration Wizard, but you can also transfer the files manually (via AirDrop, file sharing, e-mail, USB drive, etc.). Both of these techniques are explained below.
No matter how you make these copies, make sure that they don’t wind up in any kind of shared folder (DropBox, iCloud Drive, file server, etc.) when they are actually in use by Panorama. Having a shared Panorama database in a shared folder while it is open will interfere with the Panorama X server synchronization system. Make sure that the database is not in a shared folder before you open it.
Downloading with the Server Administration wizard.
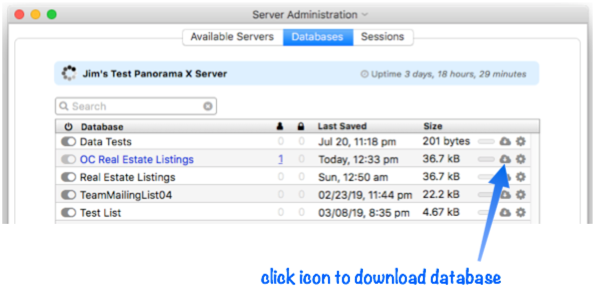
Usually the best way to download shared files from the server is to use the Server Administration Wizard (accessible from the Panorama menu). Start by opening this wizard on the client machine you want to download to, then choose the server that contains the shared database. Locate the database you want to download and click on the Download icon (looks like a cloud with a down arrow).
Panorama will display a dialog asking for the name and location on the local computer where you want to download the file. (Make sure that you don’t choose a shared folder.)
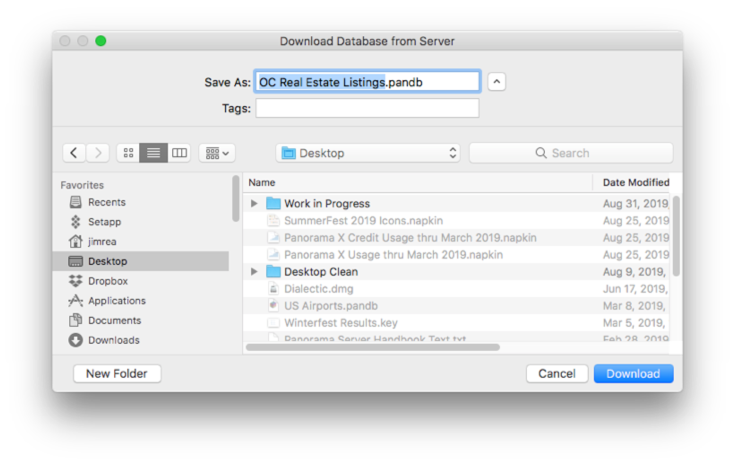
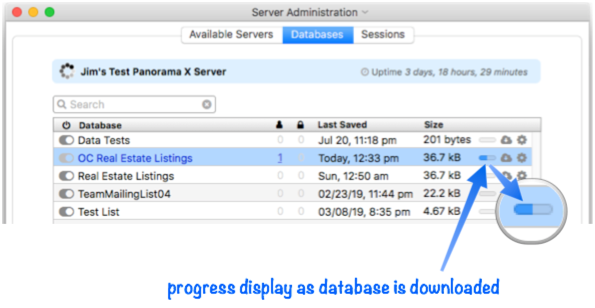
Once you’ve picked the location, press the Download button to start the download operation. The Server Administration window will display the progress of the download as it proceeds.
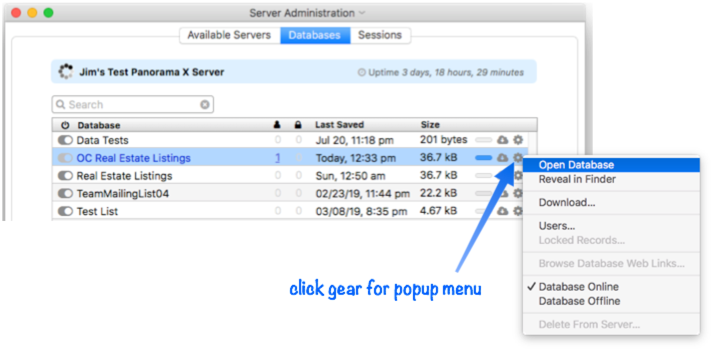
When the download is complete, Panorama will notify you (if you have notifications enabled in your System Preferences). The database is ready to use, just double click it in the Finder to open it. You can also click on the gear icon and choose Open from the popup menu.
Transferring the Database Manually
As an alternative to downloading the database with a wizard, you can also manually copy the database from any client to any other client computer.
Simply use the normal methods you would use for copying any other file. You can transfer the file using AirDrop, DropBox, iCloud Drive, using file sharing, or a USB thumb drive. You can even e-mail the file as an attachment (we recommend compressing the database to a .zip file before emailing). Or you can use a combination of these techniques.
If you transfer files via sneakernet (for example a USB thumb drive), make sure that the media you are using is formatted for Macintosh. If that is not possible then compressing the file usually allows it to be transferred cleanly between systems.
Warning: You can use a sharing service like DropBox or iCloud Drive to transfer the files, but be sure to move it out of the shared folder before you open the database with Panorama. Make sure the database is transferred to a non-shared folder before you open it, for example your Documents folder (assuming that you don’t have this folder set up to share between two computers). Using a database in a shared location will interfere with Panorama’s synchronization process. Panorama databases should only be used in locations that are accessible only to the local computer. (Yes, we’ve included this warning more than once on this page – that’s because it’s very important.)
See Also
- Changing the Design of a Shared Database -- modifying database fields, forms and/or procedures.
- Manually Uploading a Quick Patch to the Server -- uploading a procedure or form.
- Permanently Deleting a Database from the Server -- remove a database from the server.
- Permanently Detaching a Shared Database from the Server -- unshare a shared database.
- Temporarily Disconnecting a Shared Database from the Server -- pause database sharing.
History
| Version | Status | Notes |
| 10.2 | New | New in this version. |