There are two ways that you can permanently delete a database from the server — using the Database Options dialog or using the Server Administration Wizard. Either method is permanent and cannot be reversed or undone. (The Server Administration wizard method has the advantage that you can delete a database from the server without having a copy of the database on your local computer.)
Deleting a Database Using the Database Options dialog
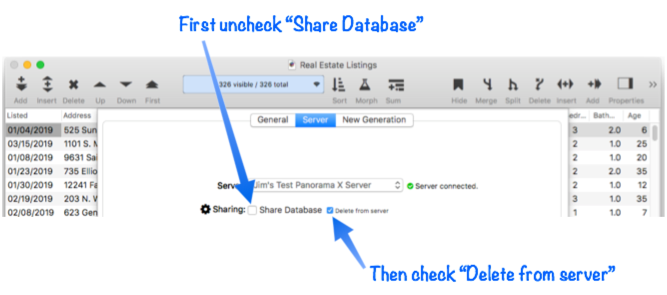
To delete a database using this method, first open the database on the local computer, then open the Server panel of the Database Options dialog (in the File menu). Uncheck the Share Database option, then check the Delete from server option.
To actually detach the database and delete it from the server, press the Ok button. Panorama will ask you to confirm that you really want to perform this action.
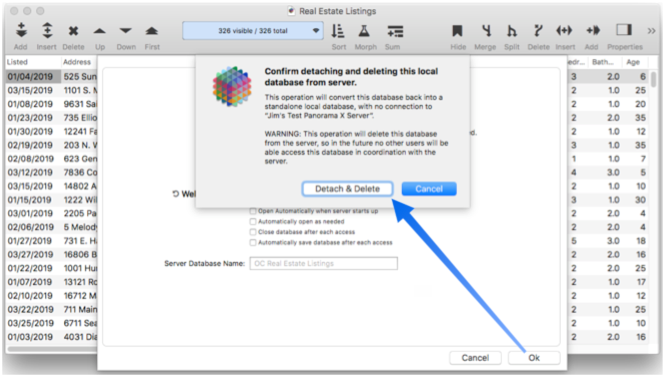
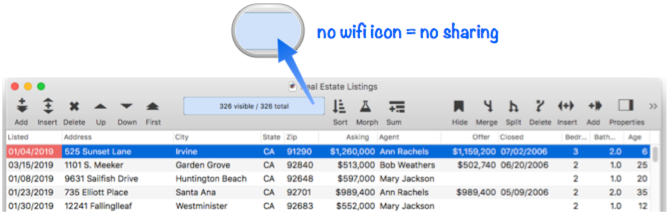
To continue, press the Detach & Delete button. If no one else is using the database, it will be deleted from the server, and the local copy of the database will be converted back to a standalone single user database, with no connection to the server. (This database is not an “orphan” database as described below, it is a standalone single user database that can be used normally going forward.)
If any other users are currently using the database, Panorama will refuse to proceed. You’ll have to wait until all other users close the database before you delete the database. (Of course, if other users are currently using this database, perhaps you should reconsider whether or not it should be permanently deleted!)
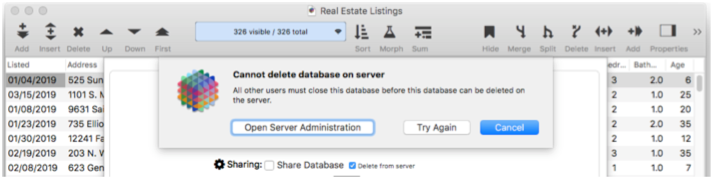
The warning dialog gives you three choices. You can simply cancel, which might be the wisest move since apparently other users still find this database useful.
If you want to find out what other users have this database open, press the Open Server Administration button. This opens the Server Administration Wizard, which can tell you who the other users are that have the database open. You can then contact them to request that they close the database so that you can delete all their work!
After contacting all of the other users and getting them to close the database on their computers, you can press the Try Again button. If they really have closed the database then the operation will complete, and the database will be deleted from the server.
Deleting a Database Using the Server Administration wizard
To delete a database using this method, start by opening choosing Server Administration from the Panorama menu. Choose the server that contains the database you want to delete, then switch to the Databases panel. (Tip: You can double click on the server name to quickly switch to the Databases panel.)
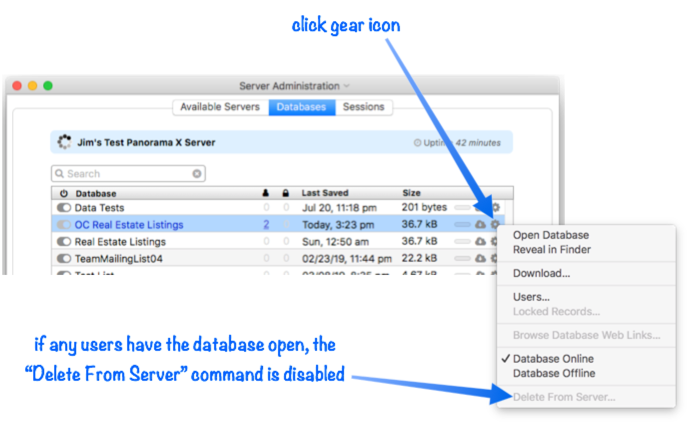
Find the database you want to delete in the list, then click on the gear icon and choose Delete From Server from the popup menu. However, if any users have the database open, this command will be disabled.
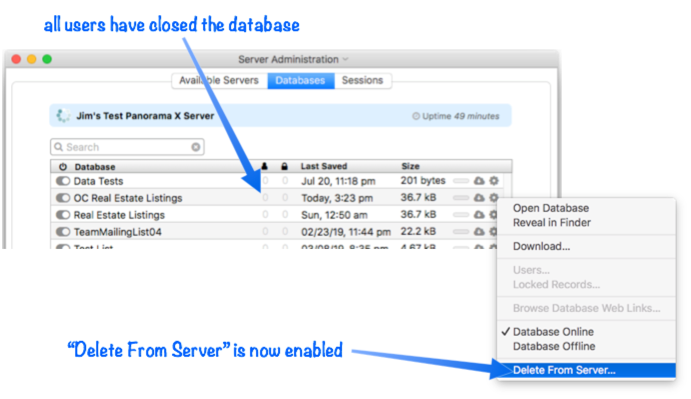
Once everyone has closed the database, the Delete From Server command is available.
You get one last chance to change your mind.
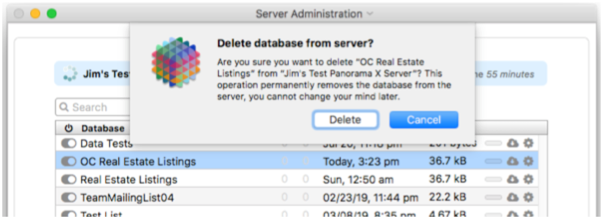
If you’re sure, press the Delete button and the database is removed from the server.
Orphan client databases on other client computers
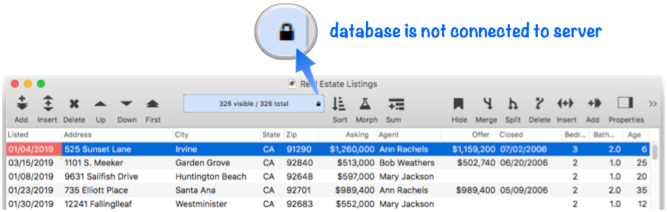
Deleting a database from the server does not delete it from all of the other client computers. When you delete a database from the server, these copies on other client computers are left as “orphans.” If anyone tries to open one of these orphaned databases they will open in read only mode – since they cannot connect to the server, the data in an orphaned database can’t be edited. When you open an orphaned database Panorama will notify you that there is a problem (if notifications are enabled), and the toolbar will show a lock icon to indicate that the data can’t be edited.
If you want to convert an orphaned database into a single user database, you need to use the Database Options dialog to detach it from the server. See Detaching a Shared Database from the Server to learn about this process. The other course of action is to simply manually use the Finder to delete orphaned databases on other computers when you encounter them.
See Also
- Changing the Design of a Shared Database -- modifying database fields, forms and/or procedures.
- Creating a Shared Database -- convert a single user database into a shared database.
- Manually Uploading a Quick Patch to the Server -- uploading a procedure or form.
- Permanently Detaching a Shared Database from the Server -- unshare a shared database.
- Temporarily Disconnecting a Shared Database from the Server -- pause database sharing.
History
| Version | Status | Notes |
| 10.2 | New | New in this version. |