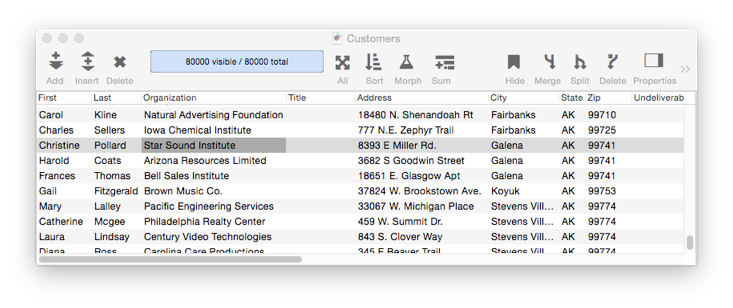
Panorama includes a mailing label constructor that can make a form for printing mailing labels in a minute or two. Let’s take a look at how it works. To illustrate this, I’ll use a customer list database with 14 fields.
I’ll start with a new blank form (see Creating a New Form). To automatically create a form for printing labels, I choose Mailing Label from the Construct menu. This opens a dialog sheet that lists all of the fields in the database. I edit the list to arrange it into the format of a mailing label (including adding the comma between City and State), and also remove the fields I don’t want to include on the label. When done, I simply press the Construct button.
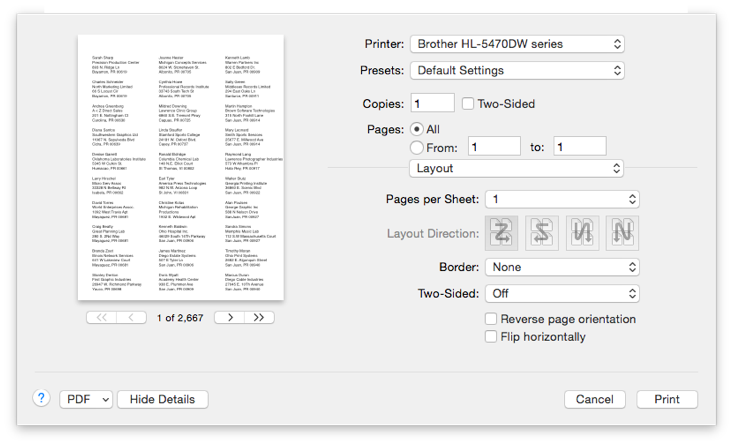
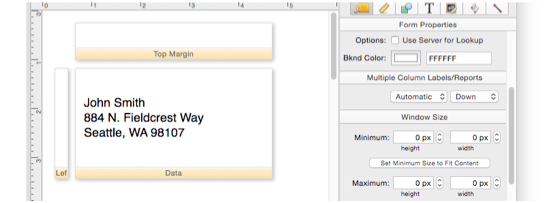
That’s it – the form is done! You can switch to data entry mode and start printing mailing labels immediately.
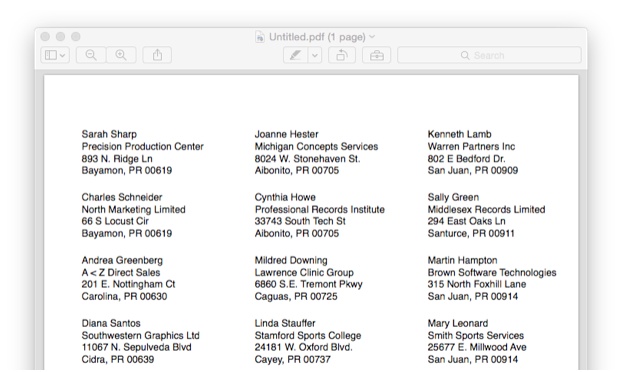
Here is a close-up at the final result.
Customizing the Automatically Generated Form
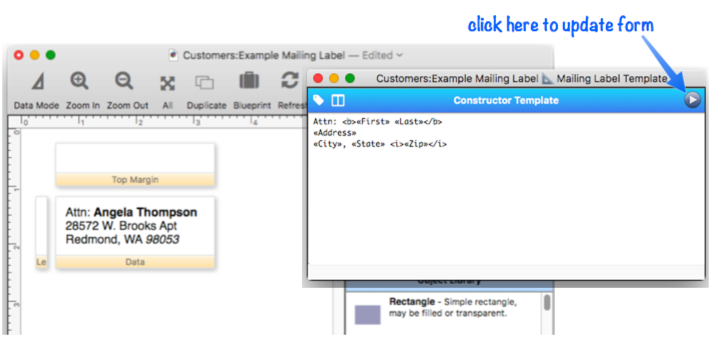
You can, of course, manually modify the form objects after they have been generated. But you can also modify the template and regenerate the form. For example, I can edit the template to add Attn: in front of the person’s name.
As long as you don’t modify the generated objects individually, you can go back and make additional modifications to the template at any time.
Opening a Semi-Permanent Template Editor Window
If you’re doing a lot of work with a template, it can get tedious to have to keep re-opening the dialog sheet over and over again. If you hold down the Option window when you click on the Construct menu, the template will open in a separate window. You can edit the template in this window, and then either press the Play button or press the Enter key on the keyboard to update the form with the changes. This separate editor window will stay open until you explicitly close it, making it much easier to make iterative changes to the template and see the results.
If you would prefer to always open templates in a separate window, choose that option in the General panel of the Preferences dialog.
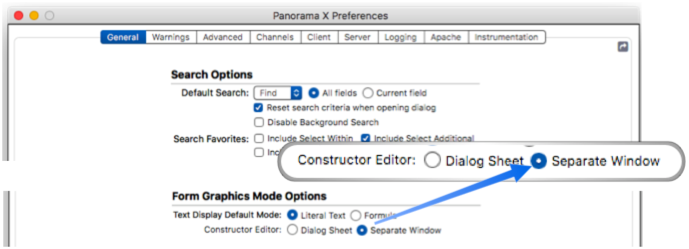
If you select Separate Window as the default, holding down the Option key will temporarily open the dialog sheet (in other words, the normal operation is exactly reversed.)
Constructor Tag Help Menu
There are about two dozen tags that you can use to customize the generated form objects. There is complete documentation for all of these tags below, but if you just need a quick reminder while using the dialog, click the tag icon in the upper left. This displays a pop-up menu with all the available tags. When you select a tag from the menu, that tag is automatically typed into the template. In this example I use the tag menu to change the label type to Avery 5162.

Fields Help Menu Right next to the tag icon is another icon that pops up a list of database fields when you click on it. Choosing a field from this menu inserts the field name into the template at the current insertion point.
Manually Modifying Generated Objects
Once they are generated, you can manually modify individual objects by dragging them, resizing them, or using the object properties panel to modify their appearance and operation. Once you do that, however, you probably want to avoid running the constructor dialog again – doing so will undo any manual changes you have made.
Using Two Templates in a Single Form
You may want to generate objects using more than one template in a single form – however, you can’t do that. But all is not lost – simply create each template in a different form, and then copy the finished results into the same form. Each form has its own separate constructor template.
Tag Language Reference
The template parameter allows you to customize how form elements are generated. You can specify which fields (or variables) are included, the size, alignment, etc. The remainder of this page describes the details of the available tags.
Fields & Punctuation
To include a field on the label, type in the name of the field surrounded by « and » characters (Option-\ and Shift-Option-\). Here’s an example of a typical mailing label with 5 fields:
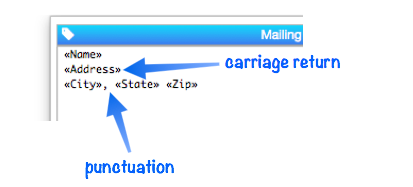
As you can see, this example also includes punctuation: spaces, carriage returns, and a comma. Here’s the finished label:
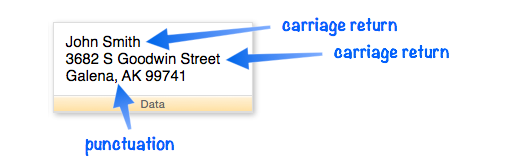
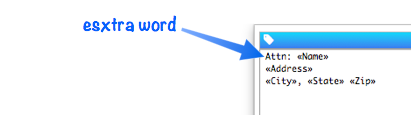
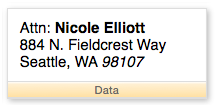
You can type in any extra text you want, including complete words and phrases. In this example, Attn: will be printed in front of the name.
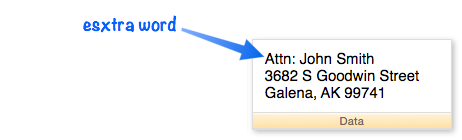
Here’s the modified label:
Note: Any spaces or line breaks before or after the text will be ignored.
If a line is completely blank, it will collapse when printed. For example, for records where the Organization field is blank, the Address line and the City, State Zip line will move up just below the Name line.
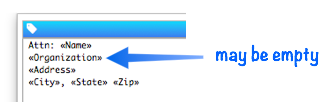
Here are two finished labels – one with the Organization line, and the second with this line missing. The line containing Organization has “collapsed” since there is no organization name to include.
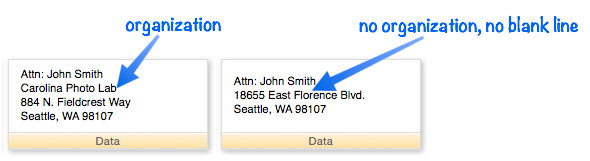
This collapse will only happen if the field is on a line all by itself. If that is not the case, you would need to use a formula (see below) to ensure that the line “collapses” when needed.
Formulas
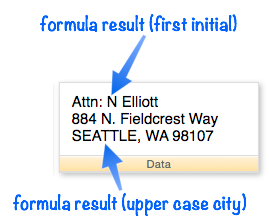
In addition to single fields, you can embed an entire formula into the label by enclosing it with { and } characters. This example uses formulas so that only the first initial of the name will be printed, and so that the City will be printed in all upper case letters.
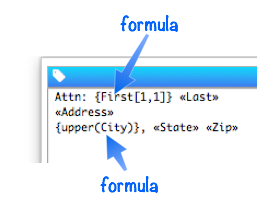
When the label is displayed or printed, the formula results are calculated and merged into the label.
Tags
To customize the generated form objects you can include one or more tags. Like HTML tags, these tags start and end with < and > characters.
Avery Labels
The most common mailing labels are from Avery. Using the <avery:type> tag, you can easily specify the most common Avery labels:
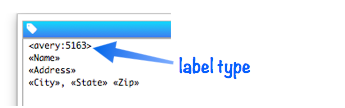
Here’s what this 5163 label looks like:

There are five Avery labels supported, 5160–5164. If you don’t specify any label or label dimensions, the default is Avery 5160.
Custom Label Dimensions
If you’re using something other than an Avery label, you can specify custom label dimension with the <height:distance>, <width:distance>, <topmargin:distance> and <leftmargin:distance> tags. The measurements are normally expressed in points (1 point = 1/72 inch) but you can also specify values in inches (1 in or 2.5 inch or 0.75") or centimeters (20 cm).
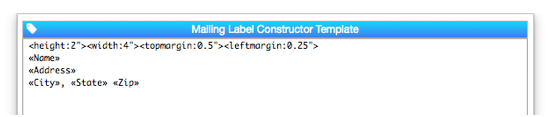
Here is what this custom label looks like:
Label Columns and Direction
Many labels have multiple columns on a page, for example Avery 5160 labels are 3-up. Panorama normally calculates the number of columns from the label width, but you can also explicitly specify from one to four columns with the <labelcolumns:count> tag. You can also specify whether labels are printed across or down with the <direction:across/down> tag.
Text Inset
The text is normally inset on the label by 8 points (one 9th of an inch). Use the <inset:distance> tag to specify a different inset.
Text Size
The size (height) of the text is normally calculated automatically so that the text vertically fills the label, but you can override this.
Use the <lines:count> tag to specify the number of lines in the text (normally this is counted for you). In this example, the automatic line count would be 3, but what if the Address field contains 2 lines? By manually setting the lines to 4, the text height is reduced to leave height for the extra address line.
<lines:4>
«Name»
«Address»
«City», «State» «Zip»
You can also explicitly set the text height with the <labelfontsize:height> tag. When this tag is used, the number of lines is ignored.
<avery:5164><labelfontsize:18>
«Name»
«Address»
«City», «State» «Zip»
Text Font
Labels text is normally Helvetica. Use the <labelfont:name> tag for a different font.
<labelfont:Papyrus>
«Name»
«Address»
«City», «State» «Zip»
Rich Text
You can embed RTML tags (see richtextdisplay() into the text to make a word or phrase bold, italic, a different font or color, etc. This example will print the person’s name in bold, and the zip code in italic.

Here is the finished label:
See Rich Text to learn more about the options that are available for creating different styles, colors, etc.
Note: If you use rich text tags, empty lines won’t collapse automatically. Instead, you’ll have to use a formula to get them to collapse.
Removing Existing Form Objects
If the very first item in the template is the <zapform> tag, the form will be cleared before generating the new objects. Be careful with this tag – it will destroy everything in the form before adding the new objects!
Note: Even if you don’t include the <zapform> tag, this statement will clear any objects that were previously generated by this statement. In other words, even if you use this statement multiple times you’ll only end up with one set of generated objects.
See Also
- Automatic Form Construction -- creates a column of form elements for editing data fields (or variables).
- Automatic Report Construction -- creates a tabular report with columns of data.
- Construct Menu -- used to automatically construct complex form applications, including calendars, lists, mailing labels, and more.
- Line Item Grid Constructor -- creates a grid of form elements for displaying and editing line item fields.
- Matrix Constructor -- quickly creating a Matrix Object from a template.
- Tab Panel Constructor -- quickly creating a Tab Panel Object from a template.
- Text List Constructor -- quickly creating a Text List Object from a template.
History
| Version | Status | Notes |
| 10.0 | New | New in this version. |