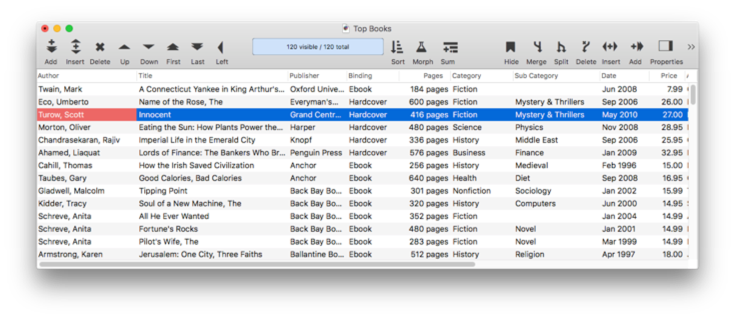
Panorama includes a report constructor that can make a form for printing a custom tabular report (with rows and columns of data) in a minute or two. Let’s take a look at how it works. To illustrate this, I’ll use this book database with 10 fields.
I’ll start with a new blank form (see Creating a New Form). To automatically create a form for printing a report, I choose Report from the Construct menu. This opens a dialog sheet that includes some default report options (more on those in a moment) and also lists all of the fields in the database. I edit the list to remove the fields I don’t want to include in the report (I can also rearrange fields). When done, I simply press the Construct button.

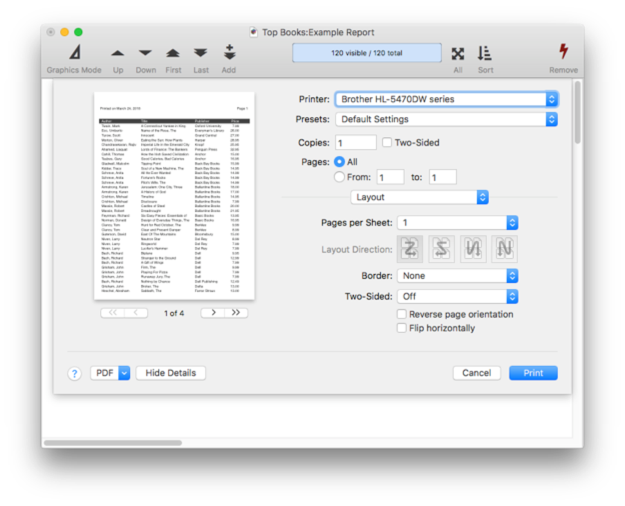
That’s it – the custom report form is done! You can switch to data entry mode and print the report immediately.
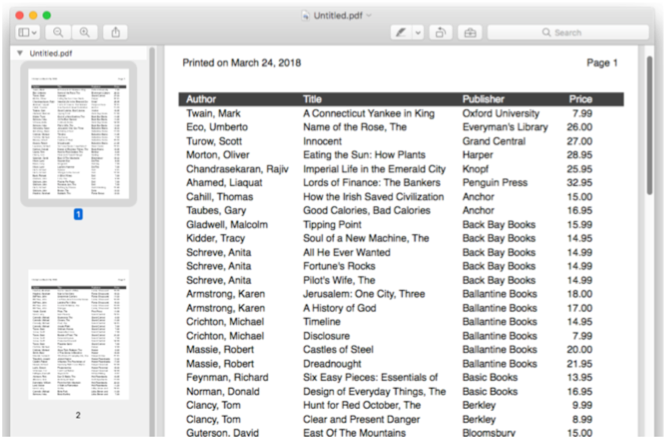
Here is a close-up at the final result.
Note: If you would prefer to edit the template in a separate window instead of a dialog, hold down the Option key when choosing from the Construct menu.
Customizing the Automatically Generated Form
You can, of course, manually modify the form objects after they have been generated. But you can also modify the template and regenerate the form. For example, I can edit the template to swap the positions of the Author and Title columns.

As long as you don’t modify the generated objects individually, you can go back and make additional modifications to the template at any time.
Constructor Tag Help Menu
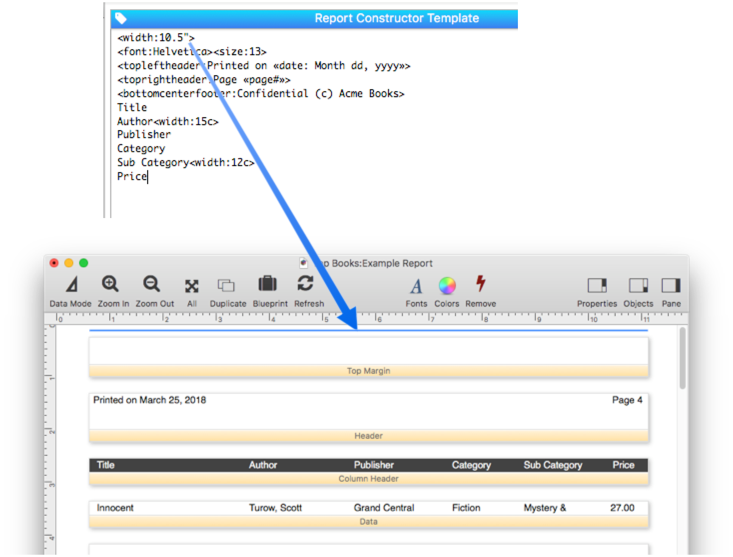
There are about two dozen tags that you can use to customize the generated form objects. There is complete documentation for all of these tags below, but if you just need a quick reminder while using the dialog, click the tag icon in the upper left. This displays a pop-up menu with all the available tags. When you select a tag from the menu, that tag is automatically typed into the template. In this example I use the tag menu to add a centered title to the bottom of each page.
Manually Modifying Generated Objects
Once they are generated, you can manually modify individual objects by dragging them, resizing them, or using the object properties panel to modify their appearance and operation. Once you do that, however, you probably want to avoid running the constructor dialog again – doing so will undo any manual changes you have made.
Using Two Templates in a Single Form
You may want to generate objects using more than one template in a single form – however, you can’t do that. But all is not lost – simply create each template in a different form, and then copy the finished results into the same form. Each form has its own separate constructor template.
Tag Language Reference
The template parameter allows you to customize how form elements are generated. You can specify which fields (or variables) are included, the size, alignment, etc. Options are specified via one or more tags in the template. Like HTML tags, these tags start and end with < and > characters. The remainder of this page describes the details of the available tags.
Column Specifications
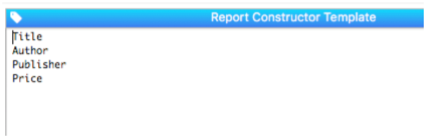
To specify the report columns, list each field name on a separate line. Here is an example for a list with four columns.
If the column name is the same as a field in the database (as in the example above), the column will have the same width and alignment as that field. You can adjust the width by adjusting the width in the data sheet and then re-constructing the report form.
If you want the report width to be different than the data sheet width, you can override the width and alignment with the <width:dimension> and <align:option> tags.
Quantity<width:75><align:center>
Item<width:250>
Price<width:100><align:right>
Normally the width is expressed in points (one point is 1/72nd of an inch). By adding a c prefix to the dimension, you can specify the width in characters. Since different characters have different widths (a W is wider than an I, for example), this is an approximate measurement. Depending on what characters are being displayed, you might be able to display more or less than the exact number of characters specified. In this example the three columns have widths of 7 characters, 25 characters, and 10 characters.
Quantity<width:7c><align:center>
Item<width:25c>
Price<width:10c><align:right>
The nice thing about specifying widths in “characters” is that the widths will automatically adjust if you change the font size of the text. You may have to fiddle a bit to get something that works well at all the text sizes you want to use, but it is usually possible.
Column Formula and Title
You can also specify a formula for the column. If you do that, you will usually want to specify a column title with the <title:name> tag, as shown in this example. (If you don’t specify a title, the formula will be used as the title.) In this example four columns of data will be printed with these titles: Quantity, Item, Price and Discount.
Quantity
upper(Item)<title:Item>
Price
pattern(ListPrice-Price,"$#.,##")<title:Discount>
One issue when using a formula is that Panorama doesn’t know what width and alignment to use, so it just defaults to 100 points left aligned. But you can use the <width> and <align> tags to set up the appearance you want.
Quantity
upper(Item)<title:Item><width:120c>
Price
pattern(ListPrice-Price,"$#.,##")<title:Discount><width:70><align:right>
General Vs. Column Options
So far we’ve talked about columns and column related options. These are specified one per line, starting with the name or formula, then with one or more options, like this.
column<column option>
column<column option><column option>
column<column option>
column<column option>
In addition to column options, you can also specify a number of general options. These should be specified on separate lines from the column specifications (however, you can have multiple general options on a single line).
<generaloption>
<generaloption><generaloption>
<generaloption>
<generaloption>
column<column option>
column<column option><column option>
column<column option>
column<column option>
The rest of this page describes the various general options that are available.
Data Truncation
If there is more data than will fit in a column, it is normally truncated, with an ellipsis on the end showing that there is additional data. You can use the <linebreakmode:> option to change this. The available options are truncate tail (the default), truncate middle, truncate head and word wrap.
Geometry
The options in this section allow you to change how generated objects are laid out. A number of the options below allow you to specify measurement values – height, width, etc. These values are normally expressed in points (1 point = 1/72 inch) but you can also specify values in inches (1 in or 2.5 inch or 0.75") or centimeters (20 cm).
View As List
The form objects are generated differently depending on whether your intention is to produce a printed report or a View-As-List form. For a printed report, Panorama will construct a full compliment of report tile margins, including data tile, header and footer, margins, and optionally, summary tiles. For a view-as-list form, only the data and header tiles will be created, since these are the only tiles that have any effect in View-As-List mode.
If you don’t explicitly use the <viewaslist:yes/no> tag to specify your intentions, Panorama will use the format specified in the Form Properties:

If this option is set to Individual Pages, Panorama will generate the tiles needed for a printed report. If set to View-As-List, it will generate only the data and header tiles. If you want to override this setting, include a <viewaslist:yes> or <viewaslist:yes/no> tag in your template.
Report Width
The default width for the data area of the generated report is 576 points. This is 8 inches, which usually works well for printing a portrait report on 8 1/2" by 11" paper (standard in the US). Use the <width:measurement> tag to specify a different width. This example creates a data area that is 10.5 inches wide, useful for landscape printing.
Keep in mind that to set the overall object width, the <width> tag must not be on the same line as a column specification. A <width> tag that is part of a column specification sets the width for that column of data, not the entire report width. This example shows the <width> tag being used both ways – the first line sets the width of the overall report, while the next three lines set the width of individual columns.
<width:11">
Quantity<width:75><align:center>
Item<width:250>
Price<width:100><align:right>
Keep in mind that the width is the width of the data area – it does not include the left and right margins.
Font and Size
You can change both the font and size of the generated text objects. Changing the size is more common; to do that use the <size:points> tag. Normally you would do this just once at the top. You can specify the size as regular (13 points), small (11 points) or mini (10 points).
<size:small>
Or, you can also specify the exact size numerically.
<size:18>
Use the <font:name> tag to change the font. If this tag is omitted, the system font will be used.
<font:Tekton><size:regular>
Quantity<width:75><align:center>
Item<width:250>
Price<width:100><align:right>
Row Height
The row height is normally set for you automatically, based on the font size (see above). However, you can also use the <rowheight:dimension> tag to directly set a specific height. The example below will create a “double spaced” report, with an extra 15 points below each line of data (of course this can be adjusted manually after the layout is generated).
<size:15>
<rowheight:30>
Quantity<width:75><align:center>
Item<width:250>
Price<width:100><align:right>
Note that the rowheight tag must be specified after the size tag (if any). If the size tag is used after the rowheight tag, the size tag will override the rowheight tag.
Margins
The constructreport statement will automatically generate 1/2 inch top and bottom margins, and 1/3 inch left margin. If you want different margins, use the <topmargin:dimension>, <bottommargin:dimension>' and<leftmargin:dimension>` tags.
<topmargin:50cm><bottommargin:30cm><leftmargin:10cm>
Quantity<width:75><align:center>
Item<width:250>
Price<width:100><align:right>
Data Column Titles
The constructreport statement will automatically generate a Data Header tile with titles. The field names will be used as the titles, unless you have explicitly set up titles with the <title:name> tag (see above). The titles will use the same font and size as the data, but you can customize the style and color.
To customize the style, use the <titlestyle:style> tag. The available options are bold, italic, bolditalic, underline, and boldunderline.
<titlestyle:bold>
Name
Address
City
State
Zip
Use the <titlecolor:color> tag to specify the color (the default is black). You can name the color (red, blue, etc) or use “html” style hex colors, for example FF0000 for red.
<titlestyle:bold><titlecolor:blue>
Name
Address
City
State
Zip
You can also use the <titlebackgroundcolor:color> tag to specify a background color for the titles. This example will print white titles on a black background.
<titlestyle:bold><titlecolor:white><titlebackgroundcolor:black>
Name
Address
City
State
Zip
Page Headers and Footers
Use these six tags to add text at the top and/or bottom of each page (to learn how to do this manually, see Custom Report Headers and Footers.
<topleftheader:text>
<topcenterheader:text>
<toprightheader:text>
<bottomleftheader:text>
<bottomcenterheader:text>
<bottomrightheader:text>
To insert the page number into one of these header areas, simply type in «page#». For example, this template will print the page number in the top right corner of every page:
<toprightheader:«page#»>
Name
Address
City
State
Zip
The date can also be inserted in a variety of different formats:
«date: mm/dd/yy»
«date: mm-dd-yy»
«date: MM/DD/YY»
«date: MM-DD-YY»
«date: mm/dd/yyyy»
«date: MM/DD/YYYY»
«date: mm-dd-yyyy»
«date: MM-DD-YYYY»
«date: dd-MON-yy»
«date: dd-Month-yy»
«date: Month dd, yyyy»
«date: Month ddnth, yyyy»
«date: DayOfWeek, Month ddnth, yyyy»
«date: DayOfWeek, Month dd»
You can also merge an entire formula into a header or footer using curly braces.
<topleftheader:Printed by {info("user")}>
<toprightheader:«page#» of {info("pagecount")}>
Name
Address
City
State
Zip
The header and footer areas default to 2/3rd’s of an inch high (48 points). You can use the <headerheight:dimension> and <footerheight:dimension> tags to customize the height.
Summary Tiles
If you would like a report with both data and summary tiles, use the <summary:level> tag. The level parameter tells how many summary level tiles should be created: 1, 2, 3, etc.
<summary:2>
Date
Check
PayTo
Amount
If your database contains summary records (see Summary Records), Panorama will automatically add the appropriate <summary:level> tag when you create a new template (it does not automatically add this tag when editing an existing template). To learn more about summary tiles, see Printing Summary Information.
See Also
- Automatic Form Construction -- creates a column of form elements for editing data fields (or variables).
- Automatic Mailing Label Construction -- creates a mailing label.
- Construct Menu -- used to automatically construct complex form applications, including calendars, lists, mailing labels, and more.
- Custom Report Headers and Footers -- setting up custom report headers and footers.
- Custom Report Margins -- specifying the top, left, right and bottom margins of a custom report.
- Line Item Grid Constructor -- creates a grid of form elements for displaying and editing line item fields.
- Matrix Constructor -- quickly creating a Matrix Object from a template.
- Printing Multiple Column Reports -- printing reports with two, three or more columns (for example mailing labels).
- Printing Multiple Page Records -- Panorama can print up to 9 pages for each record in a custom report (for example multi page invoices, etc.)
- Printing Summary Information -- printing a database that has been organized into categories with summary records.
- Report Tile Object -- component for assembling a custom report.
- Reports -- Panorama has a very flexible system for printing custom reports, labels and forms.
- Tab Panel Constructor -- quickly creating a Tab Panel Object from a template.
- Text List Constructor -- quickly creating a Text List Object from a template.
- Tiles In Action -- basic rules for using tiles to print custom reports.
- Variable Height Records -- custom reports with different heights for each record.
- View-As-List Forms -- displaying a custom data layout as a continuous sheet.
History
| Version | Status | Notes |
| 10.2 | Updated | Now defaults to truncation with ellipsis if a data is too long to fit in a column. This can be customized with the linebreakmode tag. |
| 10.1 | New | New in this version (but Panorama 6 included a similar feature. |