Panorama has special features that make it very easy to display information in a database in a Text List Object, or even to link the object with a database so that clicking on an item in the Text List automatically jumps to the corresponding record in the database. To illustrate these features, this page will use this database of books.
Displaying a List with a Database Field
It only takes four steps to create a list that displays a field from the current database.
- Create the Text List object
- Set the Database option to
~(the current database) - Type @ followed by the field name into the Multiple Columns area
- Press the Apply button
This short movie demonstrates the process in about 20 seconds:
Notice that you do not have to set up the Formula for this Text List object. If all of the fields are specified with the @ prefix, Panorama automatically figures out the formula for you.
Displaying a List with two or more Database Fields
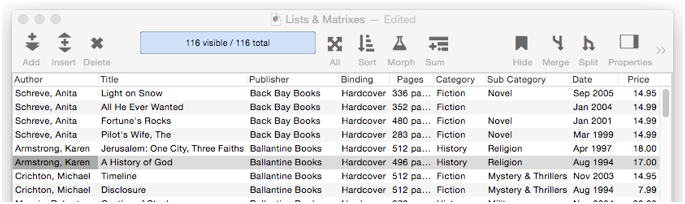
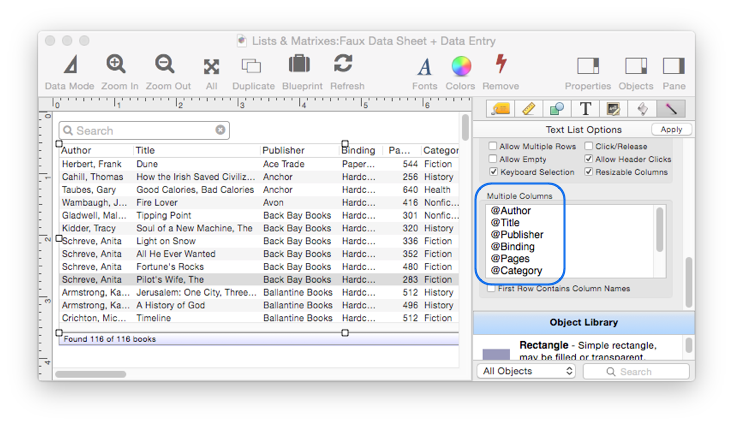
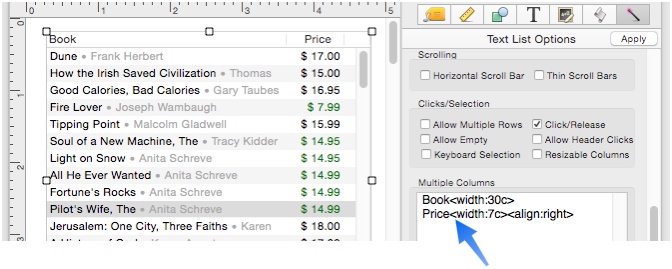
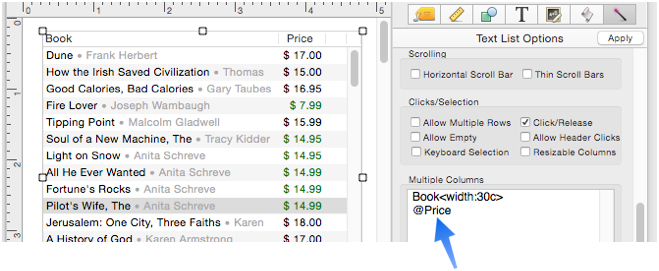
To display two or more database fields, simply add the field names to the Multiple Column area, prefixed with the @ symbol. You’ll probably also want to enable the Display Header option, as shown below. This displays the field names at the top of the list.
When the fields are specified with the @ prefix, as they are in this example, the list automatically uses the same field widths and alignment as specified in the Data Sheet. In the example above, the numbers in the Price column are aligned on the right, because that is how the field is set up in the Data Sheet.
Linking the List to the Database Current Record
Normally, the selected item in a Text List is completely independent of the current record of the database. This movie illustrates this – as different records are clicked in the list, the Data Sheet in the background is not affected.
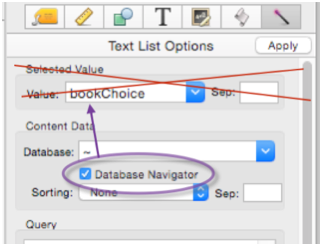
However, if the Database Navigator option is enabled, the Text List selection and the database current record will be locked together. Clicking on an item in the list will cause the database to jump to that spot (provided that the record is part of the current selection), so that the Text List can be used to navigate within the database (hence the name of the option).
This link works in both directions – so clicking on a different record in the data sheet updates the selection in the Text List.
IMPORTANT: You should not use a Text List with the Database Navigator option when you have the Data Sheet window open. Closing the Data Sheet will fix this problem. In fact, this also applies to Text Lists on separate forms and also View-As-List windows. You can only have one user interface element that controls the list of records. If there is more than one, they fight each other. (We only show them both open here to illustrate how it works.)
Important: When the Database Navigator option is checked, the Selected Value option is ignored. Even if you’ve specified a field or variable name for the Selected Value, the Text List won’t do anything with that field or variable if the Database Navigator option is enabled (so you might as well leave the Selected Value option blank).
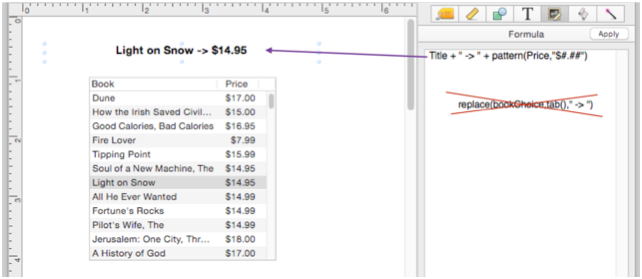
If you think about it, there’s really no need for a separate field or variable to hold the selected choice – you can always find that out directly from the database fields, as this Text Display Object does.
This can be taken even further by adding text editing fields to the form (see Automatic Form Construction). Now I can choose a book on the left, then edit all the details on the right. All this without any programming at all.
Warning: The Database Navigator option does not work with summary records, only data records can be navigated to with a Text List Object or Matrix Object.
Specifying the Records to be Displayed
When the Text List is linked with a database, the Query formula should contain comparisons based on one or more database fields. By default, it displays all records in the database. To display only the selected records, enter a Query formula of info("Visible"). For other searching options, see the next section.
Searching the Database
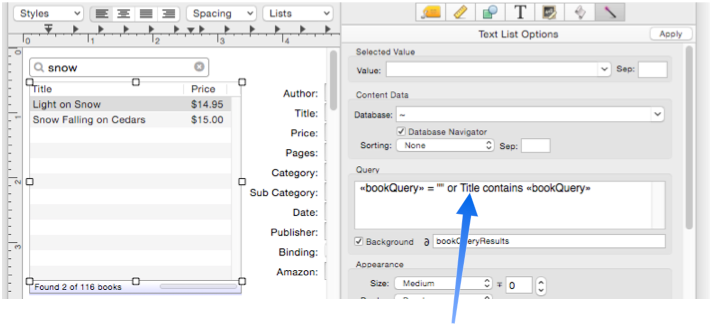
Using the techniques described in Text List Searching, a search option can be added to the Text List. As shown here, the list can be both searchable and linked to the database with the Database Navigation option.
This example will search based on the title.
If you want the search to include all fields in the database, use the exportline() function.
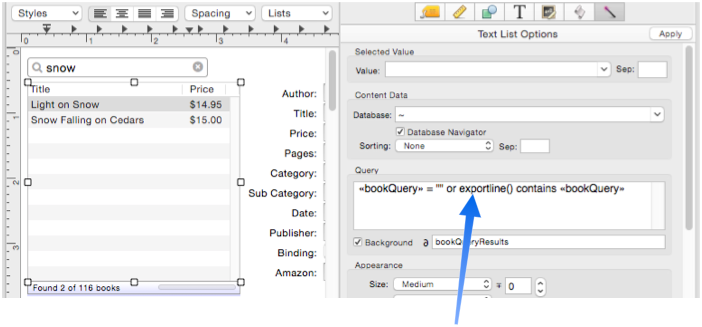
When the exportline() function is used, all fields are searched, even if they aren’t visible in the list. For example, I can search for all books by John Grisham, even though the book author isn’t displayed in the list.
To learn more about setting up searching of a Text List, see Text List Searching.
Displaying All Fields
To display all fields, you could list all of them in the Multiple Columns area.
However, that could get tedious if there are a lot of fields, and you would have to update the list if fields were added or deleted. Instead, you can simply use a single <allfields> tag, like this:
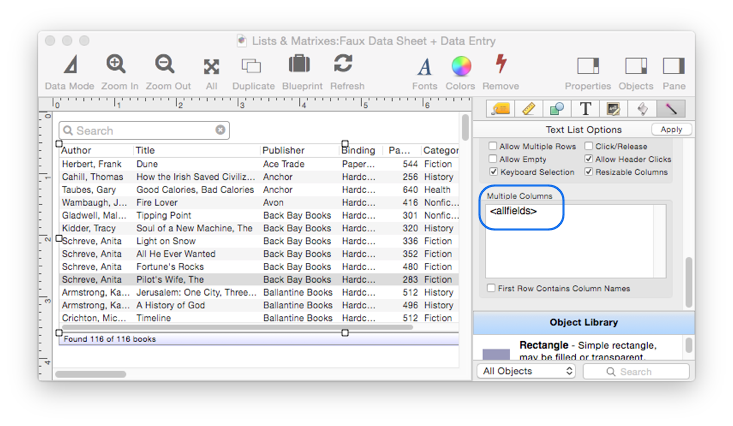
You cannot combine the <allfields> tag with any other column definitions, it must be used by itself.
Custom List Columns
So far all of the examples covered have shown a one-to-one correspondence between database fields and columns in the list. It is also possible to use a formula to create custom columns. In this example the first column is created by combining and rearranging the Title and Author columns, the second column is calculated from the Price field but adds a color tag to make the text green if the price is less than $15.00. The columns are separated by a tab character (generated by the tab() function in the formula below).
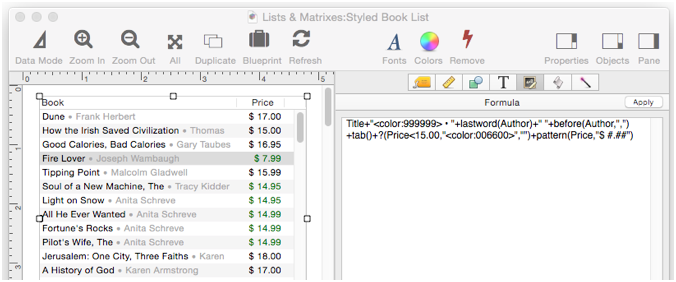
Since the columns in the list don’t correspond with database columns, the names, widths, and alignment have to be defined manually. See Text List Multiple Columns to learn how to do this.
In this example, the Price column actually does correspond to a database field, even though the Book column does not. So it is possible to define the width and alignment of the Price column automatically using the @ prefix, as shown here.
When some columns are defined manually and some using the @ prefix, Panorama does not generate the formula for you – you must write a formula that generates the data for all of the columns, including those that use the @ prefix. (In fact, even if all columns use the @ prefix, you can still provide your own formula, which will override the formula that Panorama generates manually.)
See Also
- Displaying Data in a Grid -- fundamentals of displaying data in a grid (Text List/Matrix).
- Matrix Clicking -- handling clicks in a Matrix Object.
- Matrix Constructor -- quickly creating a Matrix Object from a template.
- Matrix Database Integration -- synchronizing a Matrix Object with a database.
- Matrix Geometry -- customizing the size and geometry of Matrix Object elements.
- Matrix Header and Horizontal Scrolling -- setting up a custom header for a Matrix Object grid.
- Matrix Object -- displaying a grid of items with a custom arrangement.
- Matrix Object Frame -- setting up the arrangement of items within a Matrix Object.
- Matrix Programming -- programming a Matrix object.
- Text List Appearance -- customizing the appearance of a Text List Object.
- Text List Constructor -- quickly creating a Text List Object from a template.
- Text List Multiple Columns -- displaying multiple columns in a Text List Object
- Text List Object -- displaying a grid of text.
- Text List Programming -- programming a Text List Object.
- Text List Searching -- searching within a Text List Object.
- Text List Selection -- selecting items in a Text List Object.
History
| Version | Status | Notes |
| 10.0 | New | New in this version. |