If the data tile is less than half the width of the page Panorama can print a two column report. If the data tile is less than 1/3 of the page width Panorama can print a three column report. Multiple column reports can be used to print mailing labels, or to print multiple column catalogs, lists, and directories.
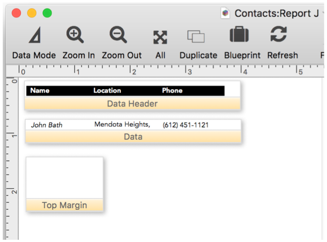
For example, the data tile on this form is just about 1/3 page.
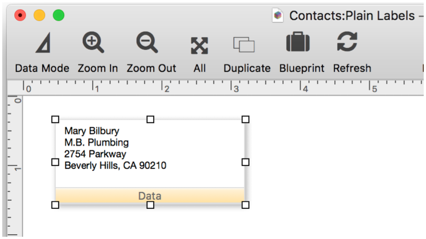
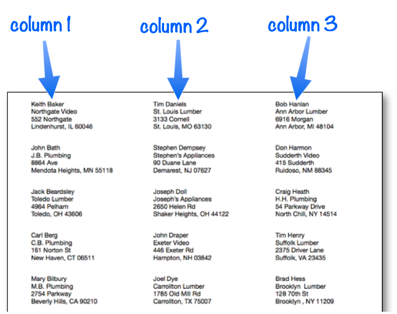
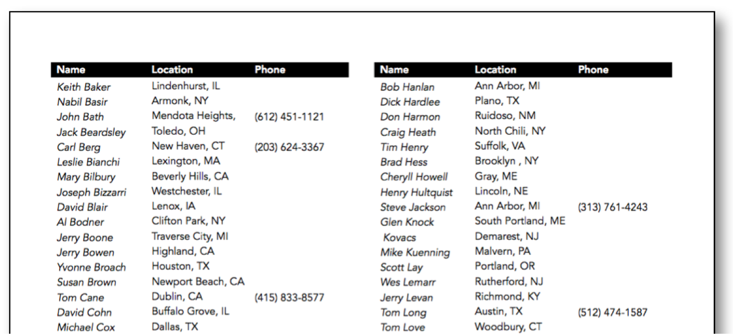
When you print this form it will look like this.
Here’s another report where the Data tile is just less than half of the page width.
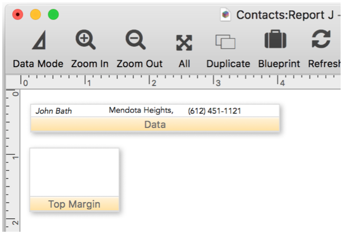
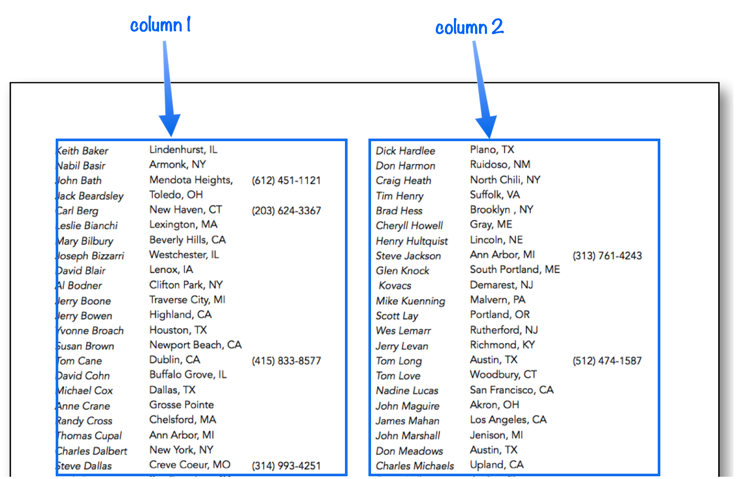
Panorama will print a two-up report, like this.
Across or Down?
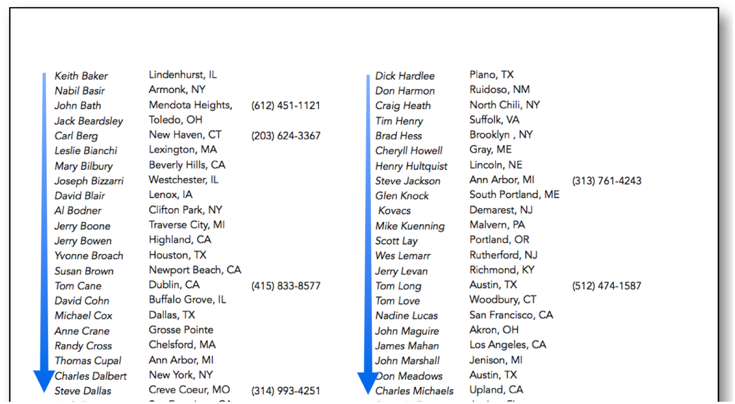
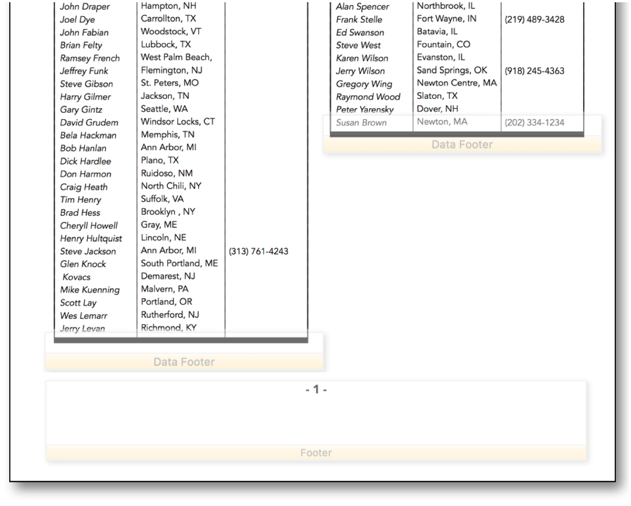
When printing a multiple column report Panorama normally prints the entire first column, then goes back to the top of the second column, prints the entire column, goes to the top of the third column and prints it and on and on for all of the columns in the report. In this example the database is sorted by last name, so each column is printed in alphabetical order.
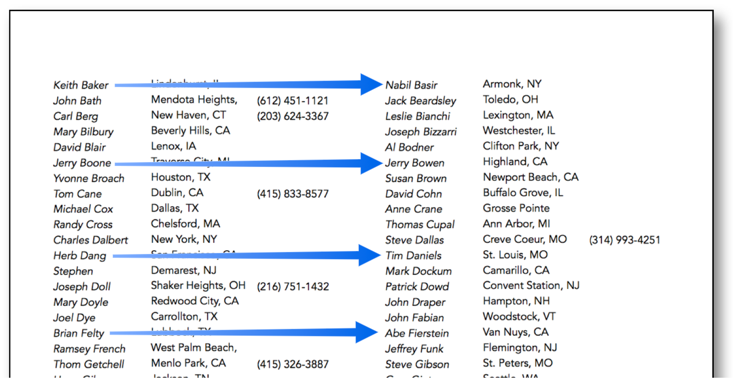
If you want Panorama to print the data row by row instead of column by column, open the Form Properties panel and switch to Across instead of Down.

Here is the exact same report but with the Across option enabled.
Data Header and Data Footer Tiles
The Data Header and Data Footer tiles allow you to print a header and/or footer at the top and bottom of each column in a multiple column report (in earler versions of Panorama, these were called the Table Header and Table Footer tiles. Unlike the regular header and footer tiles which are only printed once per page, the Data Header and Data Footer tiles are printed once for each column. You can combine the Data Header/Footer tiles with regular Header/Footer tiles if you wish, using the regular Header/Footer tiles for page numbers and overall page titles while using the Data Header/Footer tiles to create headers for each column.
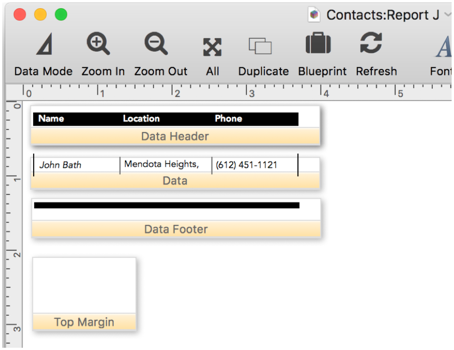
Here is an example of a form with a Data Header tile.
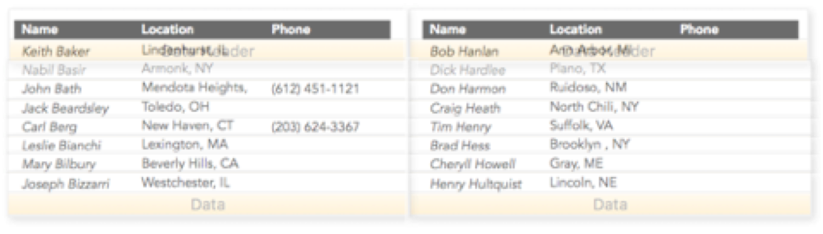
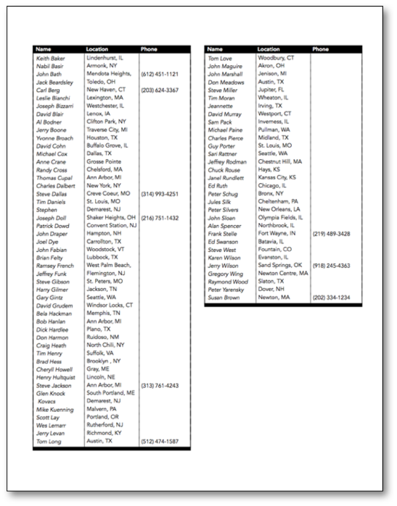
When the form is printed, the Data Header appears at the top of each column.
This illustration shows how Panorama assembles the Data Header and Data tiles into two columns.
Here’s a modified version of the same report that includes both Data Header and Data Footer tiles.
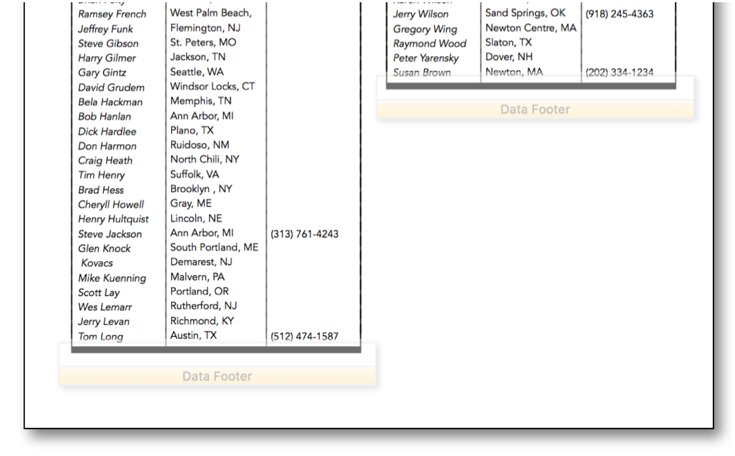
This form uses the Table Footer tile to print a bottom border below each column.
Notice that unlike the regular Footer tile there is no gap between the last data tile and the data footer tile. (In this example the second column is shorter than the first because there weren’t enough data records to fill the entire page. The height of each column will always be the same except for the last column on the last page.)
However, if the form does contain a regular Footer tile there may be a gap between the bottom of the Table Footer tile and the top of the Footer tile. Here’s an example showing a report with both a Table Footer and a regular Footer tile. The regular Footer tile is being used to print the page number.
Usually table header and footer tiles are combined with the normal header and footer tiles for printing the report title, date, and page numbers.
Controlling the Number of Columns
Panorama normally packs in as many columns as it can based on the width of the data tile. However, you can override the number of columns with the Form Properties panel.
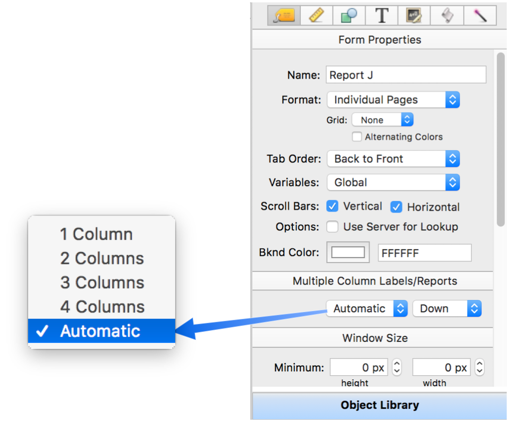
Picking 1, 2, 3, or 4 forces the number of columns to that specific number, no matter what the width of the Data Tile is. Panorama will use the number of columns you specify even if the columns won’t fit on the page. This is usually useful when the number of columns you want to fit almost fits on the page, but not quite. There’s no point in printing four columns when only three will fit — the extra column will simply be invisible. Pick Auto to let Panorama choose the number of columns based on the width of the data tile.
Spacer Tile
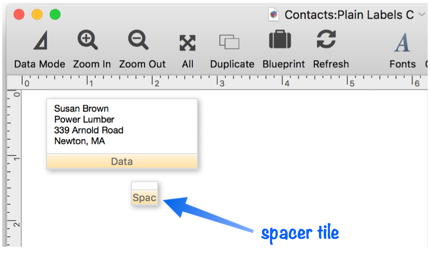
The spacer tile is rarely used. Panorama normally packs the data tiles as close to each other as possible. The spacer tile allows you to spread the data tiles apart. When printing a multiple column report, Panorama will spread the columns apart by the width of the spacer tile. Vertically, each data tile will be spread apart by the height of the spacer. Horizontally, each data tile will be spread apart by the width of the spacer. Here’s an example of a form with a spacer tile.
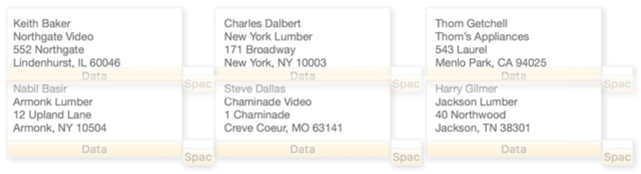
When the form is printed, Panorama inserts the Spacer tile in between the Data tiles. Notice, however, that there are no spacer tiles to the right of the last column. This slightly reduces the overall width of the report, possibly allowing you to sqeeze in that extra column.
For most reports, this same spreading effect can be obtained by increasing the size of the data tile. If you are using automatic multiple columns however, increasing the size of the data tile doesn’t always work, because it may force the last column into the right margin. If that happens, Panorama won’t print the final column. The spacer tile allows you to spread the columns apart while still printing the maximum number of columns. Remember, the only time you may need the spacer tile is when you are printing reports with automatic multiple columns. You can also force the number of columns with the Form Properties panel (see previous section).
See Also
- Automatic Mailing Label Construction -- creates a mailing label.
- Automatic Report Construction -- creates a tabular report with columns of data.
- Custom Report Headers and Footers -- setting up custom report headers and footers.
- Custom Report Margins -- specifying the top, left, right and bottom margins of a custom report.
- Printing Multiple Page Records -- Panorama can print up to 9 pages for each record in a custom report (for example multi page invoices, etc.)
- Printing Summary Information -- printing a database that has been organized into categories with summary records.
- Report Tile Object -- component for assembling a custom report.
- Reports -- Panorama has a very flexible system for printing custom reports, labels and forms.
- setreportcolumns -- allows a procedure to control the number of columns of a report, and the direction (across or down).
- Tiles In Action -- basic rules for using tiles to print custom reports.
- Variable Height Records -- custom reports with different heights for each record.
- View-As-List Forms -- displaying a custom data layout as a continuous sheet.
History
| Version | Status | Notes |
| 10.0 | Updated | Carried over from Panorama 6.0, with some updates. |